Appearance
Create a Workspace
A workspace is created from the Workspaces Page. A workspace is, in essence, an online Cloud Development Environment (CDE) accessible via a Cloud IDE, a terminal or an SSH connection. Using an SSH connection is possible from a locally installed IDE supporting development from a remote container.
Basic Set-Up
You can create a workspace by pressing the "Create Workspace" button.
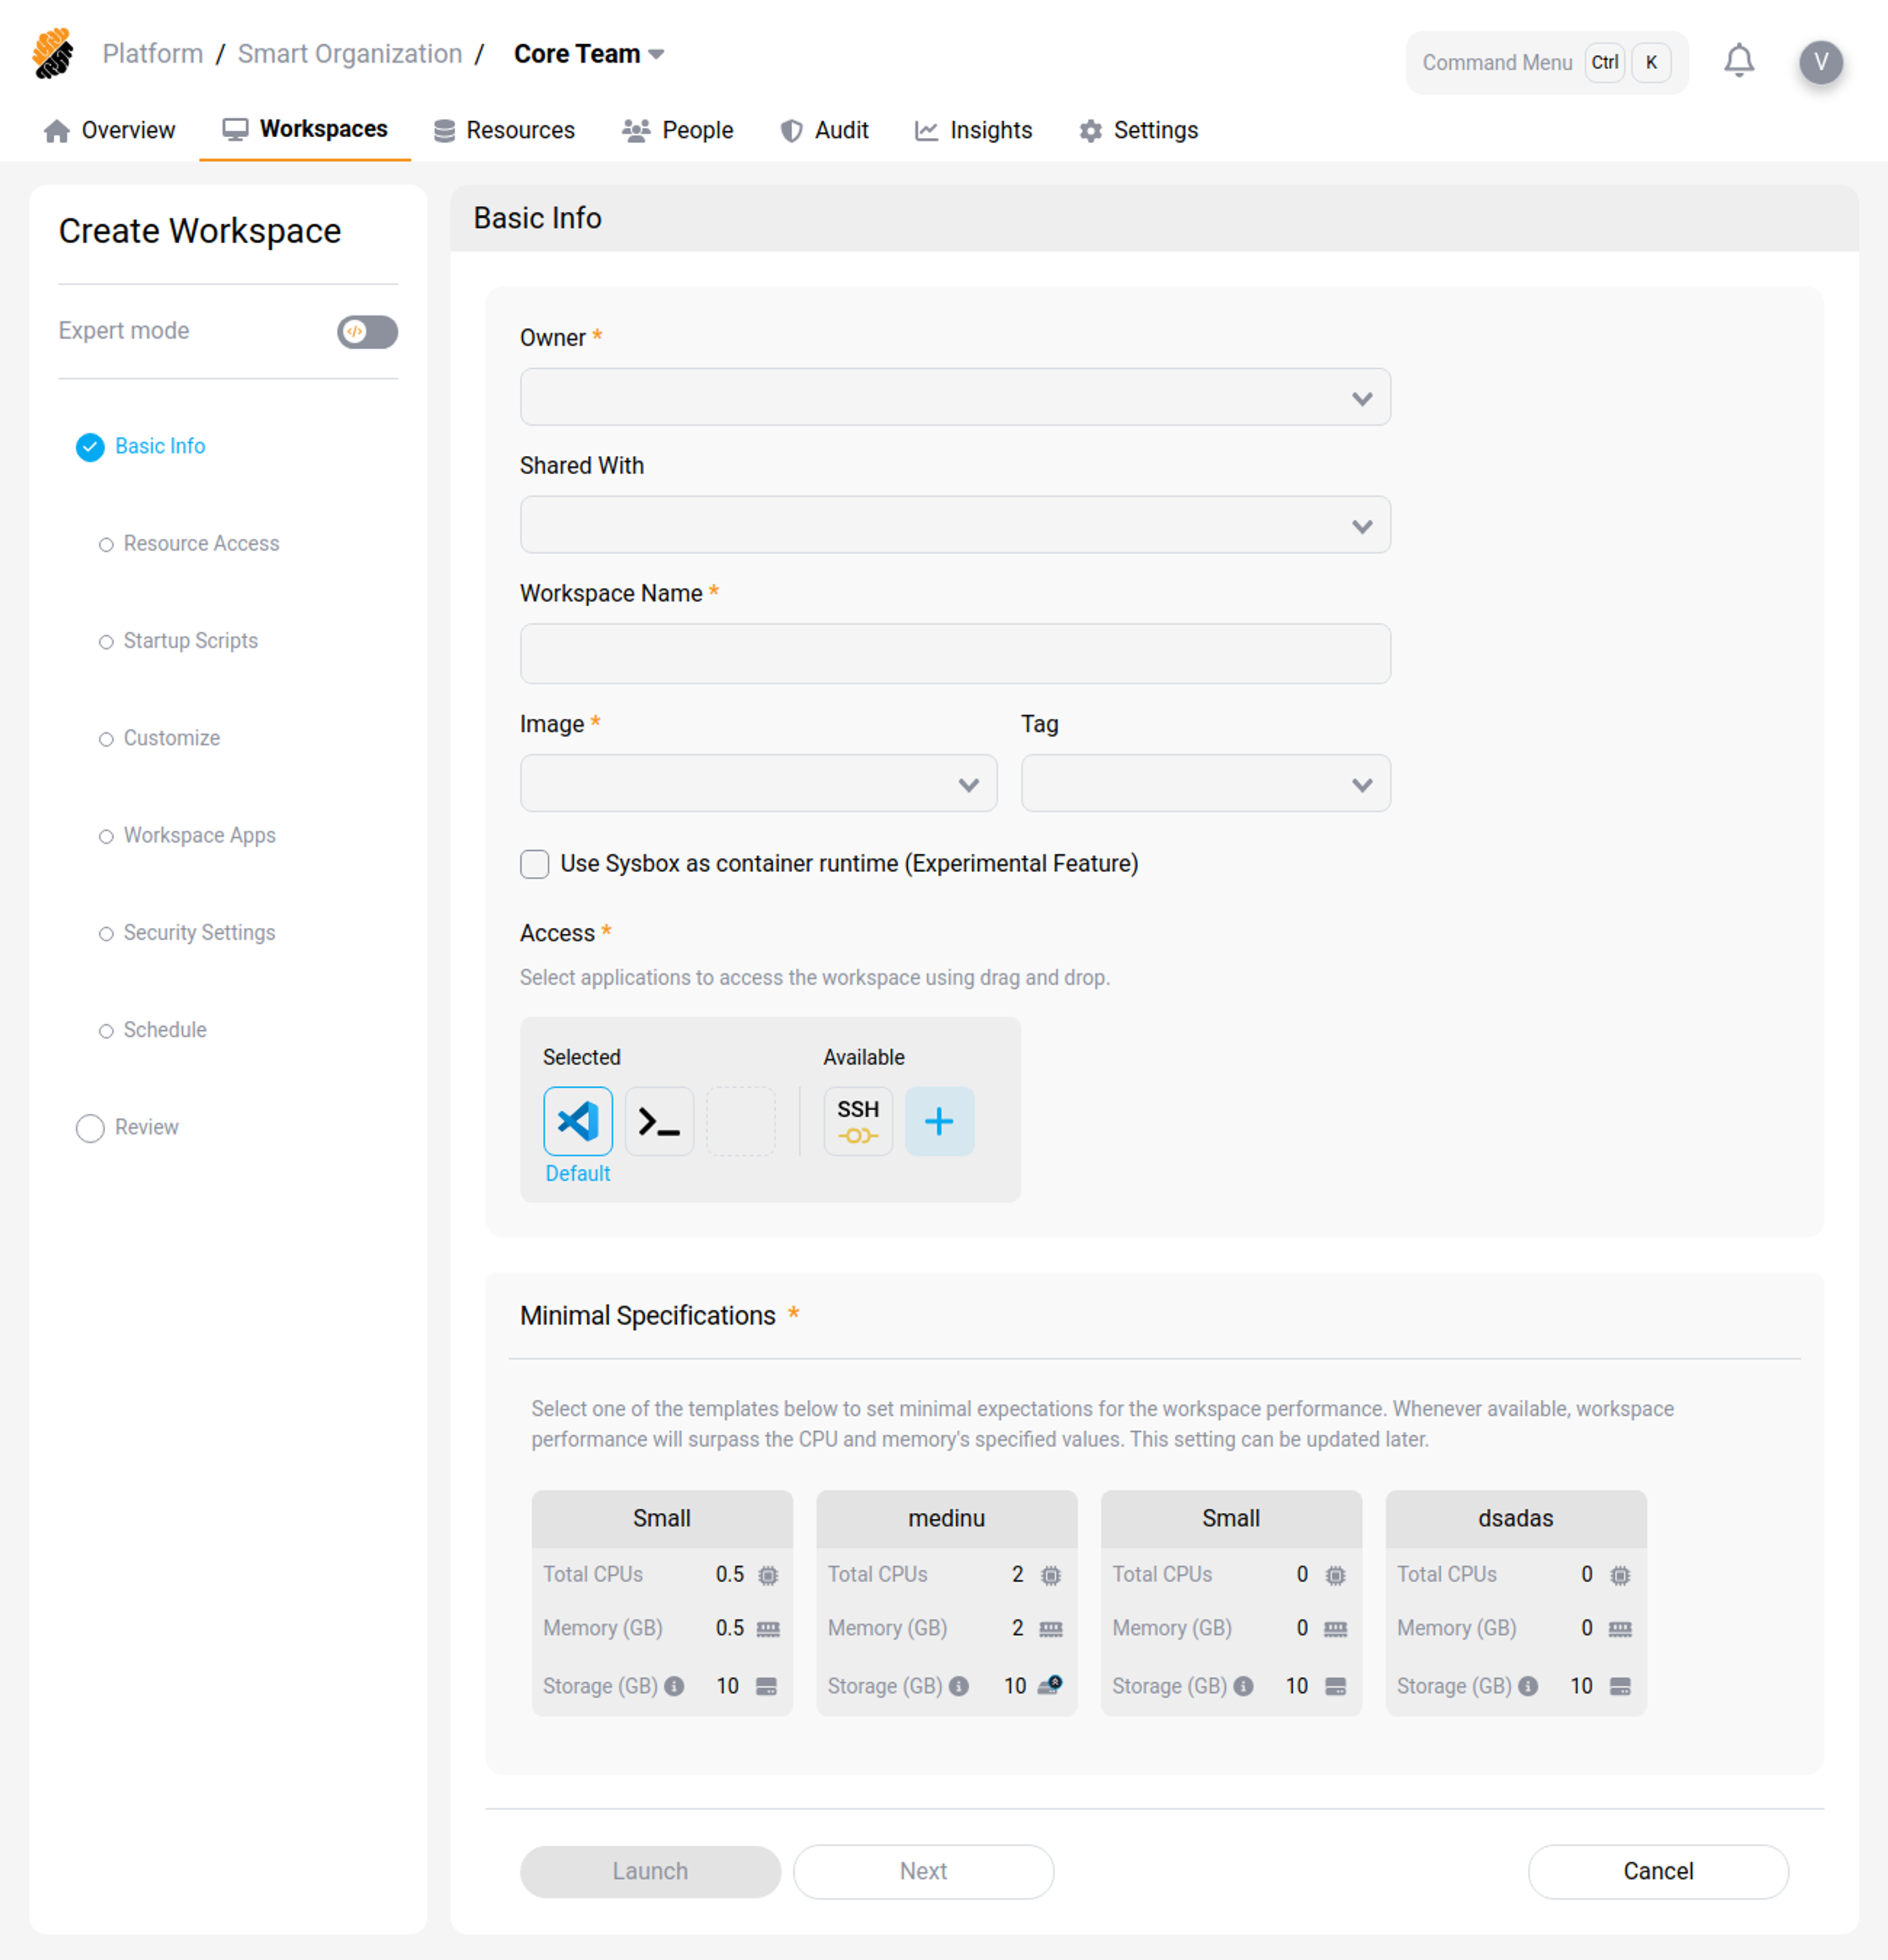 Basic Set-Up Section
You will need to select the following information:
Basic info
- Workspace Name
- Embedded Cloud IDE
- User Sharing Options
- Docker Image
- Image Version
- Minimal Resource Specifications
Resource Access Control
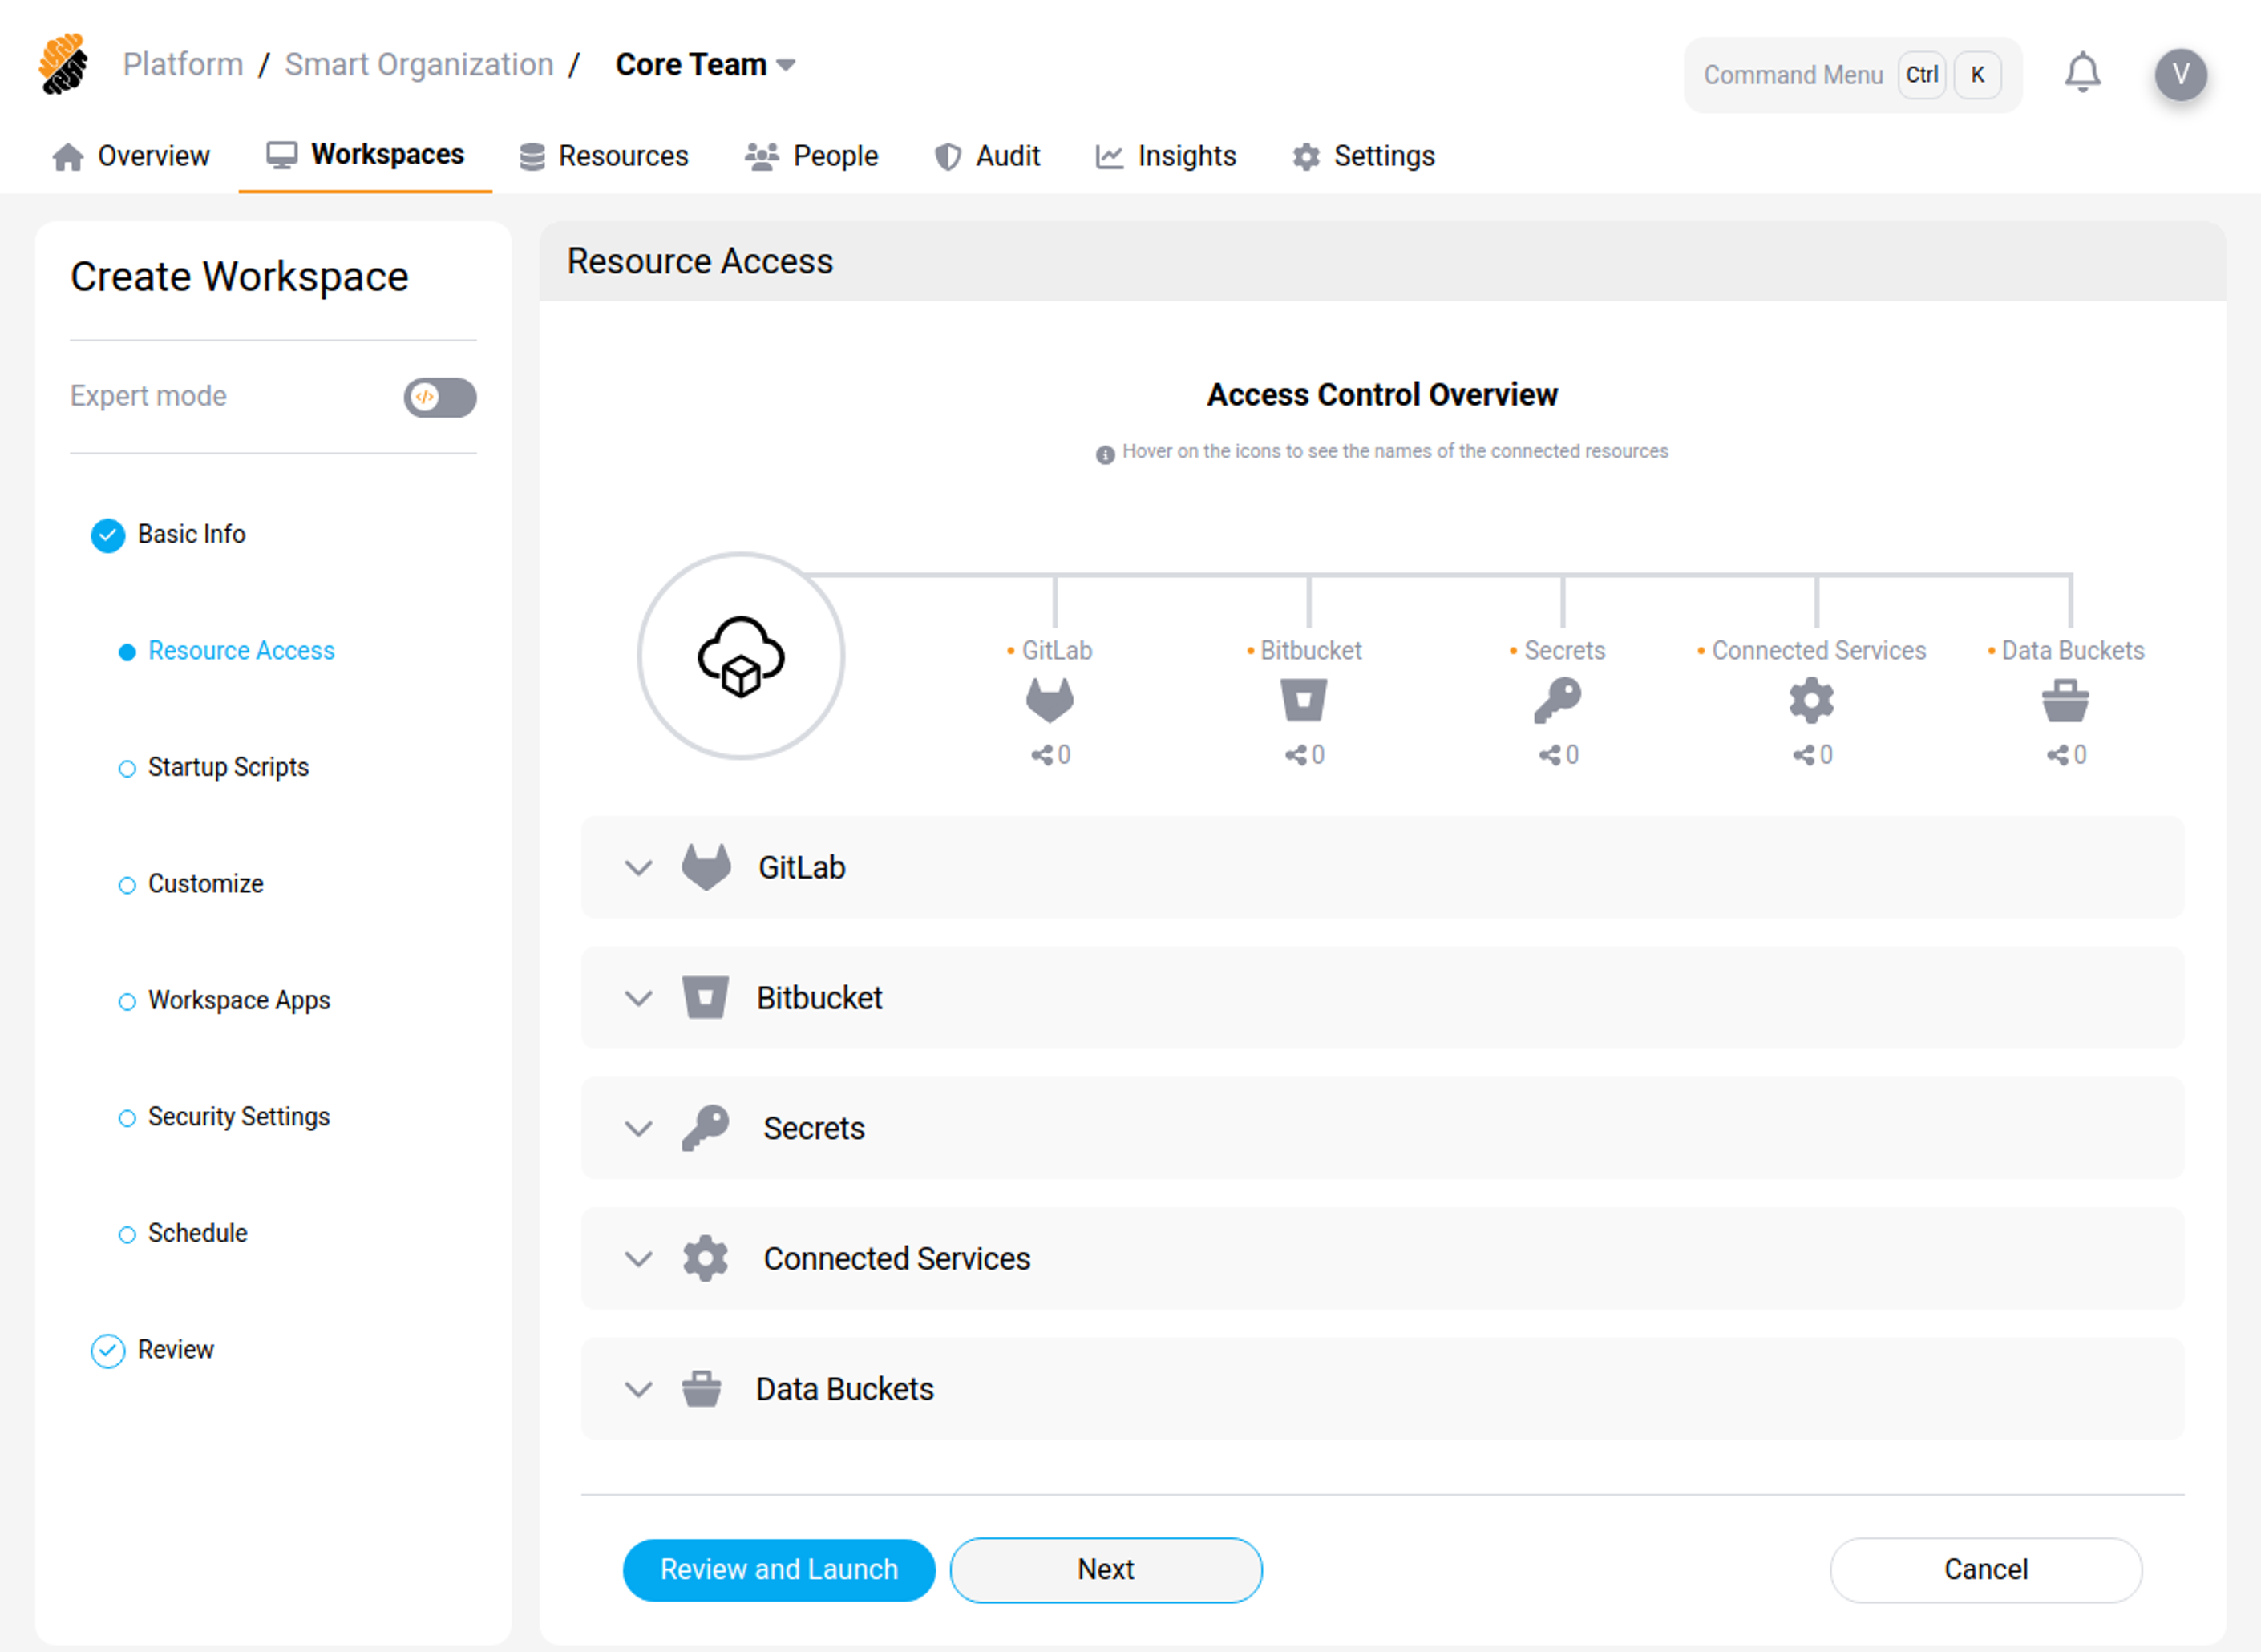 Workspace Resources
You can attach various project resources to your workspace. Resources must have been previously added to the project. In addition, you might need the appropriate access rights to access them.
You can add the following resource:
- Git Applications And Repositories: You can connect the entire GIT applications available from your platform or single repositories that have been previously imported to the project's or organization's resources. Additionally, you can specify a default folder location within your workspace where the Git files will be cloned.
- Secrets: You can import secrets to the workspace as files or environment variables in the workspace. Choose from existing secrets or create a new one.
- Connected HTTP and SSH Services: You can connect services to appear as environment variables in the workspace. Supported and available services are part of the project's and organization's resources and depend on the platform's configuration.
- Startup Script: Finally, you can set-up a startup script to be executed automatically at workspace's boot time. This allows you to customize the software available in the container.
Data Loss Prevention Permission: Security::Manage
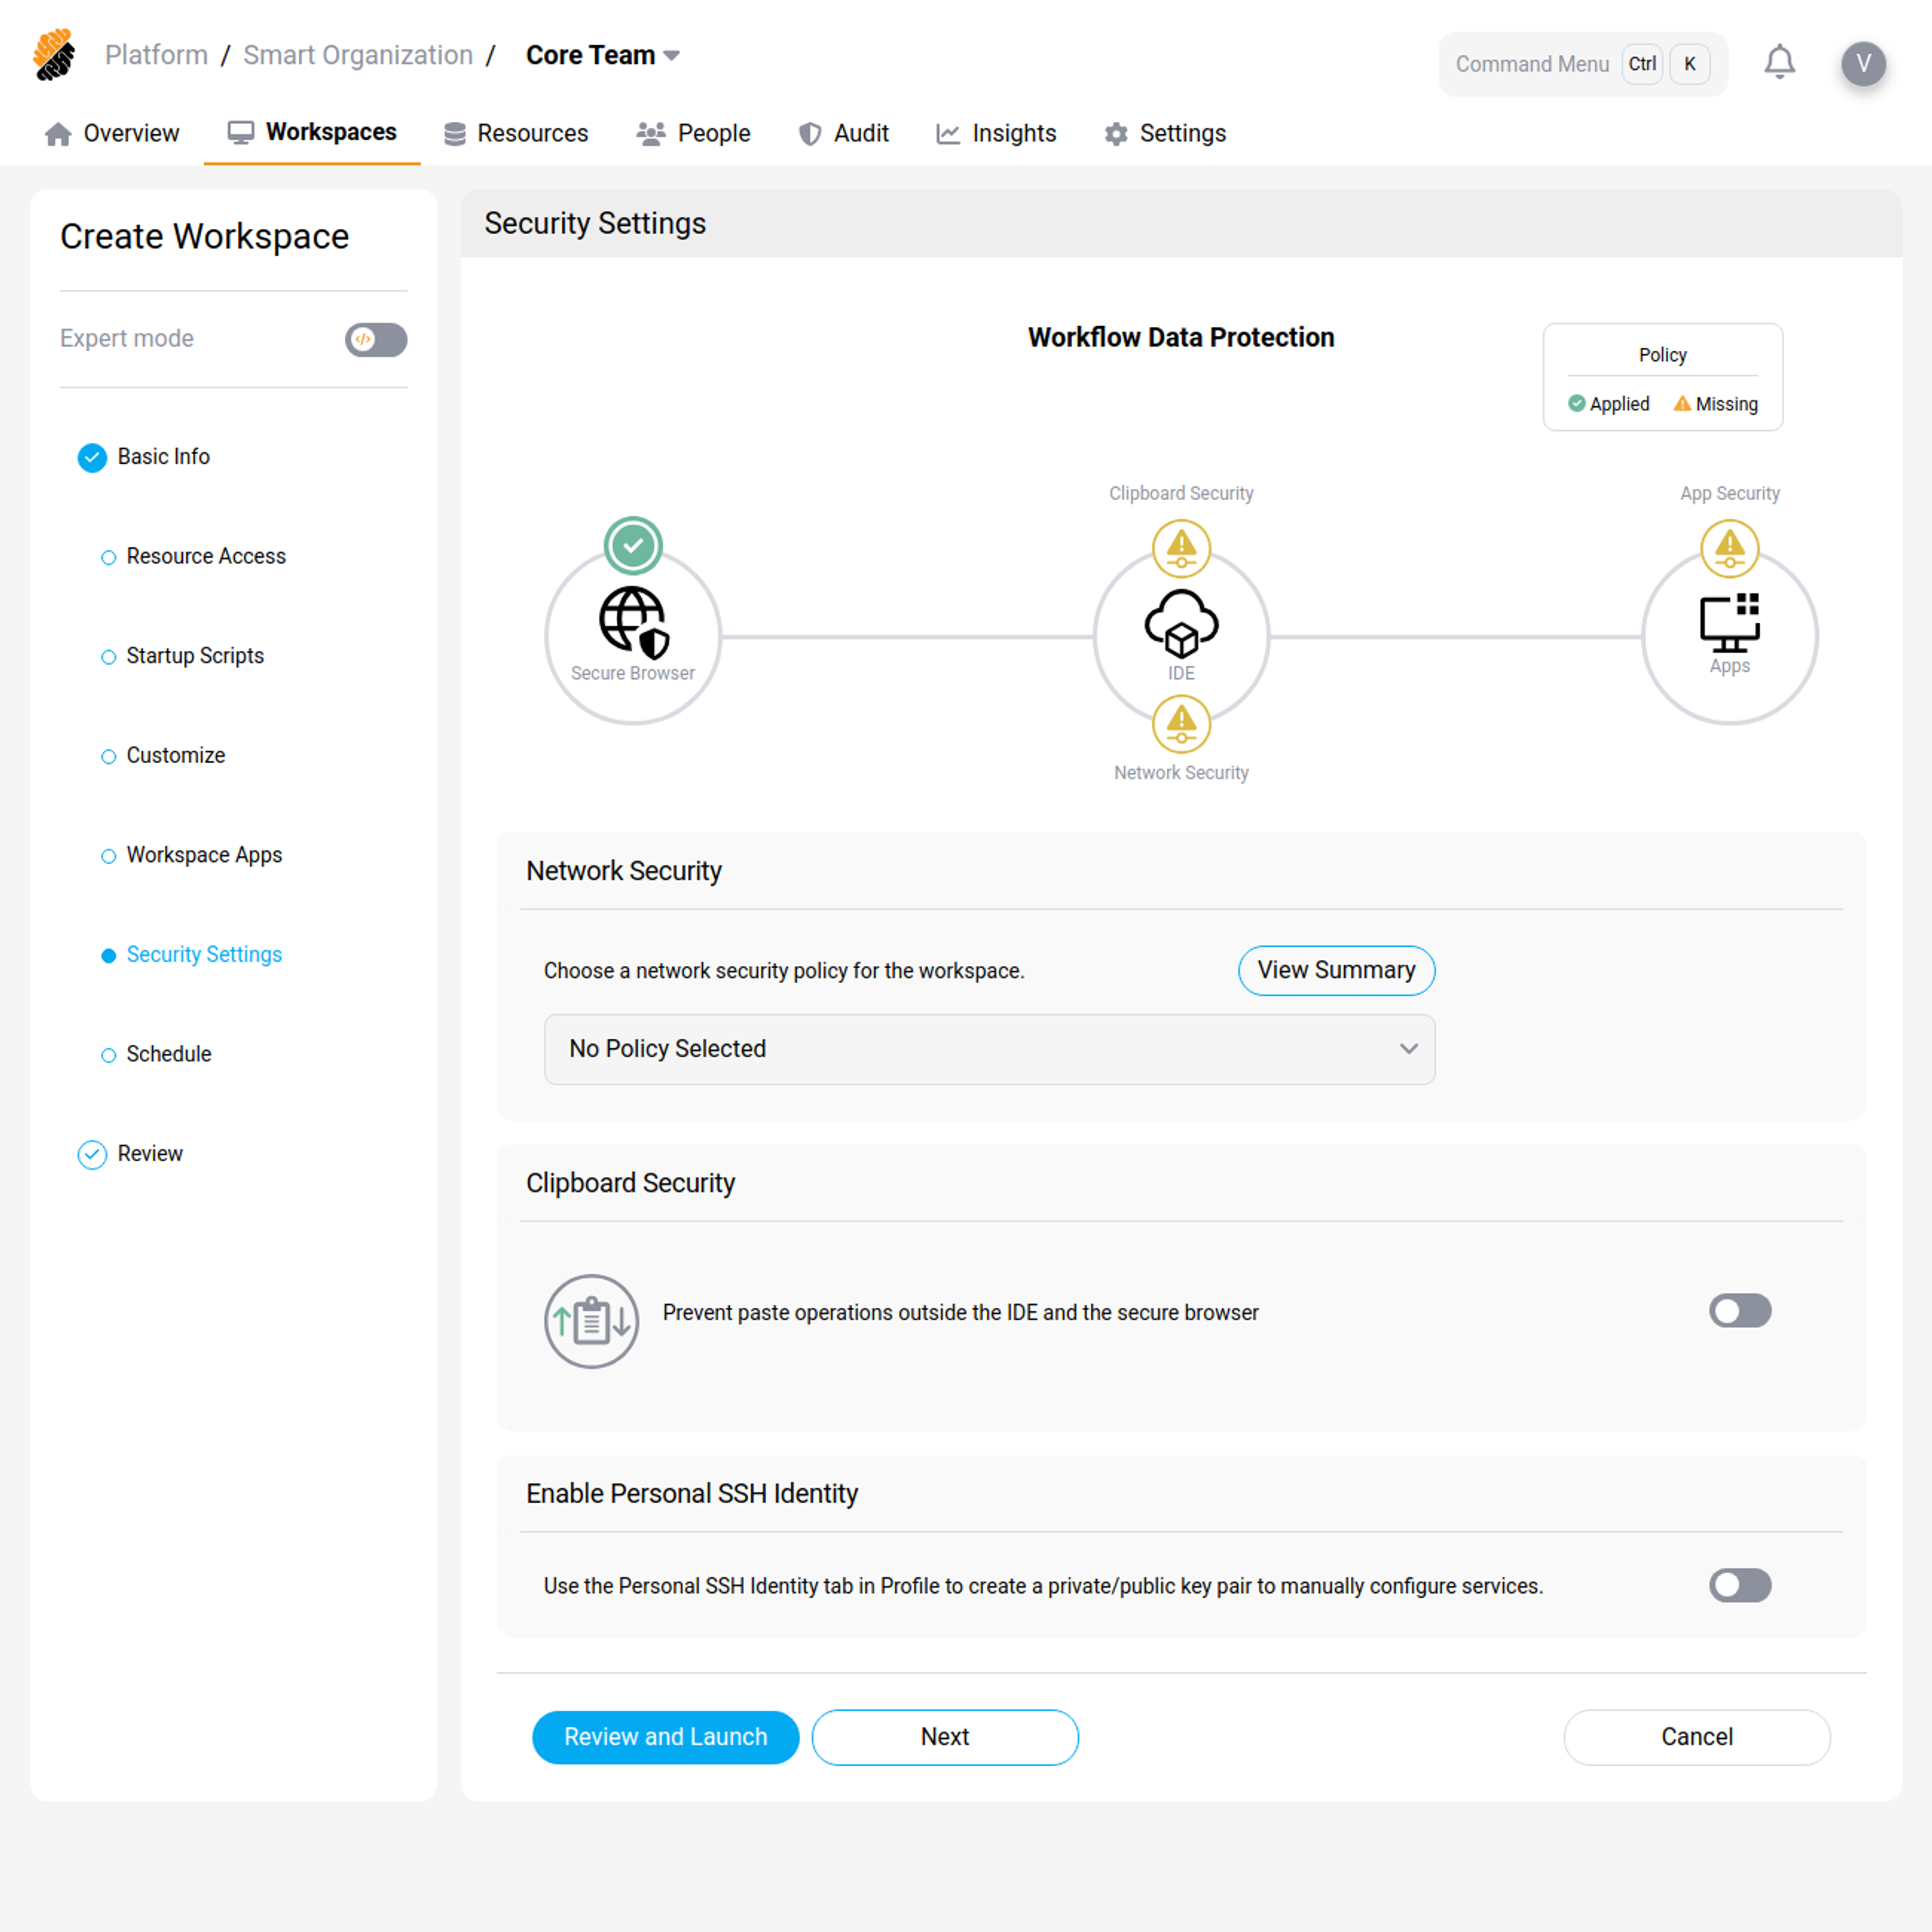 Workspace Data Loss Prevention
In the Data Loss Prevention section you can configure the security of your workspace.
Under Security Settings you can configure:
- Network Policy: Select a network policy to enforce on the workspace. Network policies are part of the project's and organization's resources and are defined by the user with the Security::Manage permission. In particular, policies allow you to control outbound network traffic from the workspace.
- Clipboard Security: Prevent pasting outside of the IDE and the Secure Browser for this workspace.
- Apps Security: Configure Workspace Apps to be accessed only through the Secure Browser.
Under Secure Access Management you can configure:
- Enable Remote Development Over SSH: Allow connection to the workspace via SSH.
- Enable Personal SSH Identity: Allow users to use their personal SSH identity from within the workspace.
Custom Work Schedule
You can define a custom work schedule for your workspace.
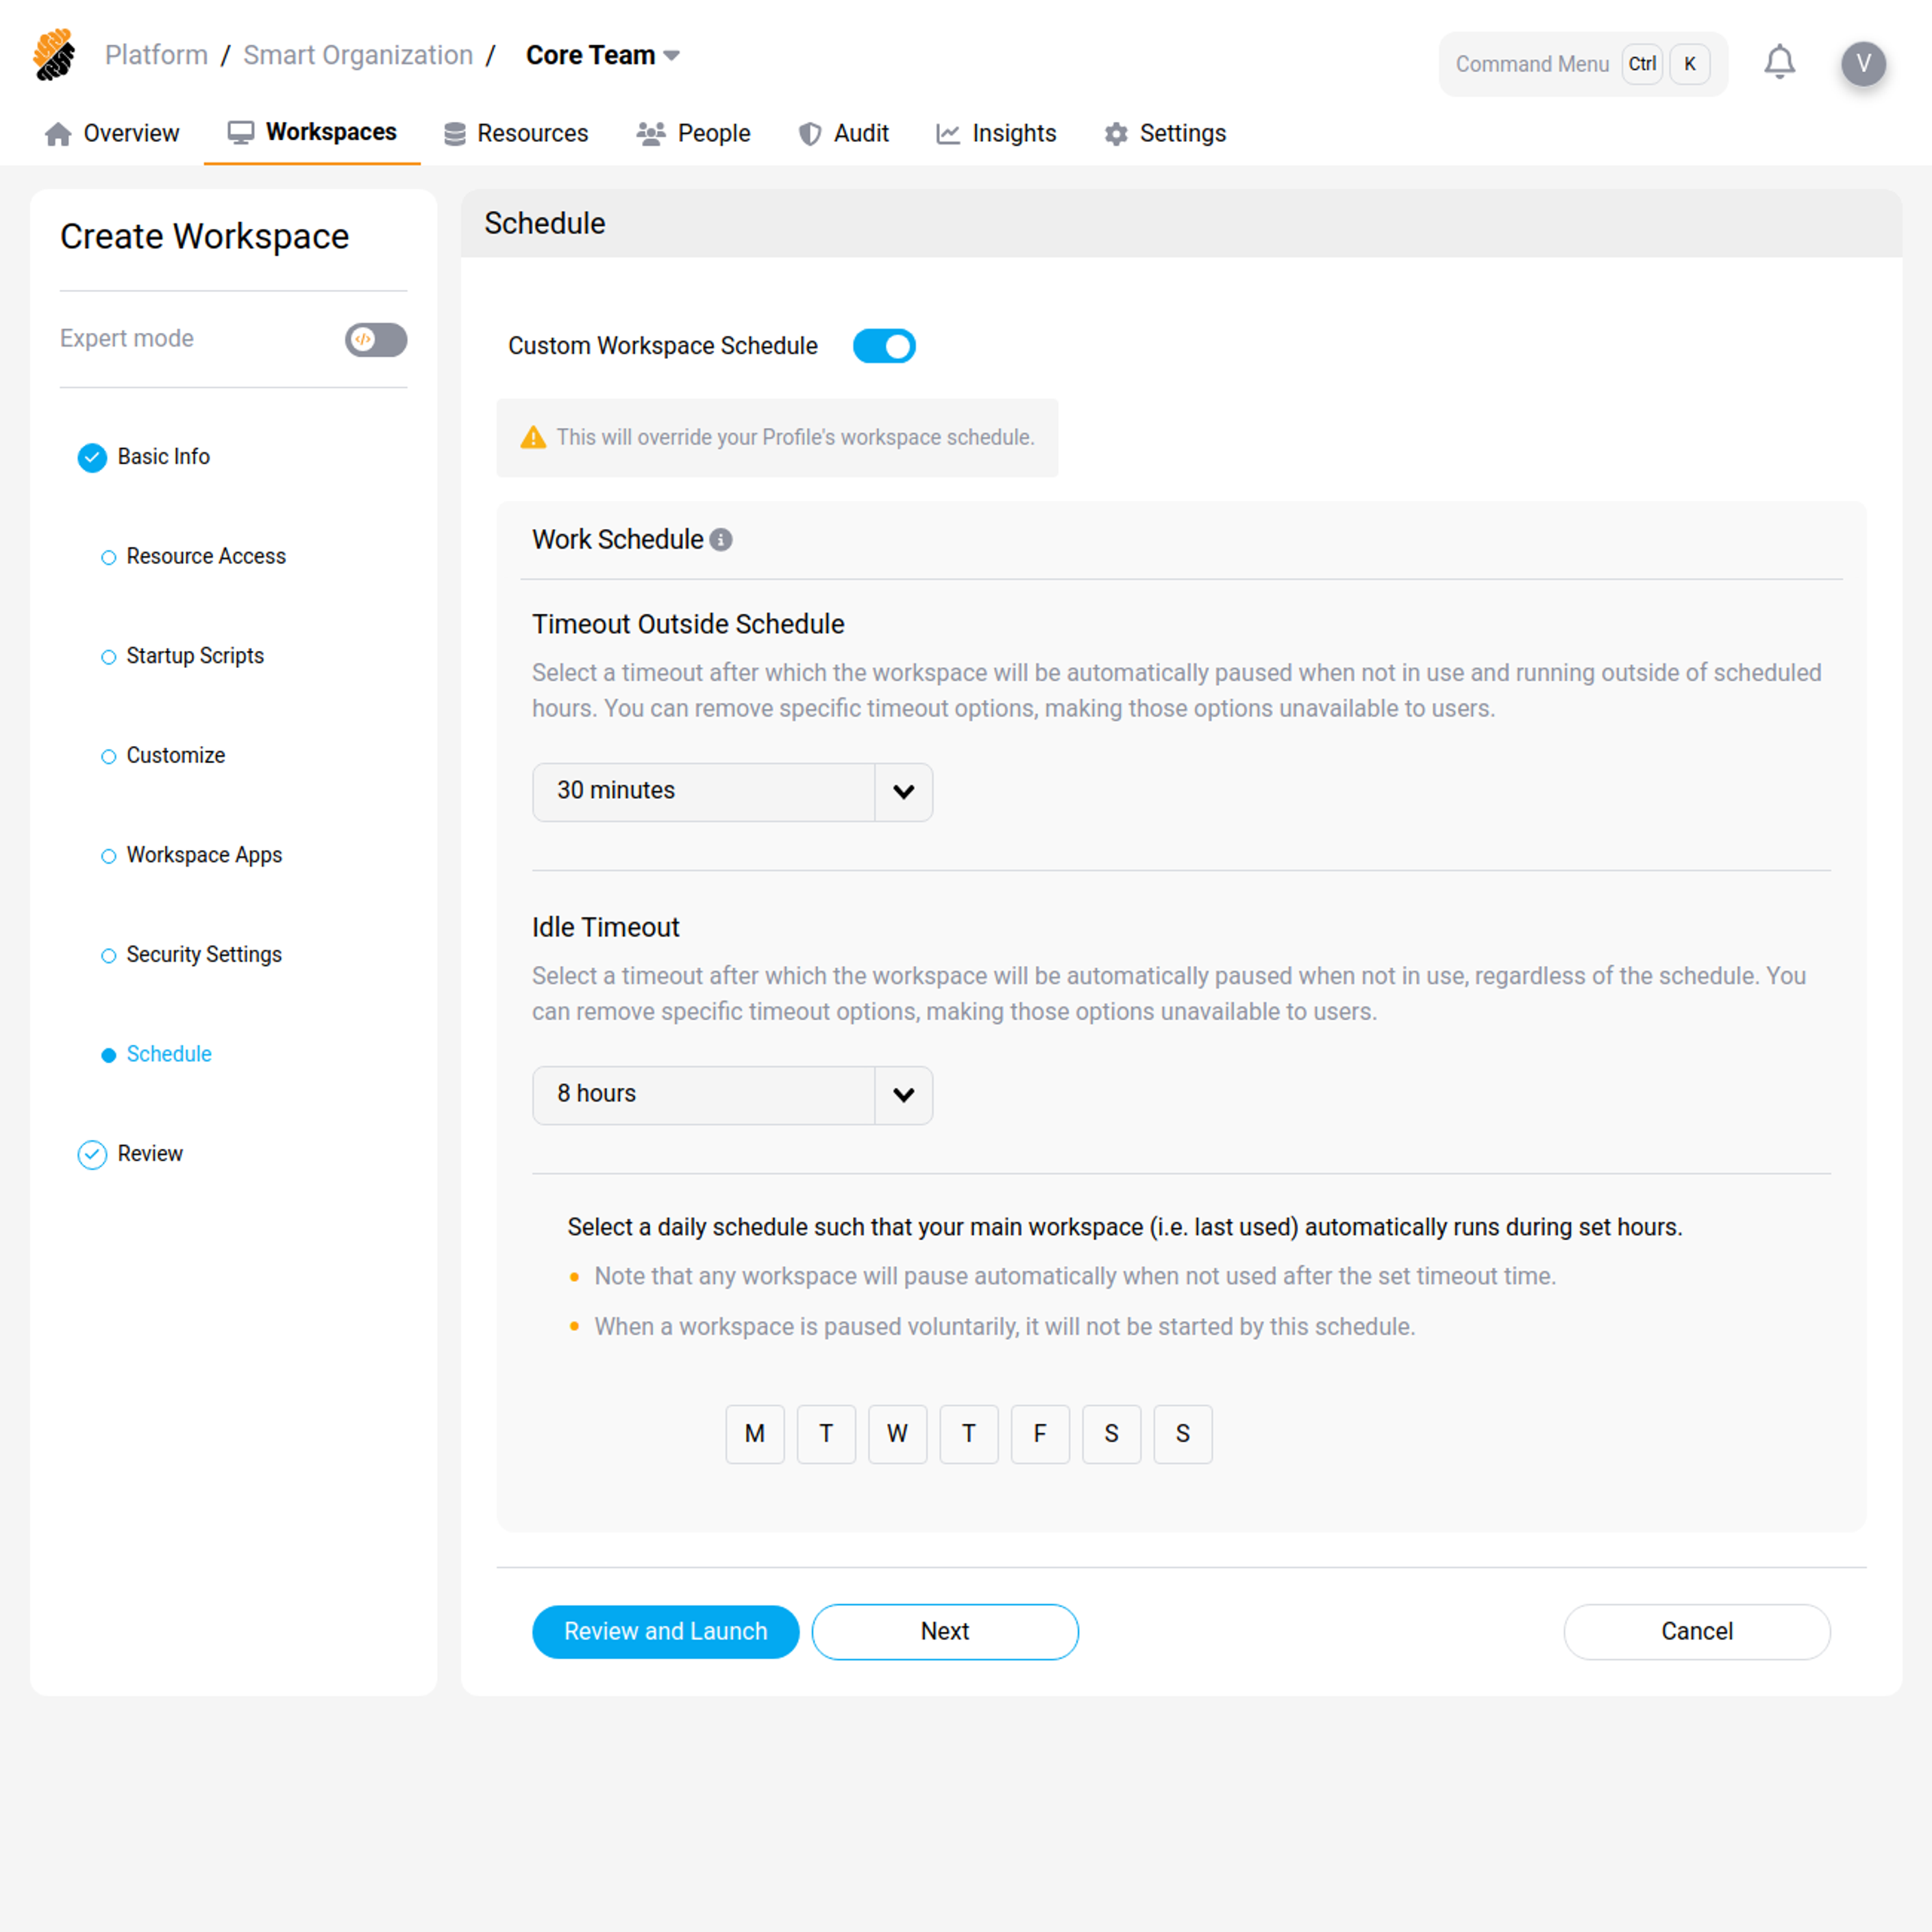 Custom Workspace Schedule
Launch it!
Finally, review your Workspace configuration, and launch it. Your workspace will be automatically deployed. You can edit its configuration at anytime from the Overview or Workspaces pages.
From an existing Workspace
You can create a workspace from an existing one by pressing the "Create from Existing" button on the drop-down button of the "Create Workspace" button.
You will need to provide the following information:
- Workspace to Copy
- Owner for the WorkspaceOnce done, press the "Launch" button.
TIP
Click on "Customize" to edit the workspace as if you were creating it from scratch.
From a template
You can create a workspace from an existing one by pressing the "Create from Template" button on the drop-down button of the "Create Workspace" button.
You will need to provide the following information:
- template Name
- Owner for the WorkspaceOnce done, press the "Launch" button.
TIP
Click on "Customize" to edit the workspace as if you were creating it from scratch.