Appearance
SSH Into Your Workspace
This guide provides instructions for accessing your workspace via SSH, enabling you to edit code directly using a local command-line editor. This process requires the generation of an SSH Key pair.
1. Generate an SSH Key Pair on UNIX and UNIX-like Systems
- To generate an SSH key pair on UNIX and UNIX-like systems, run the
ssh-keygencommand in your terminal:
bash
ssh-keygen- The terminal will suggest a default path and file name (for example, /home/user_name/.ssh/id_rsa). To accept the default path and file name, press Enter. If you want to specify a different path and file name, enter those details and then press Enter.
- The command prompts you to enter a passphrase. Although optional, it's recommended to set a passphrase for additional security against unauthorized use of your private key.
- If you set a passphrase, you will be prompted to enter it again for confirmation. If you didn't set a passphrase, simply press Enter.
- The command generates an SSH key pair - a public key and a private key - and saves them in the specified path. The public key file name is automatically created by appending .pub to the private key file name. For instance, if the private key file is named id_rsa, the public key file will be named id_rsa.pub.
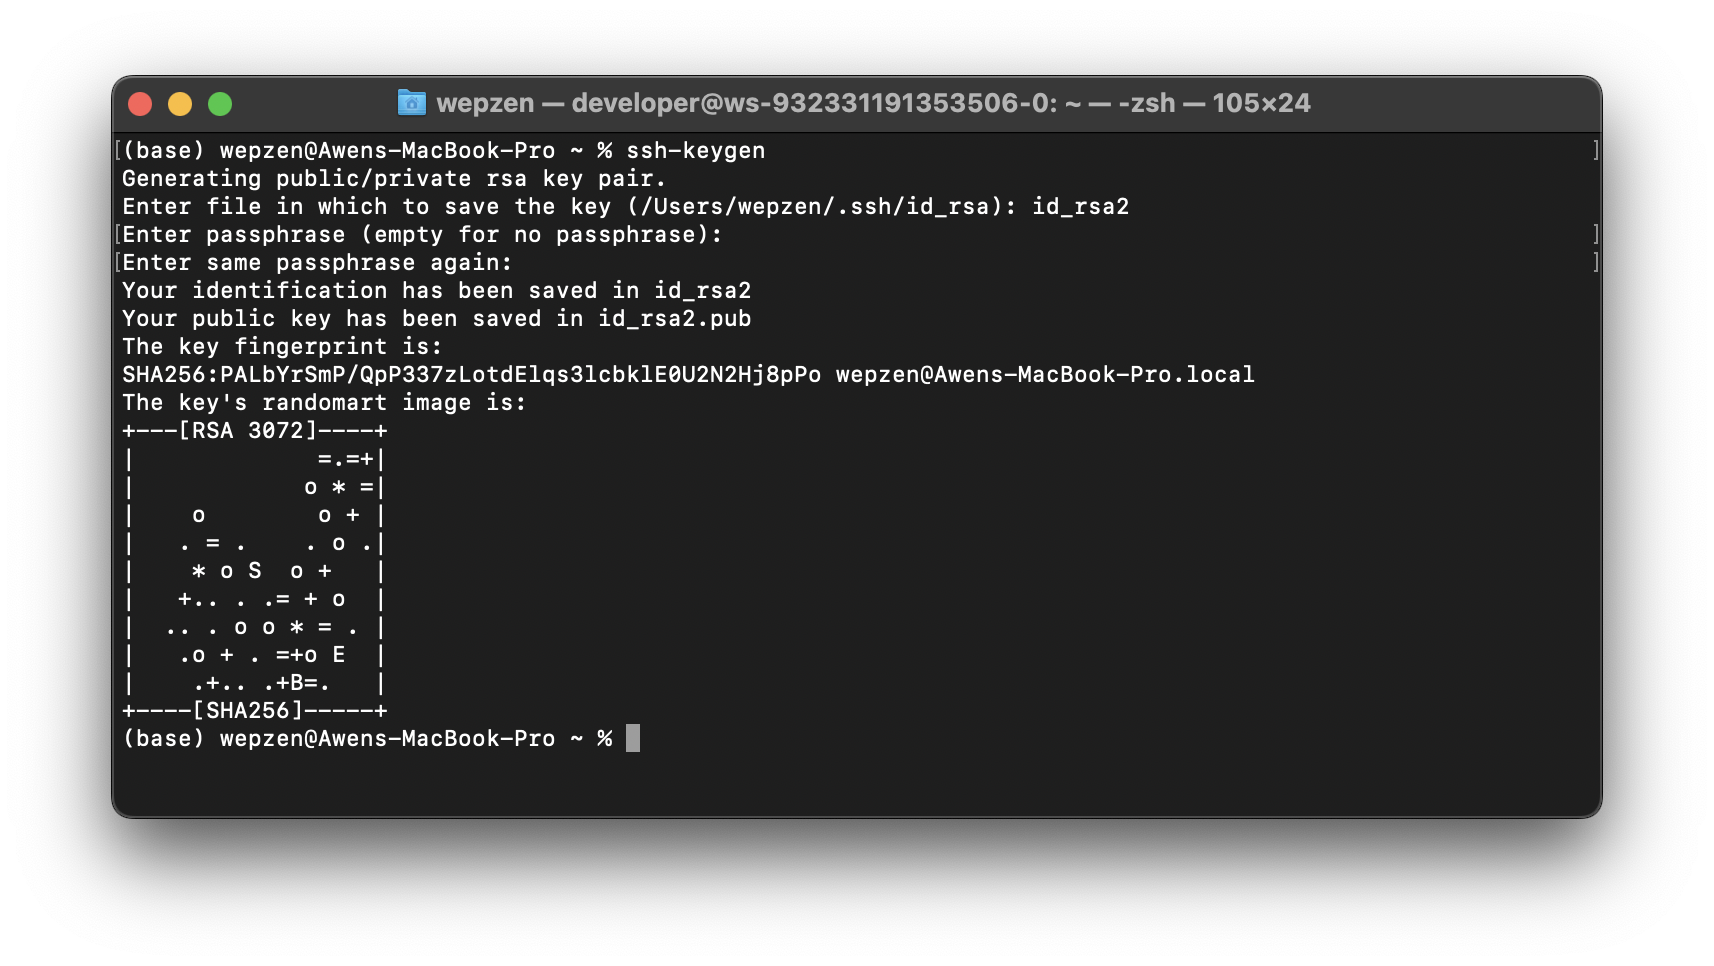 Terminal view of the key pair generation process
2. Upload Your Public Key to the Platform
Once your SSH Key pair is generated, you need to upload it to the SSH Keys Section in your Profile.
The key begins with 'ssh-rsa', 'ecdsa-sha2-nistp256', 'ecdsa-sha2-nistp384', 'ecdsa-sha2-nistp521', 'ssh-ed25519', 'sk-ecdsa-sha2 nistp255@openssh.com' or 'sk-ssh-ed25519@openssh.com'.
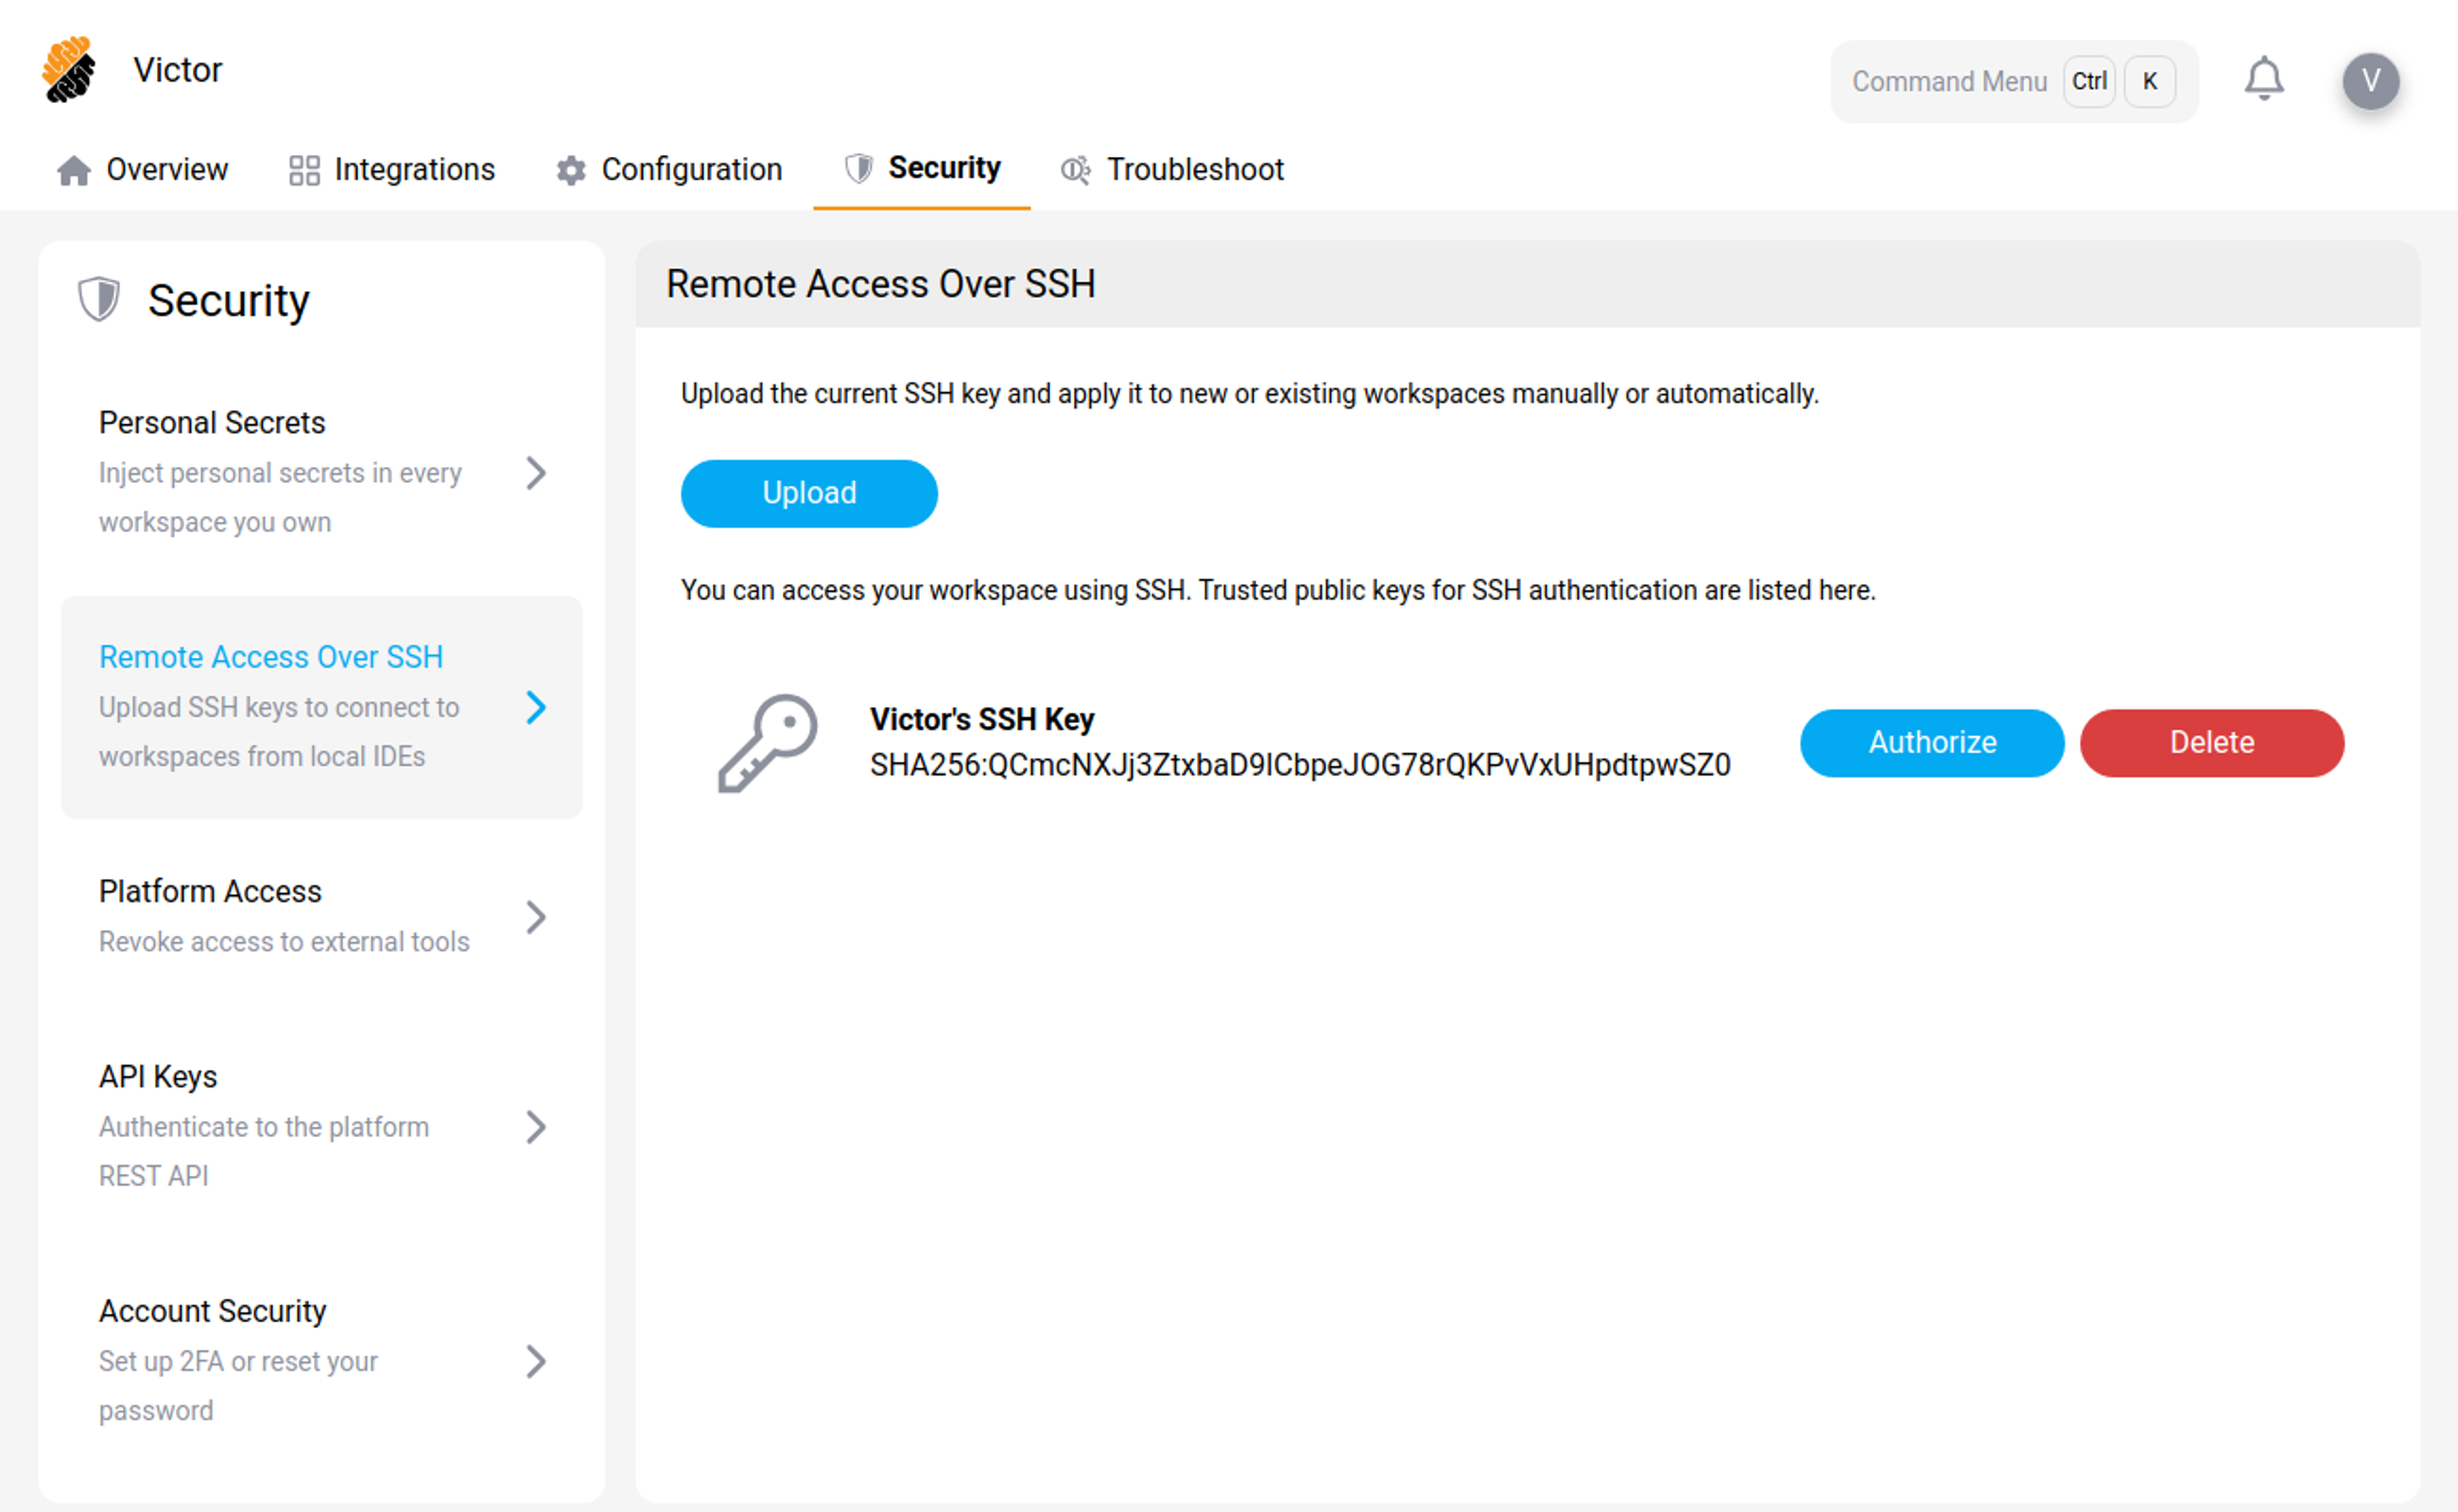 Upload your public key
3. Authorize Your Workspace to Use Your SSH Key
After uploading your SSH key to your profile, you need to authorize your workspace(s) to access it.
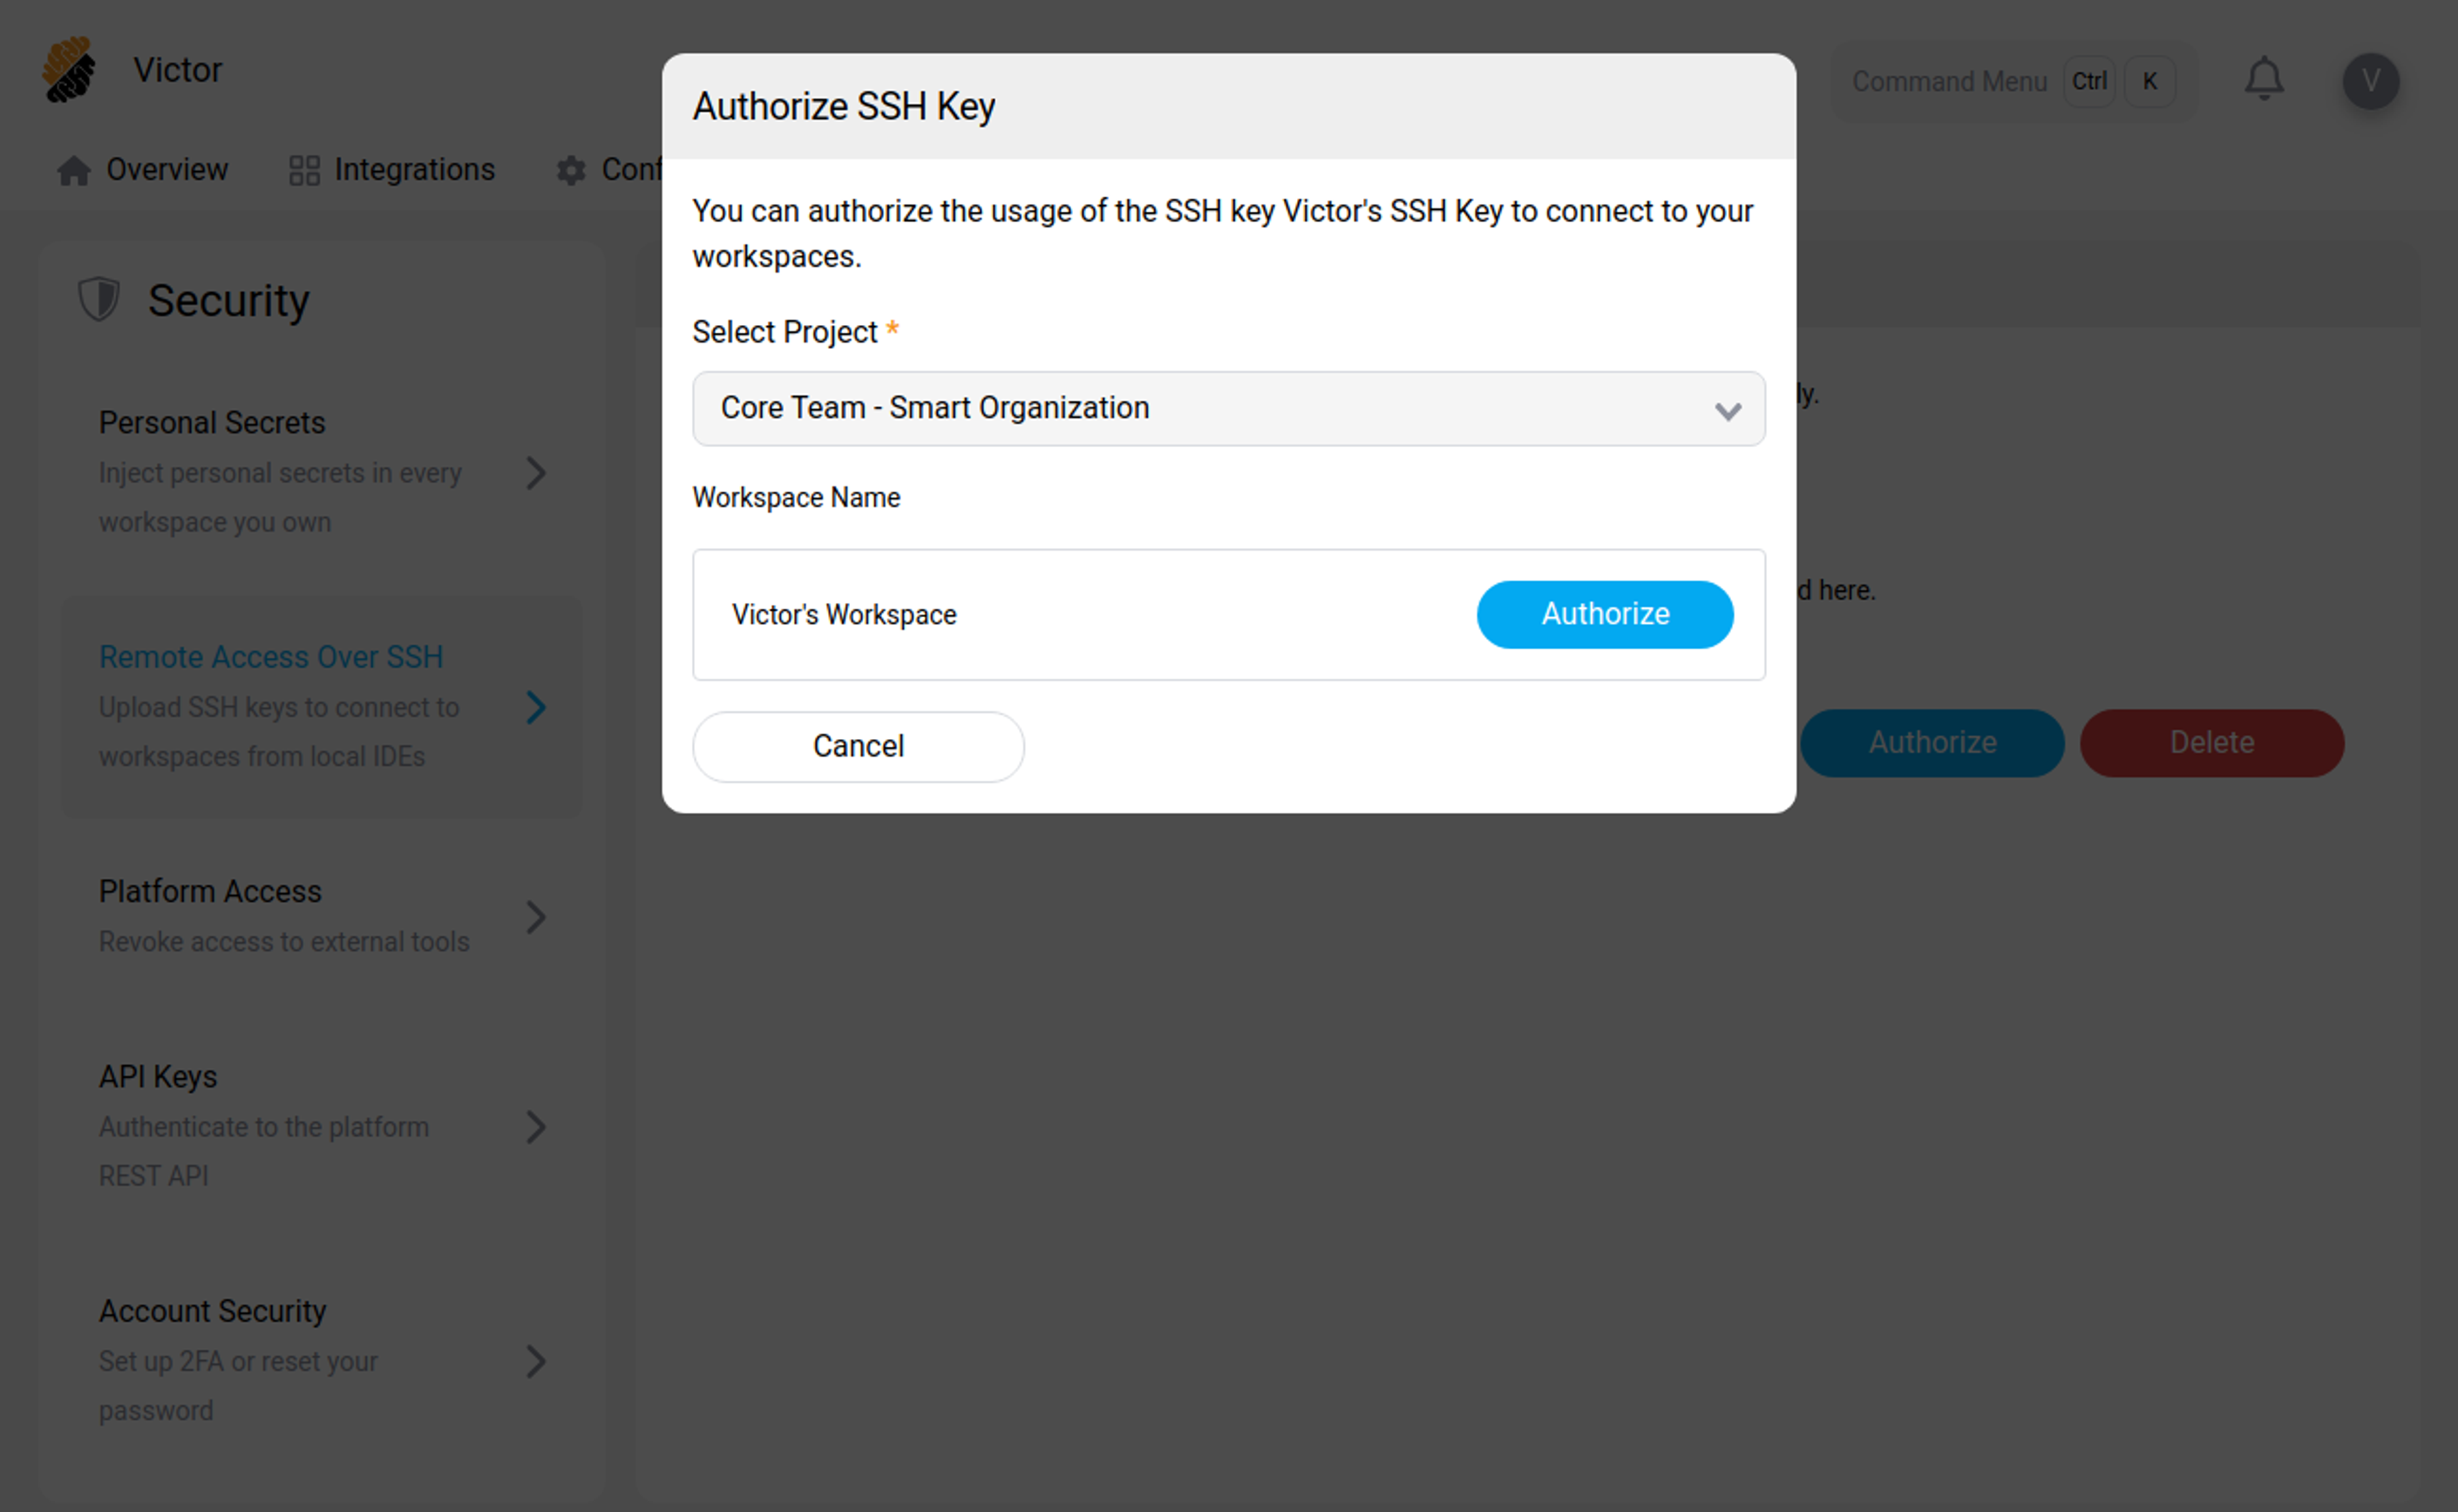 Authorize workspace to access SSH Key
4a. Connect to Your Workspace Using a Shell
Navigate to the Running Actions List of Your Workspace and select the "Connect With SSH" option. This action will display the ssh command that you need to establish an SSH connection to your Workspace.
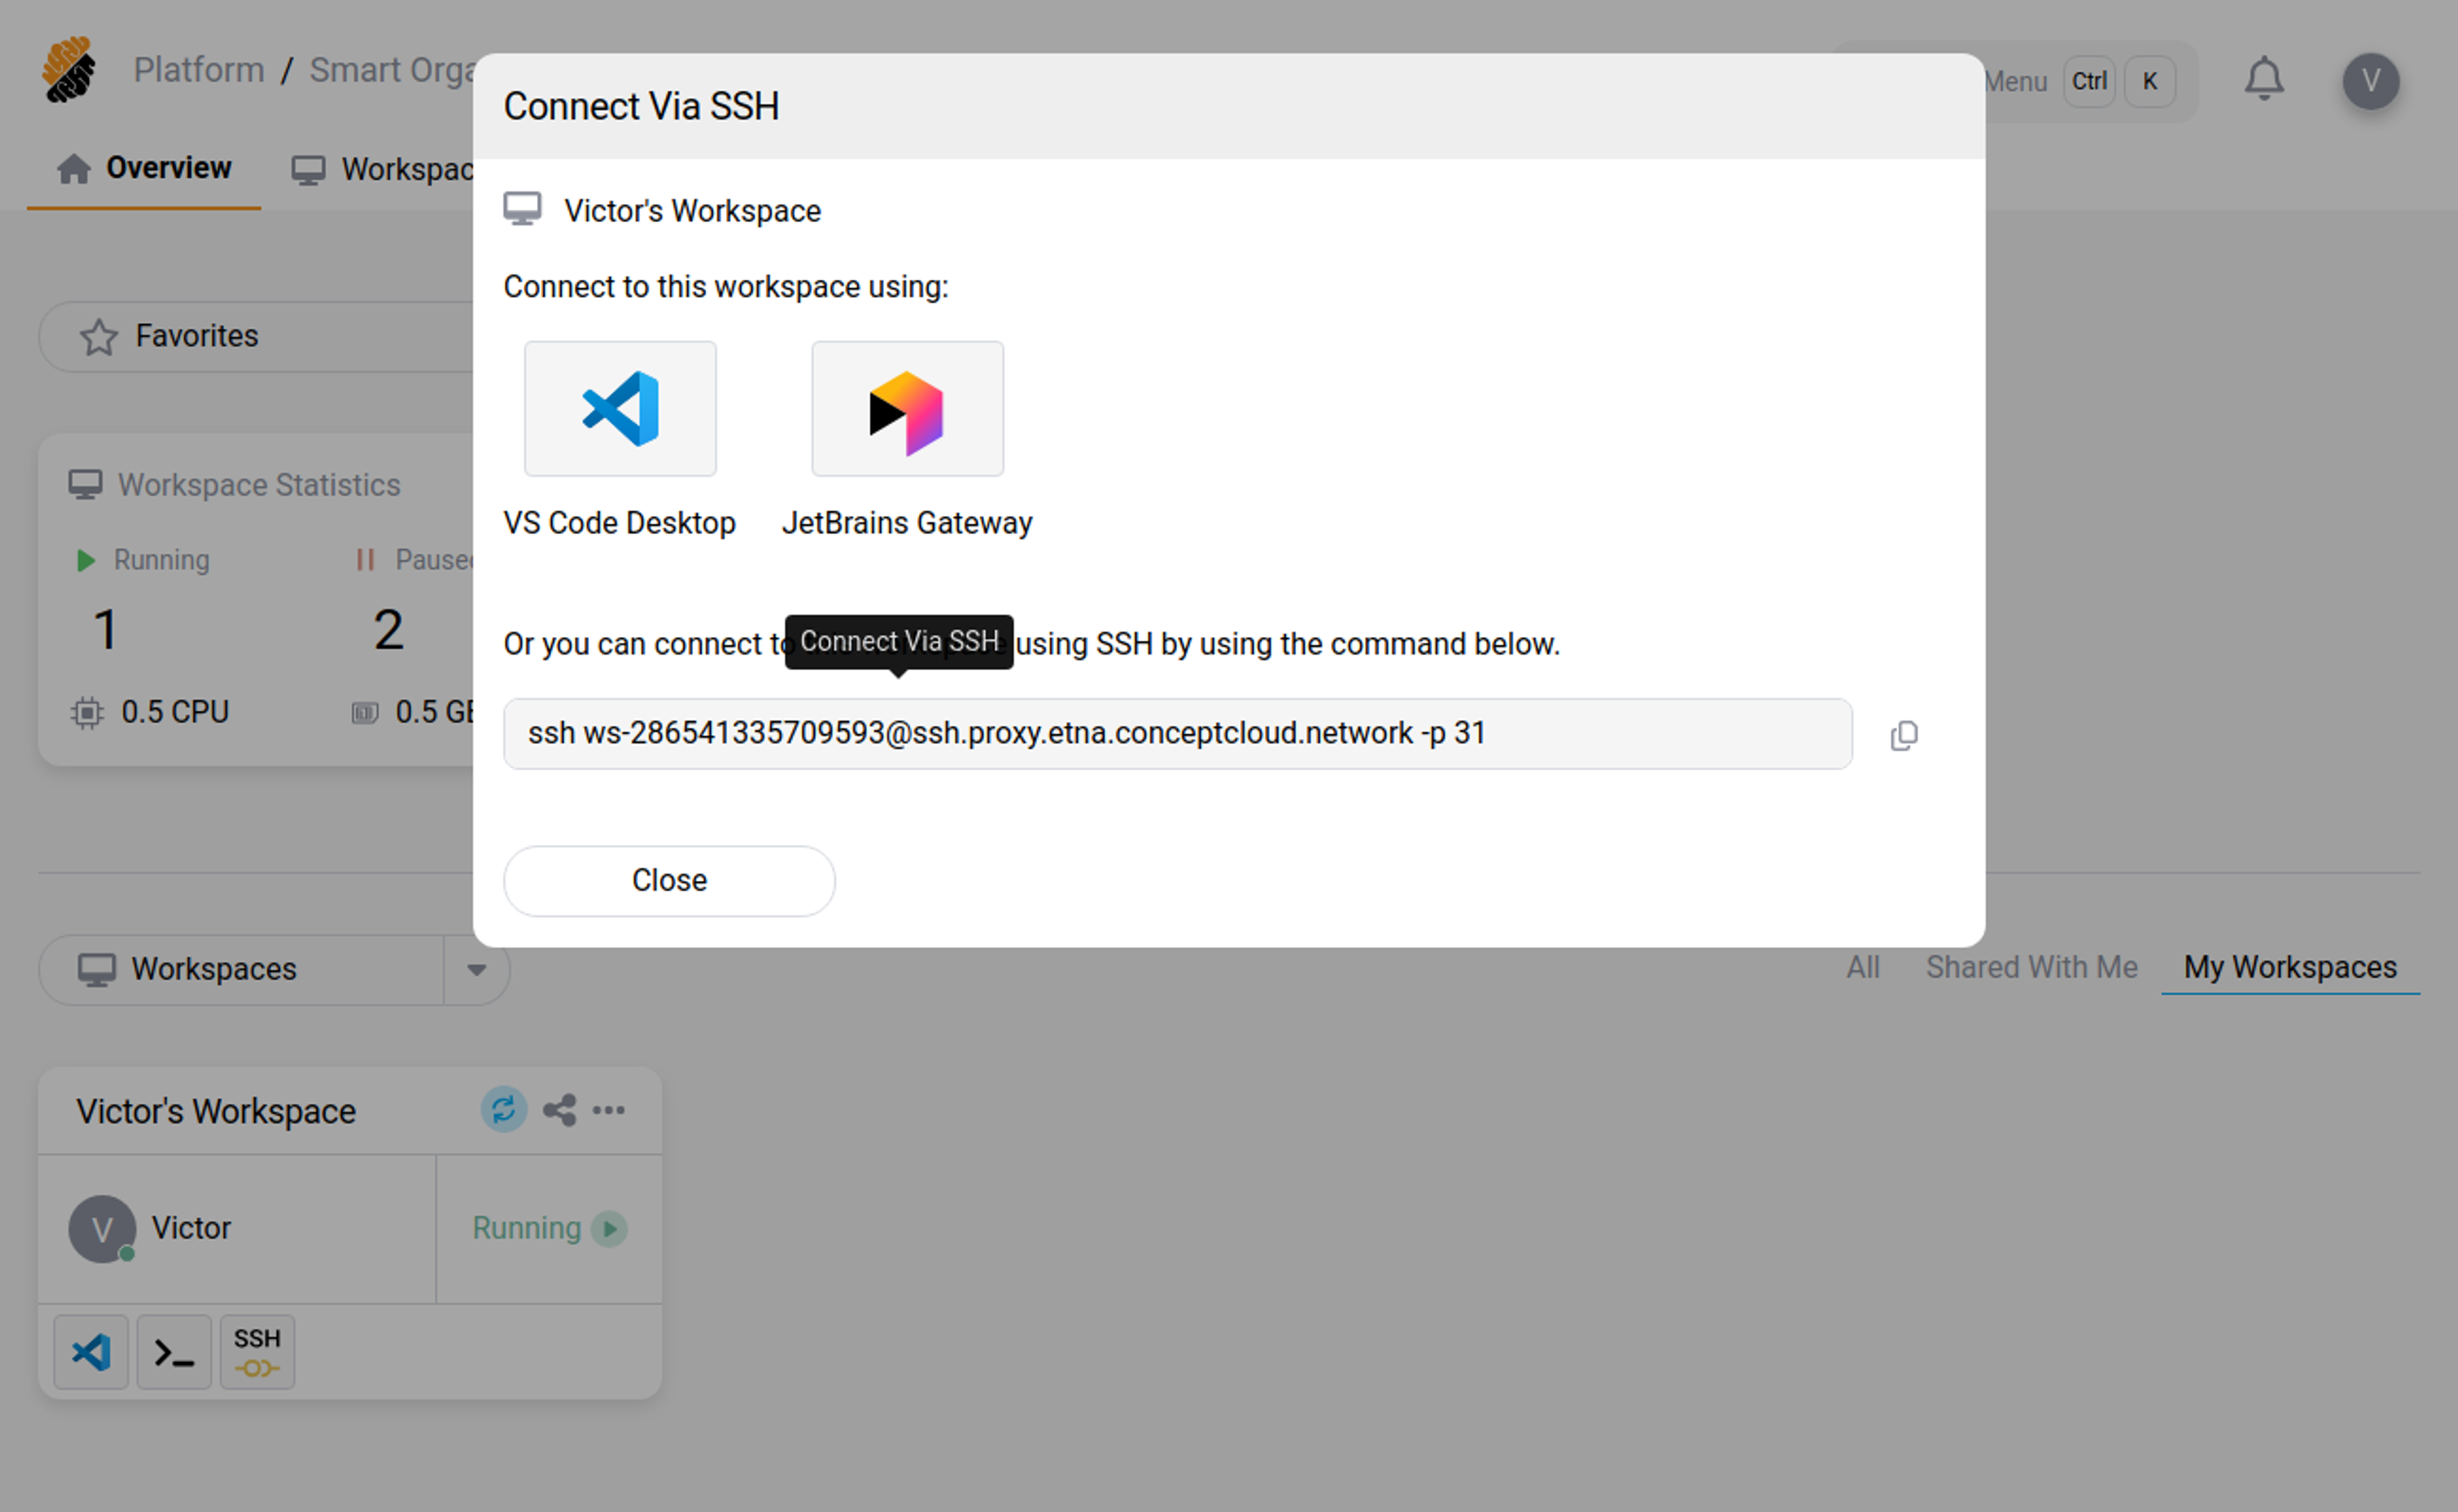 Workspace-specific SSH command
Input this command in your terminal.
 Enter the SSH command
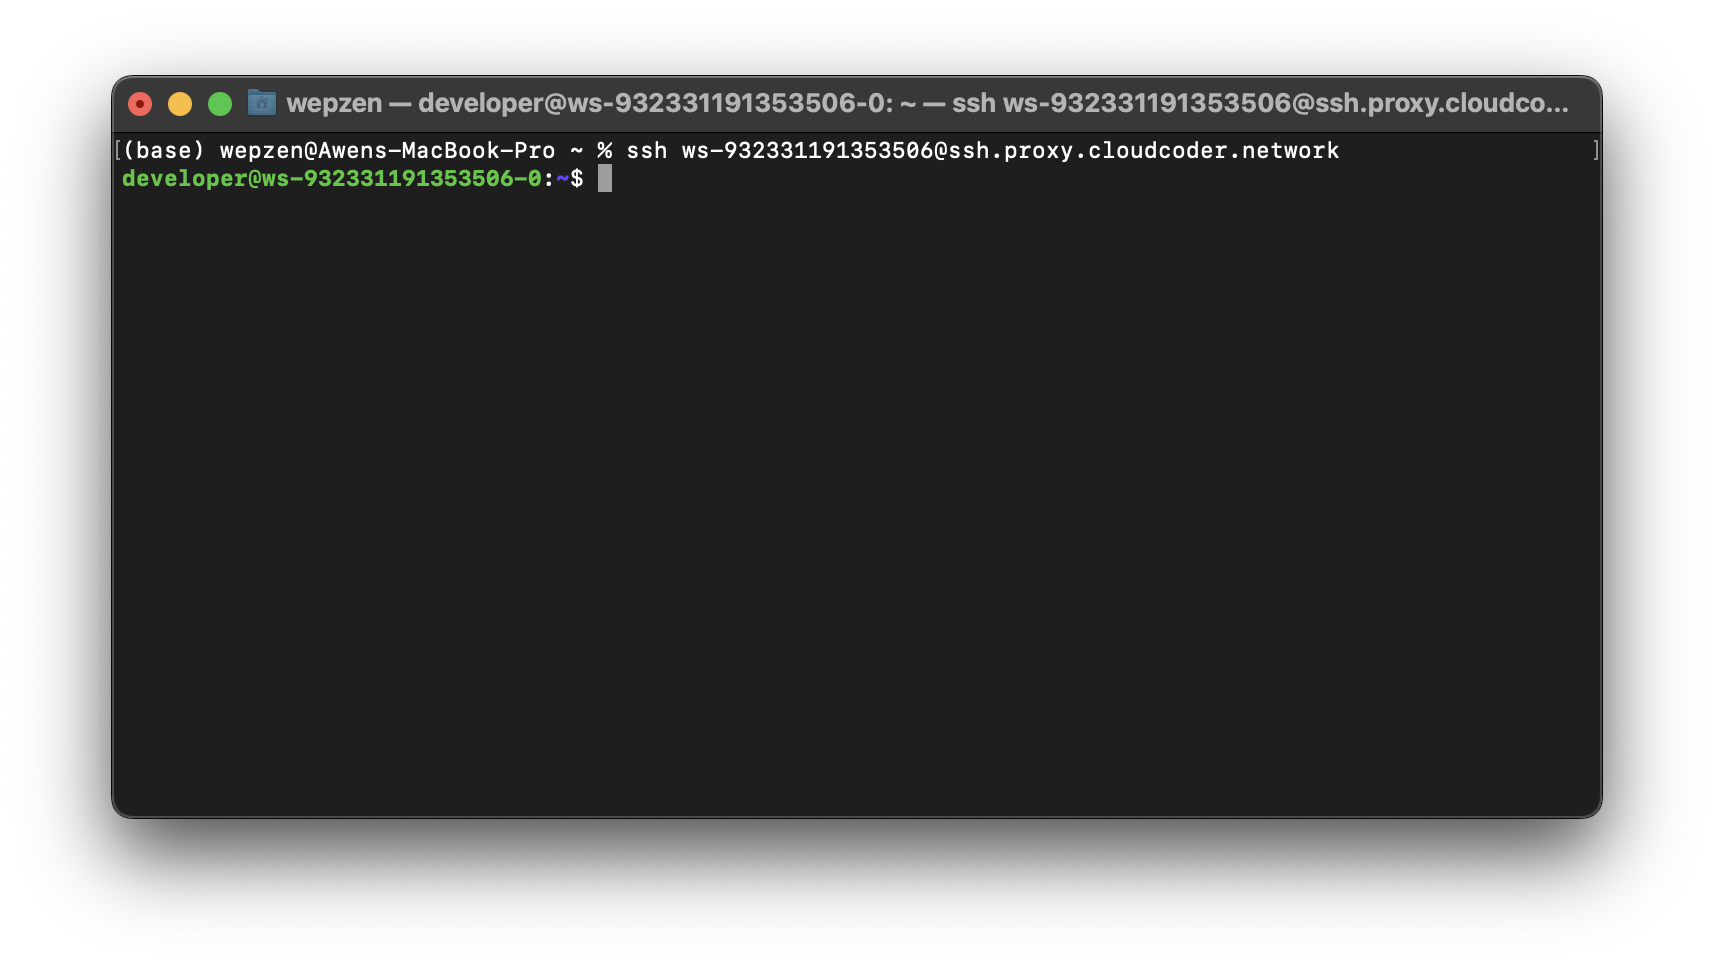
Once this is done, you will have successfully established an SSH connection to your Workspace!
4b. Connect to Your Workspace via SSH Using VSCode
This section provides a detailed walkthrough on setting up an SSH connection to your workspace using the VSCode SSH extension.
TIP
Note that you can execute the same steps directly from your terminal, beginning with step 5b.3.
4b.1. Install the VSCode SSH Extension
To SSH into your workspace directly from your local VSCode IDE, you can download the Microsoft SSH Extension. This extension replicates the usual SSH command you would perform from your terminal, but allows you to work directly within your local VSCode.
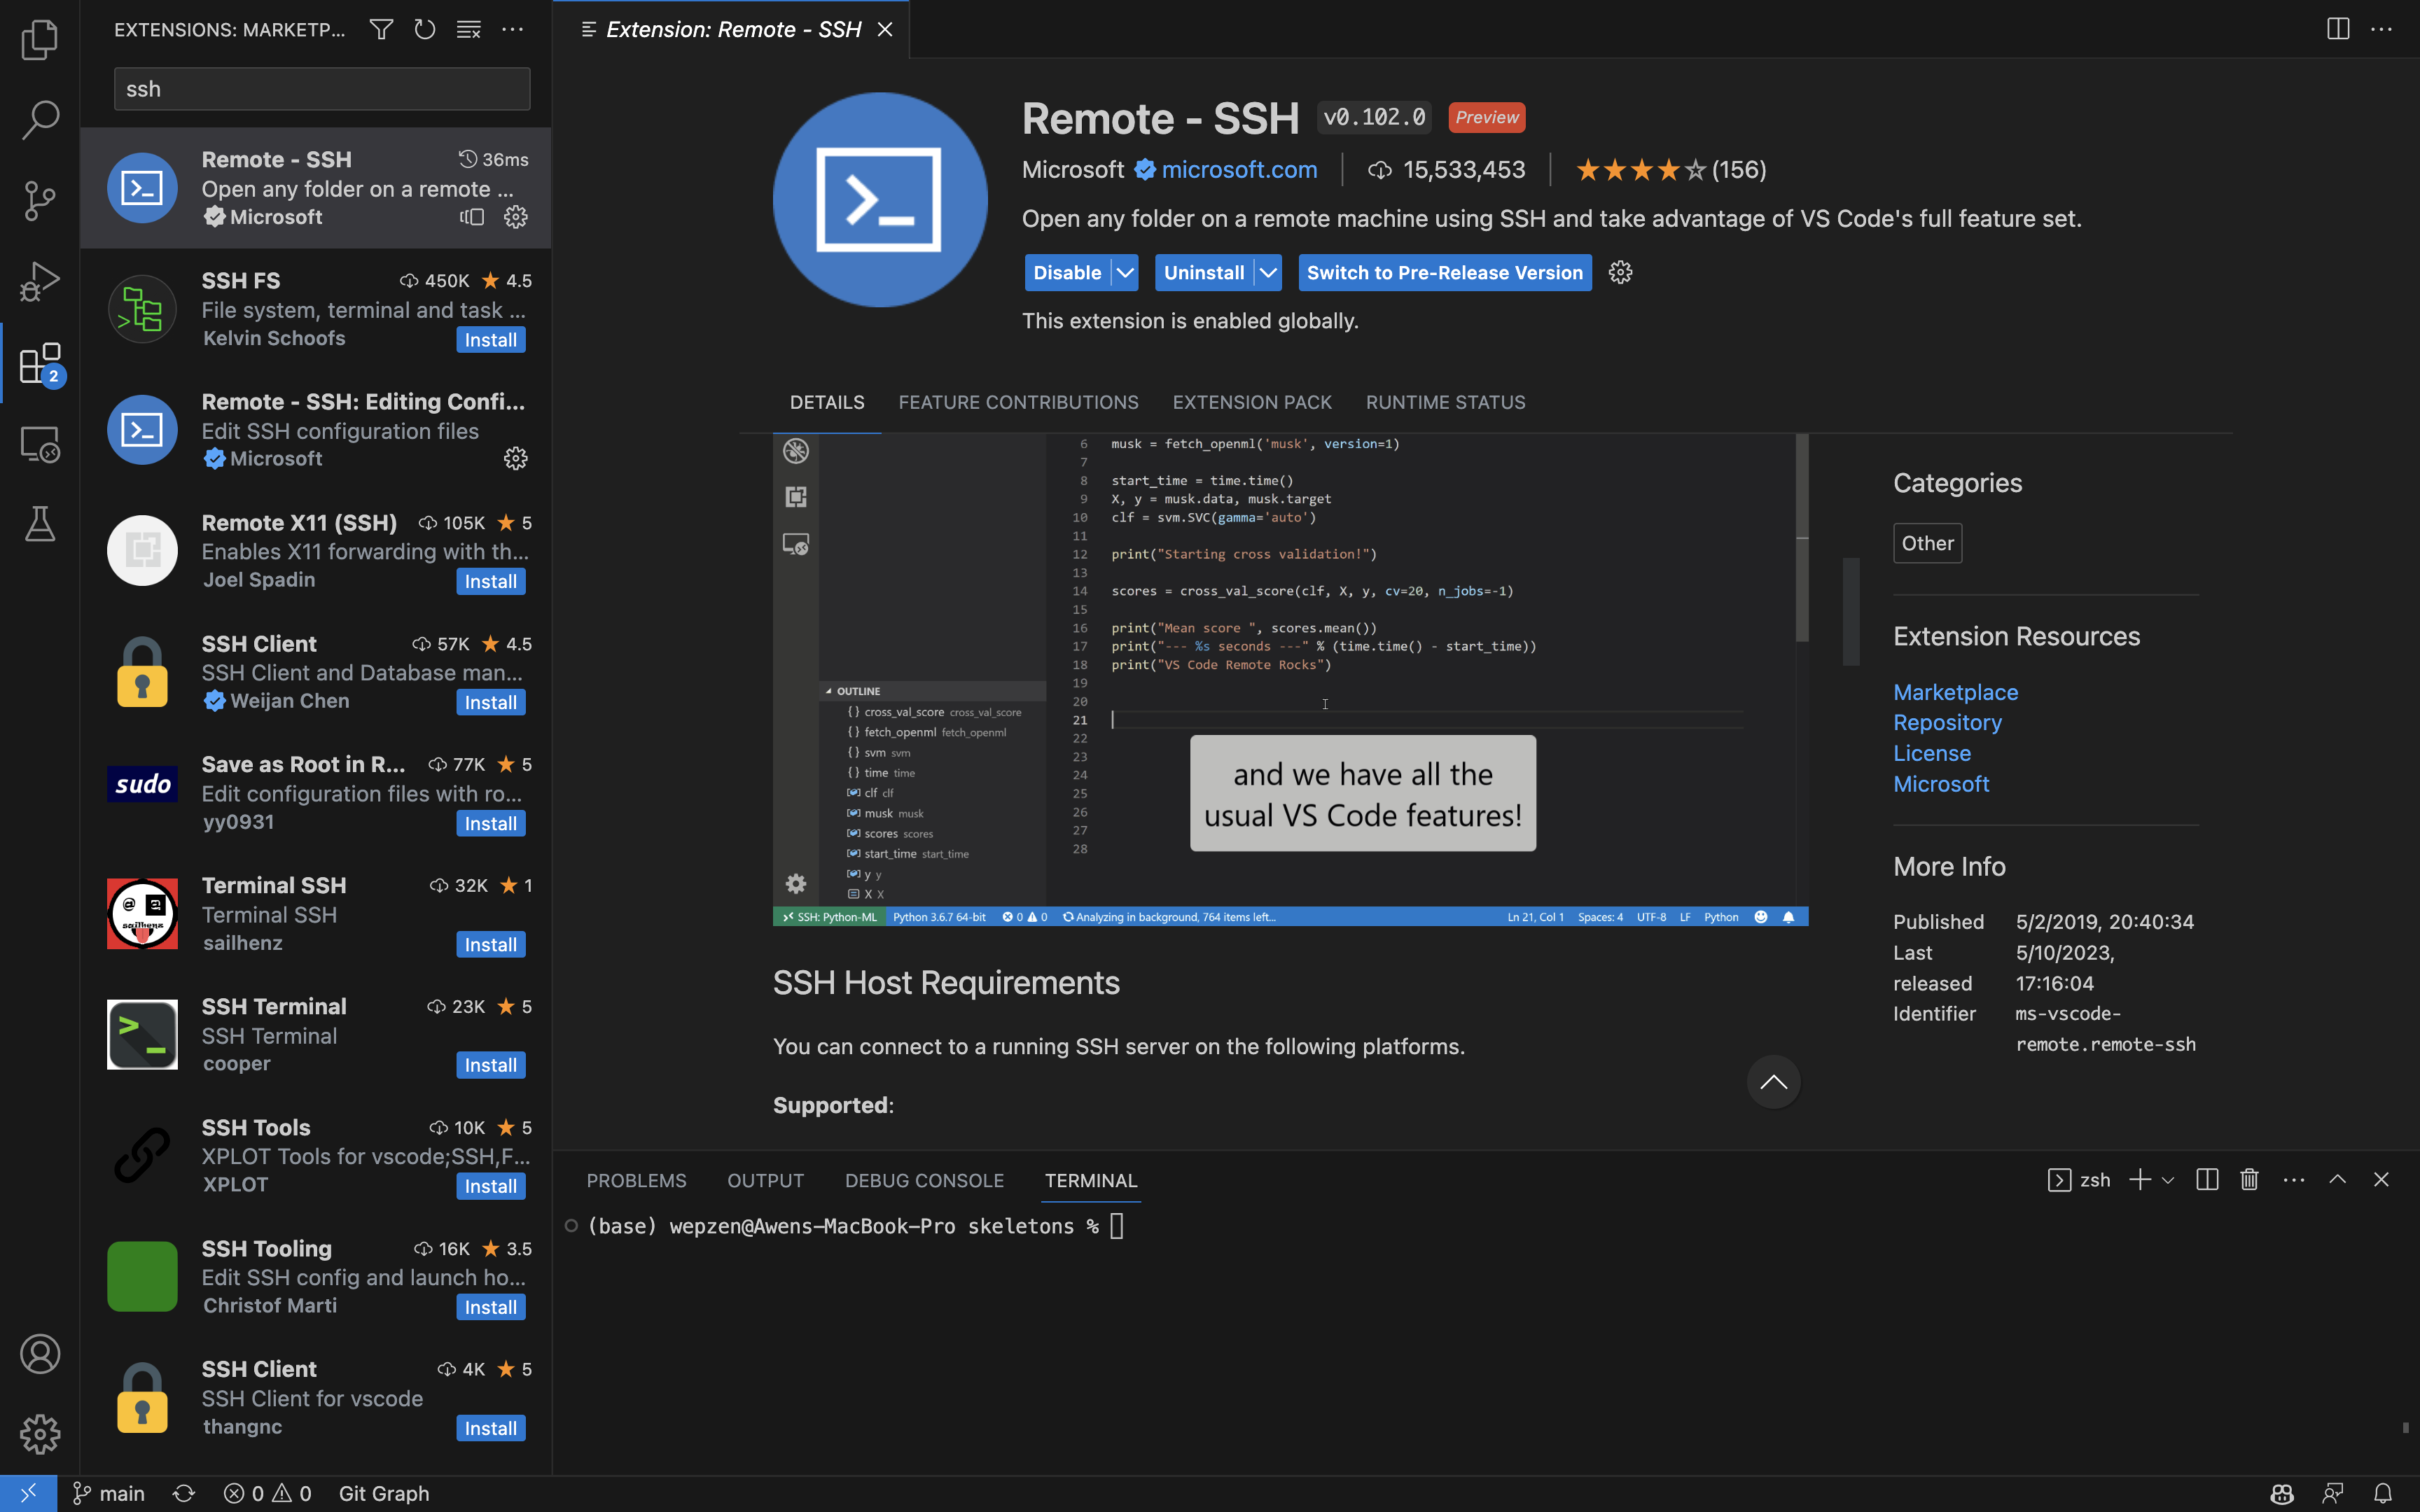 Microsoft SSH Extension
4b.2. Initiate a New SSH Connection from the VSCode SSH Extension
By clicking the "+" button next to the "SSH" pannel in the VSCode Extension section.
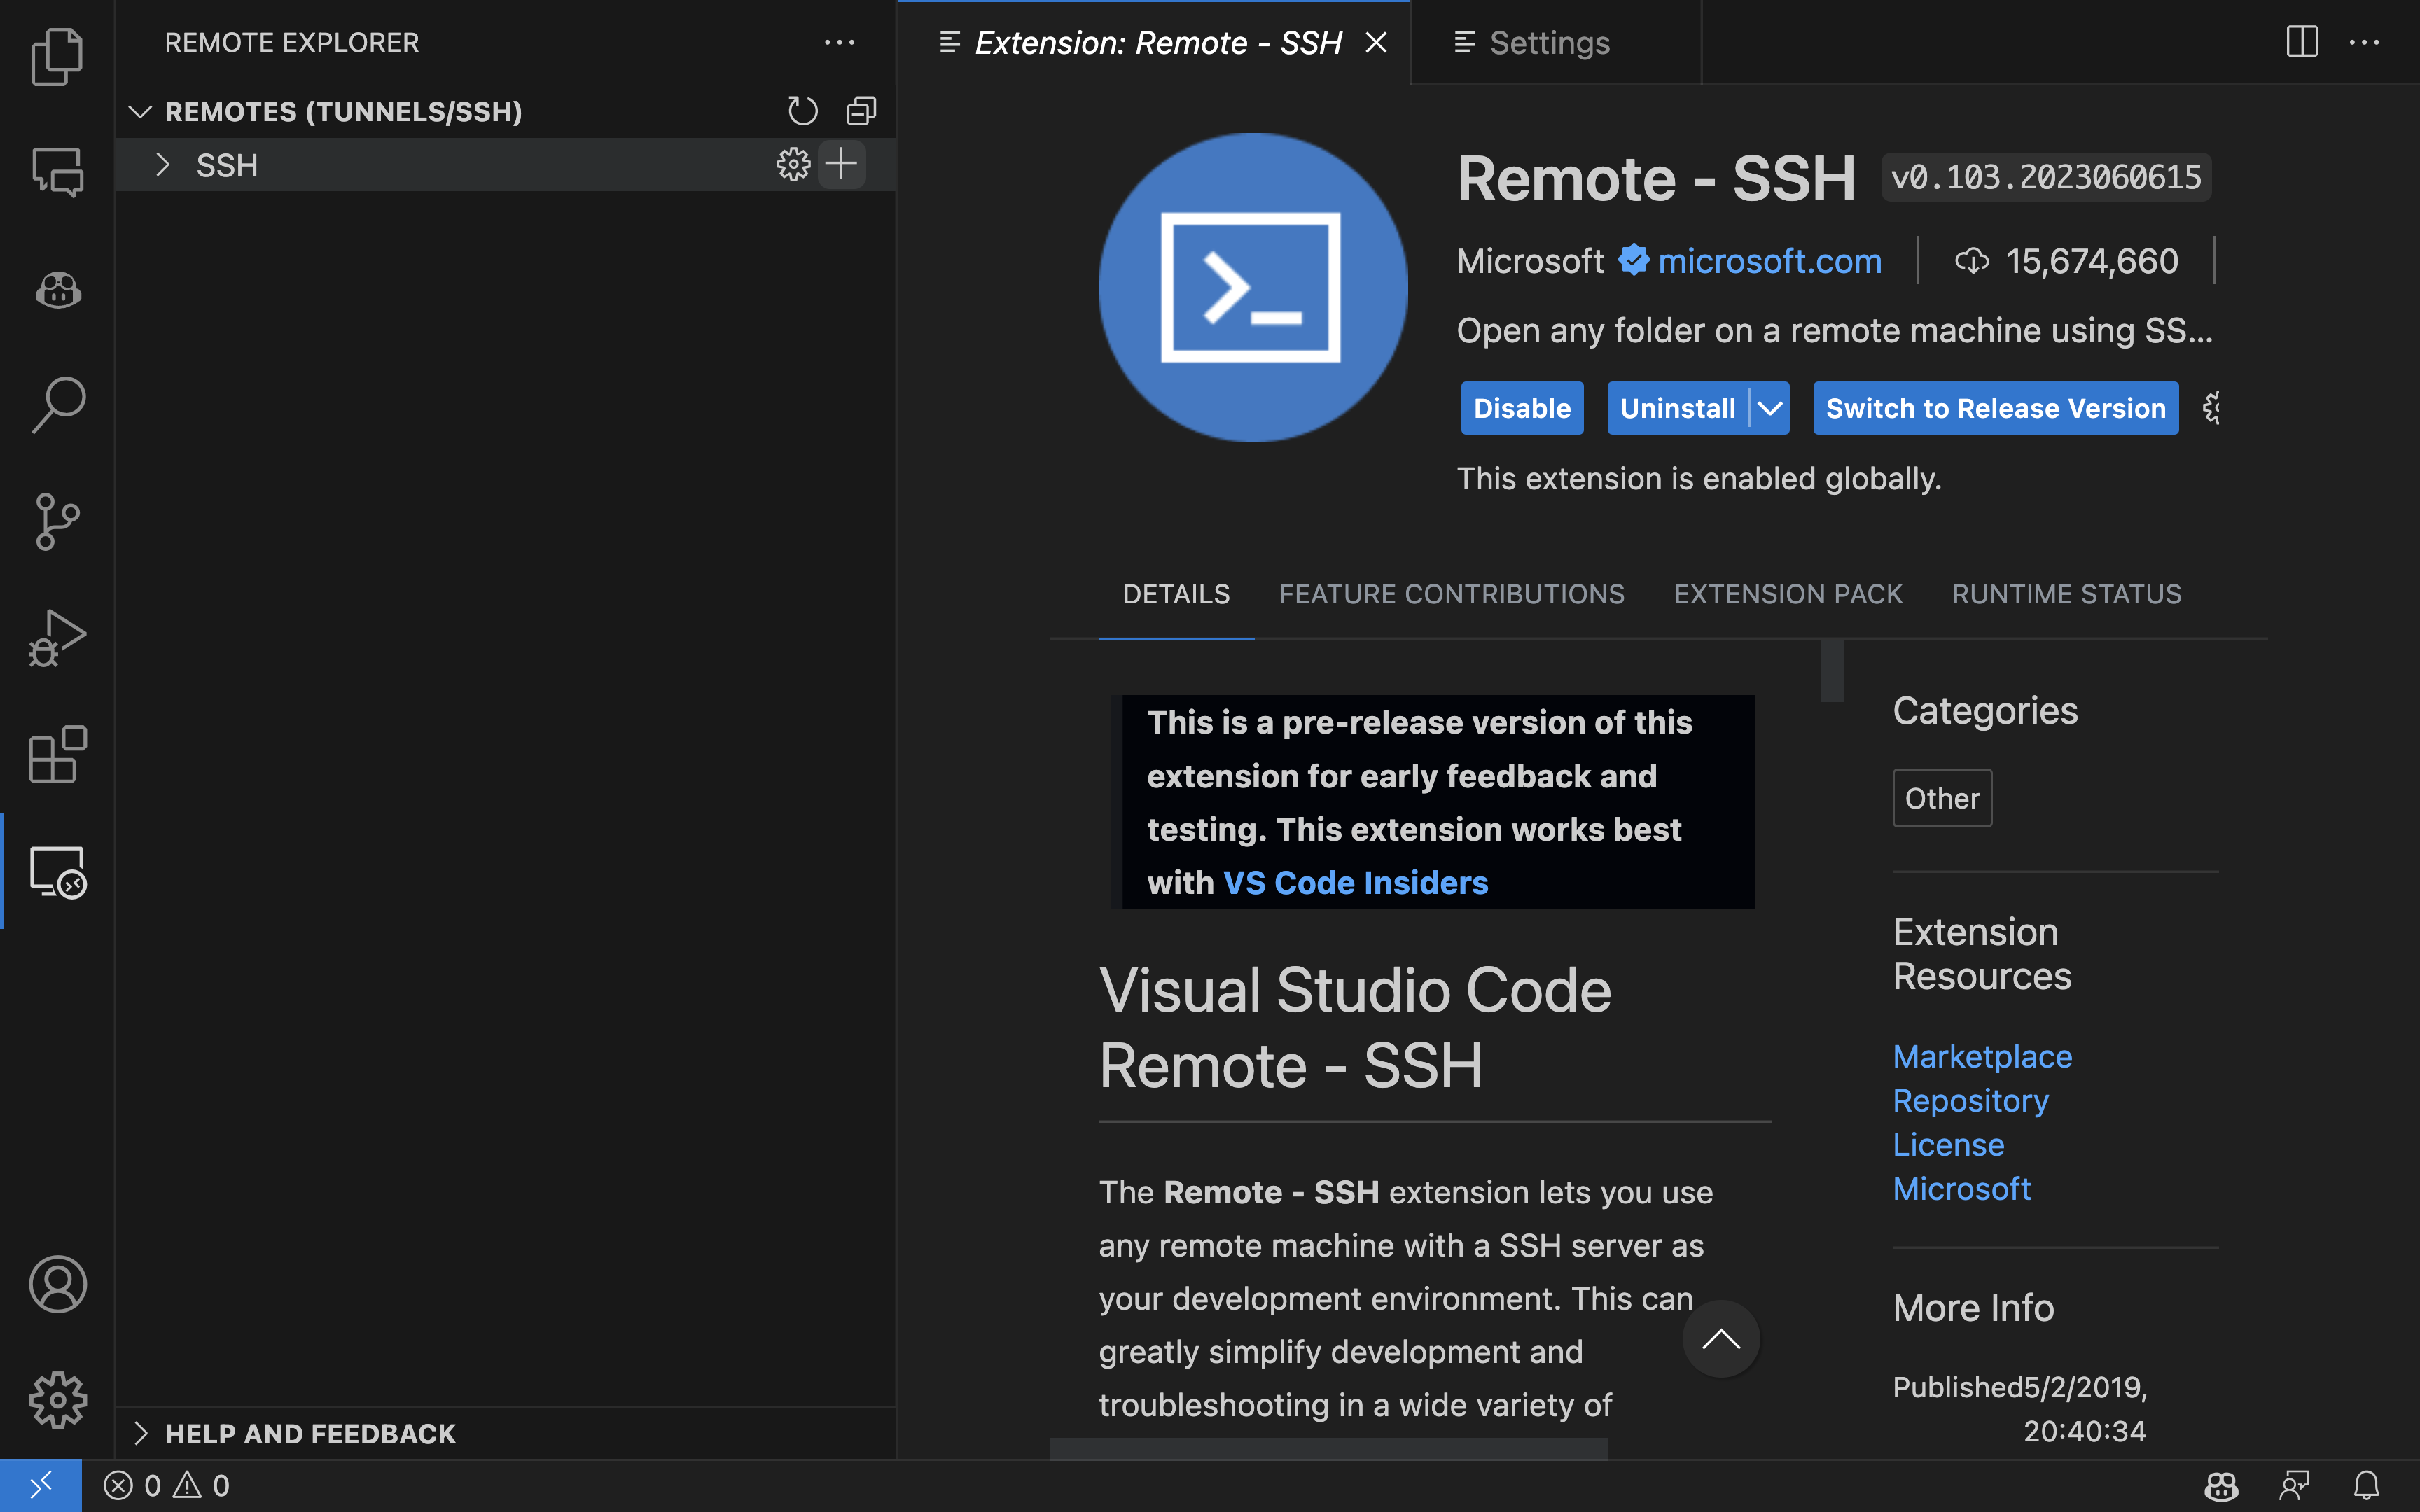 Initiate a new SSH connection using the VSCode extension
4b.3. Input the SSH Command into the Extension Prompt
From your Workspace's Running Actions List select the "Connect With SSH" option to display the ssh command you need to connect to your Workspace via SSH.
SSH command specific to your Worksapce
Enter this command in the VSCode extension prompt.
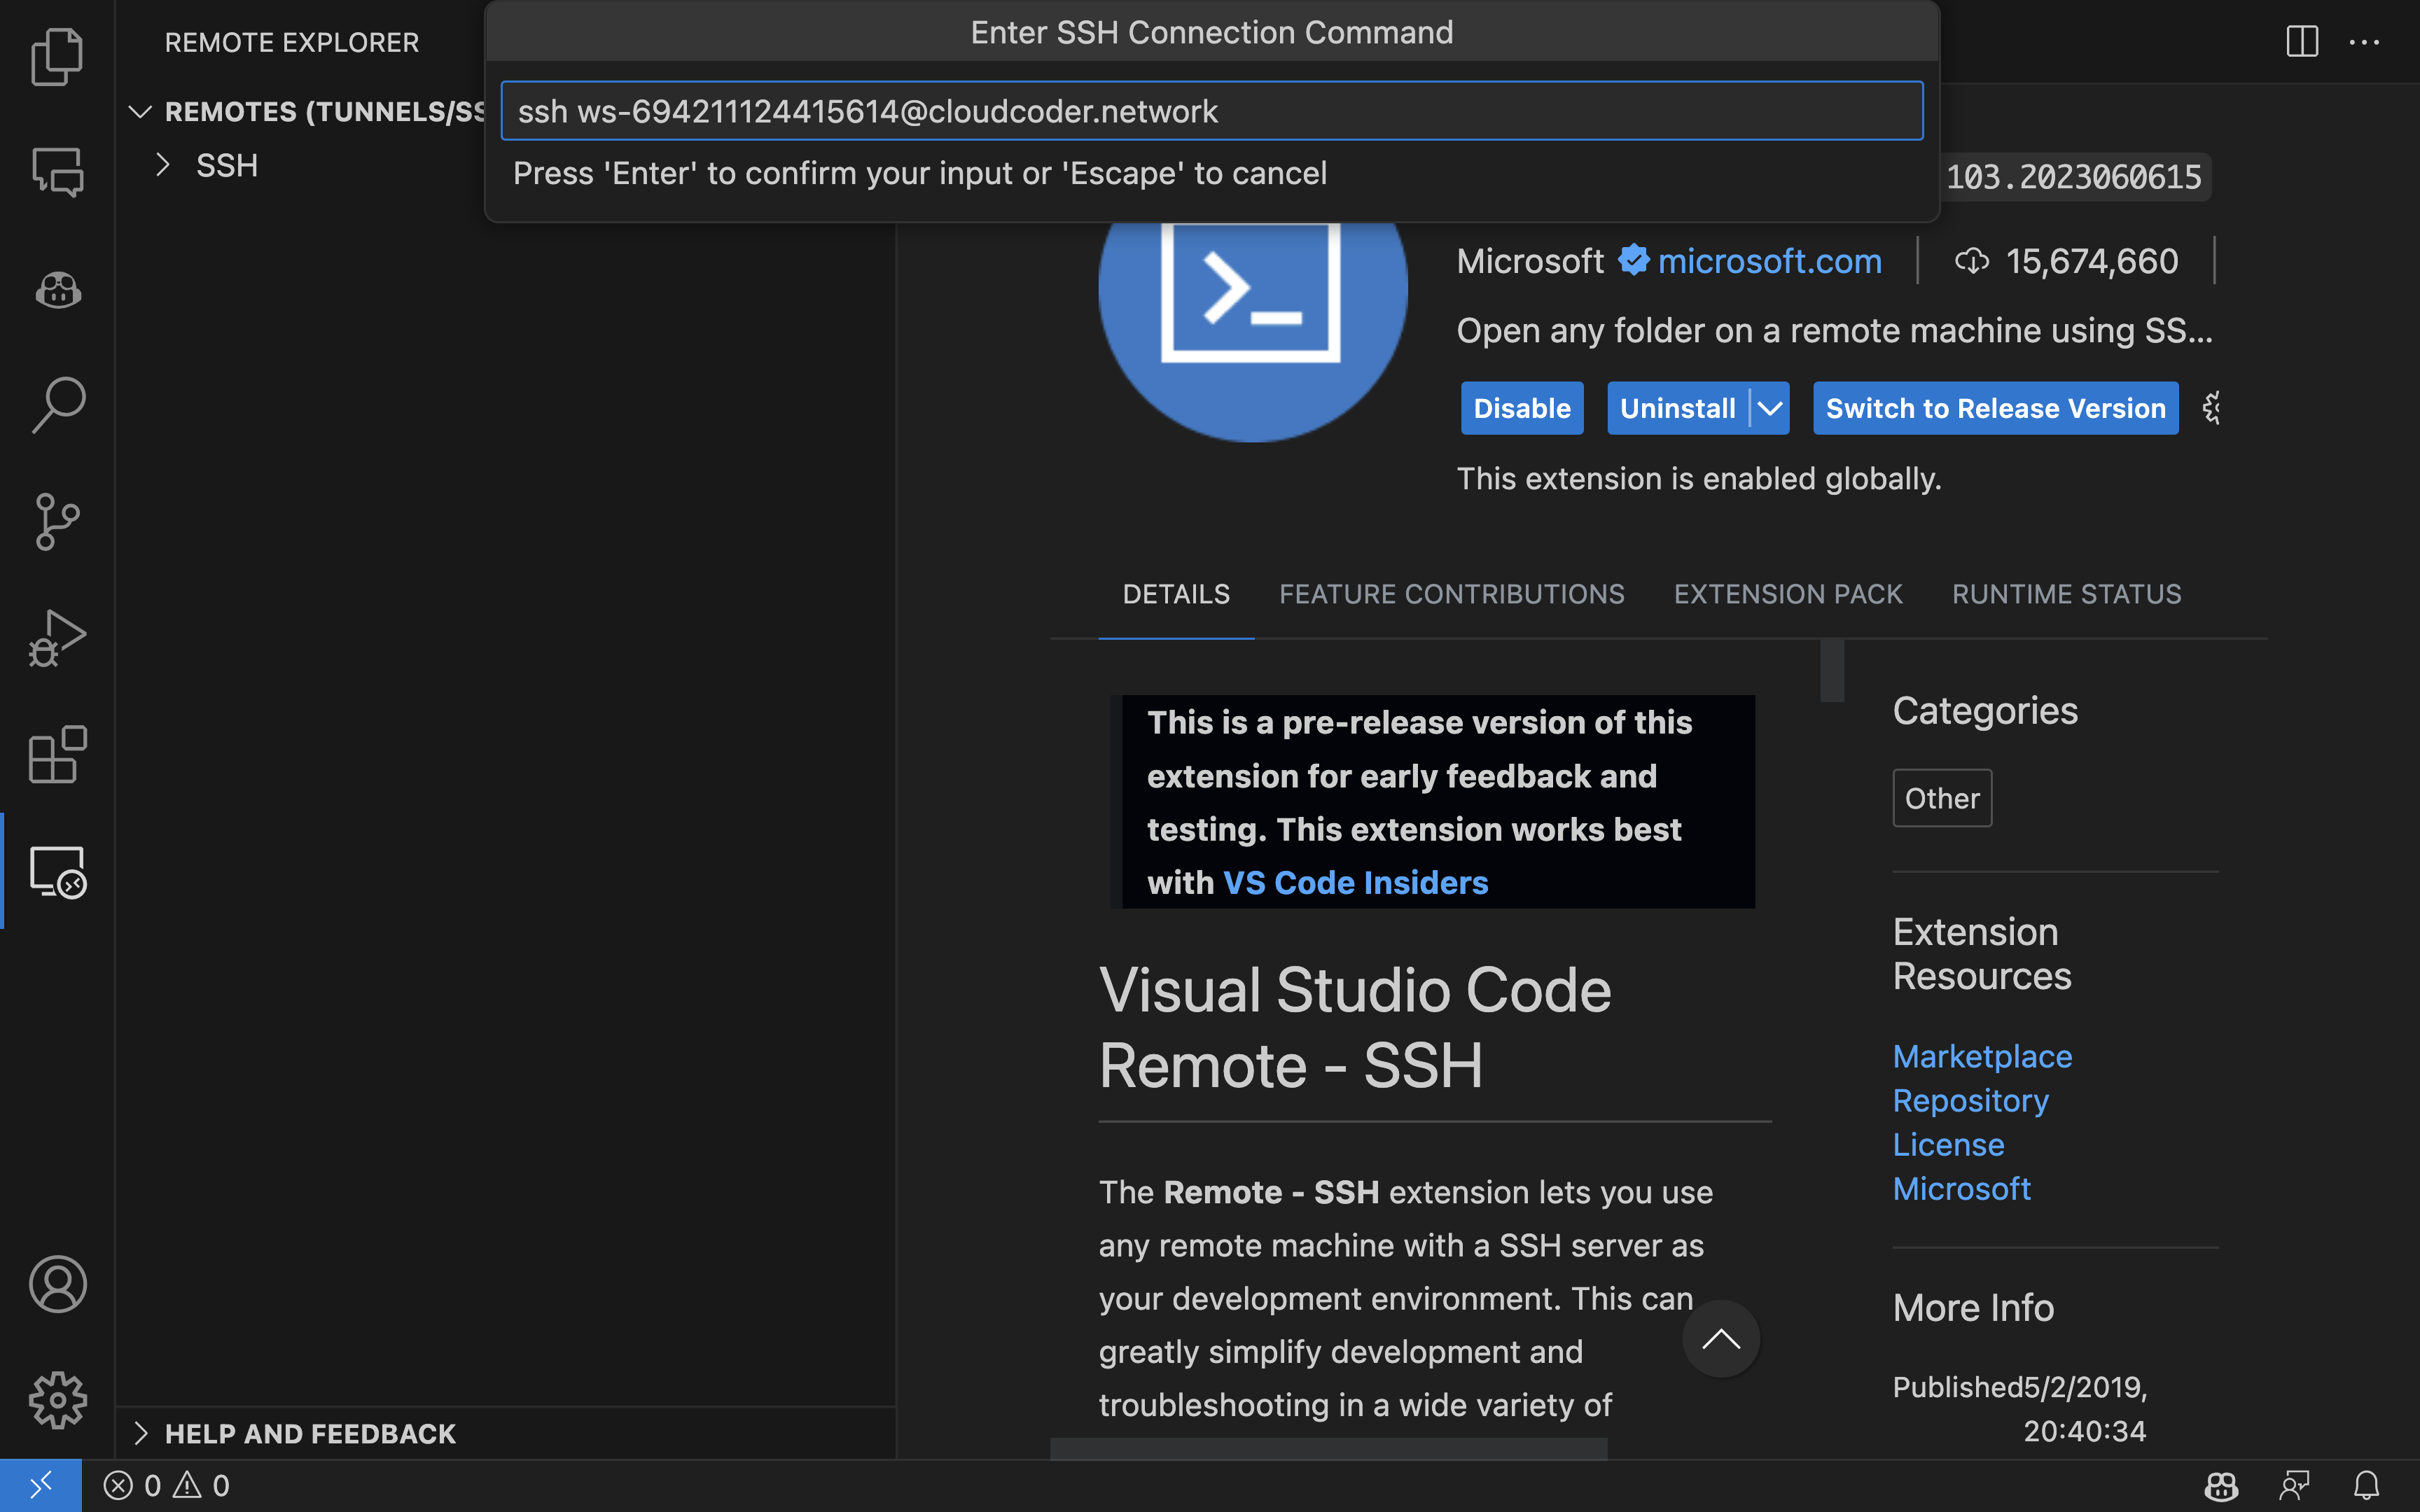 Input the SSH command
4b.4. Select the Default SSH Configuration
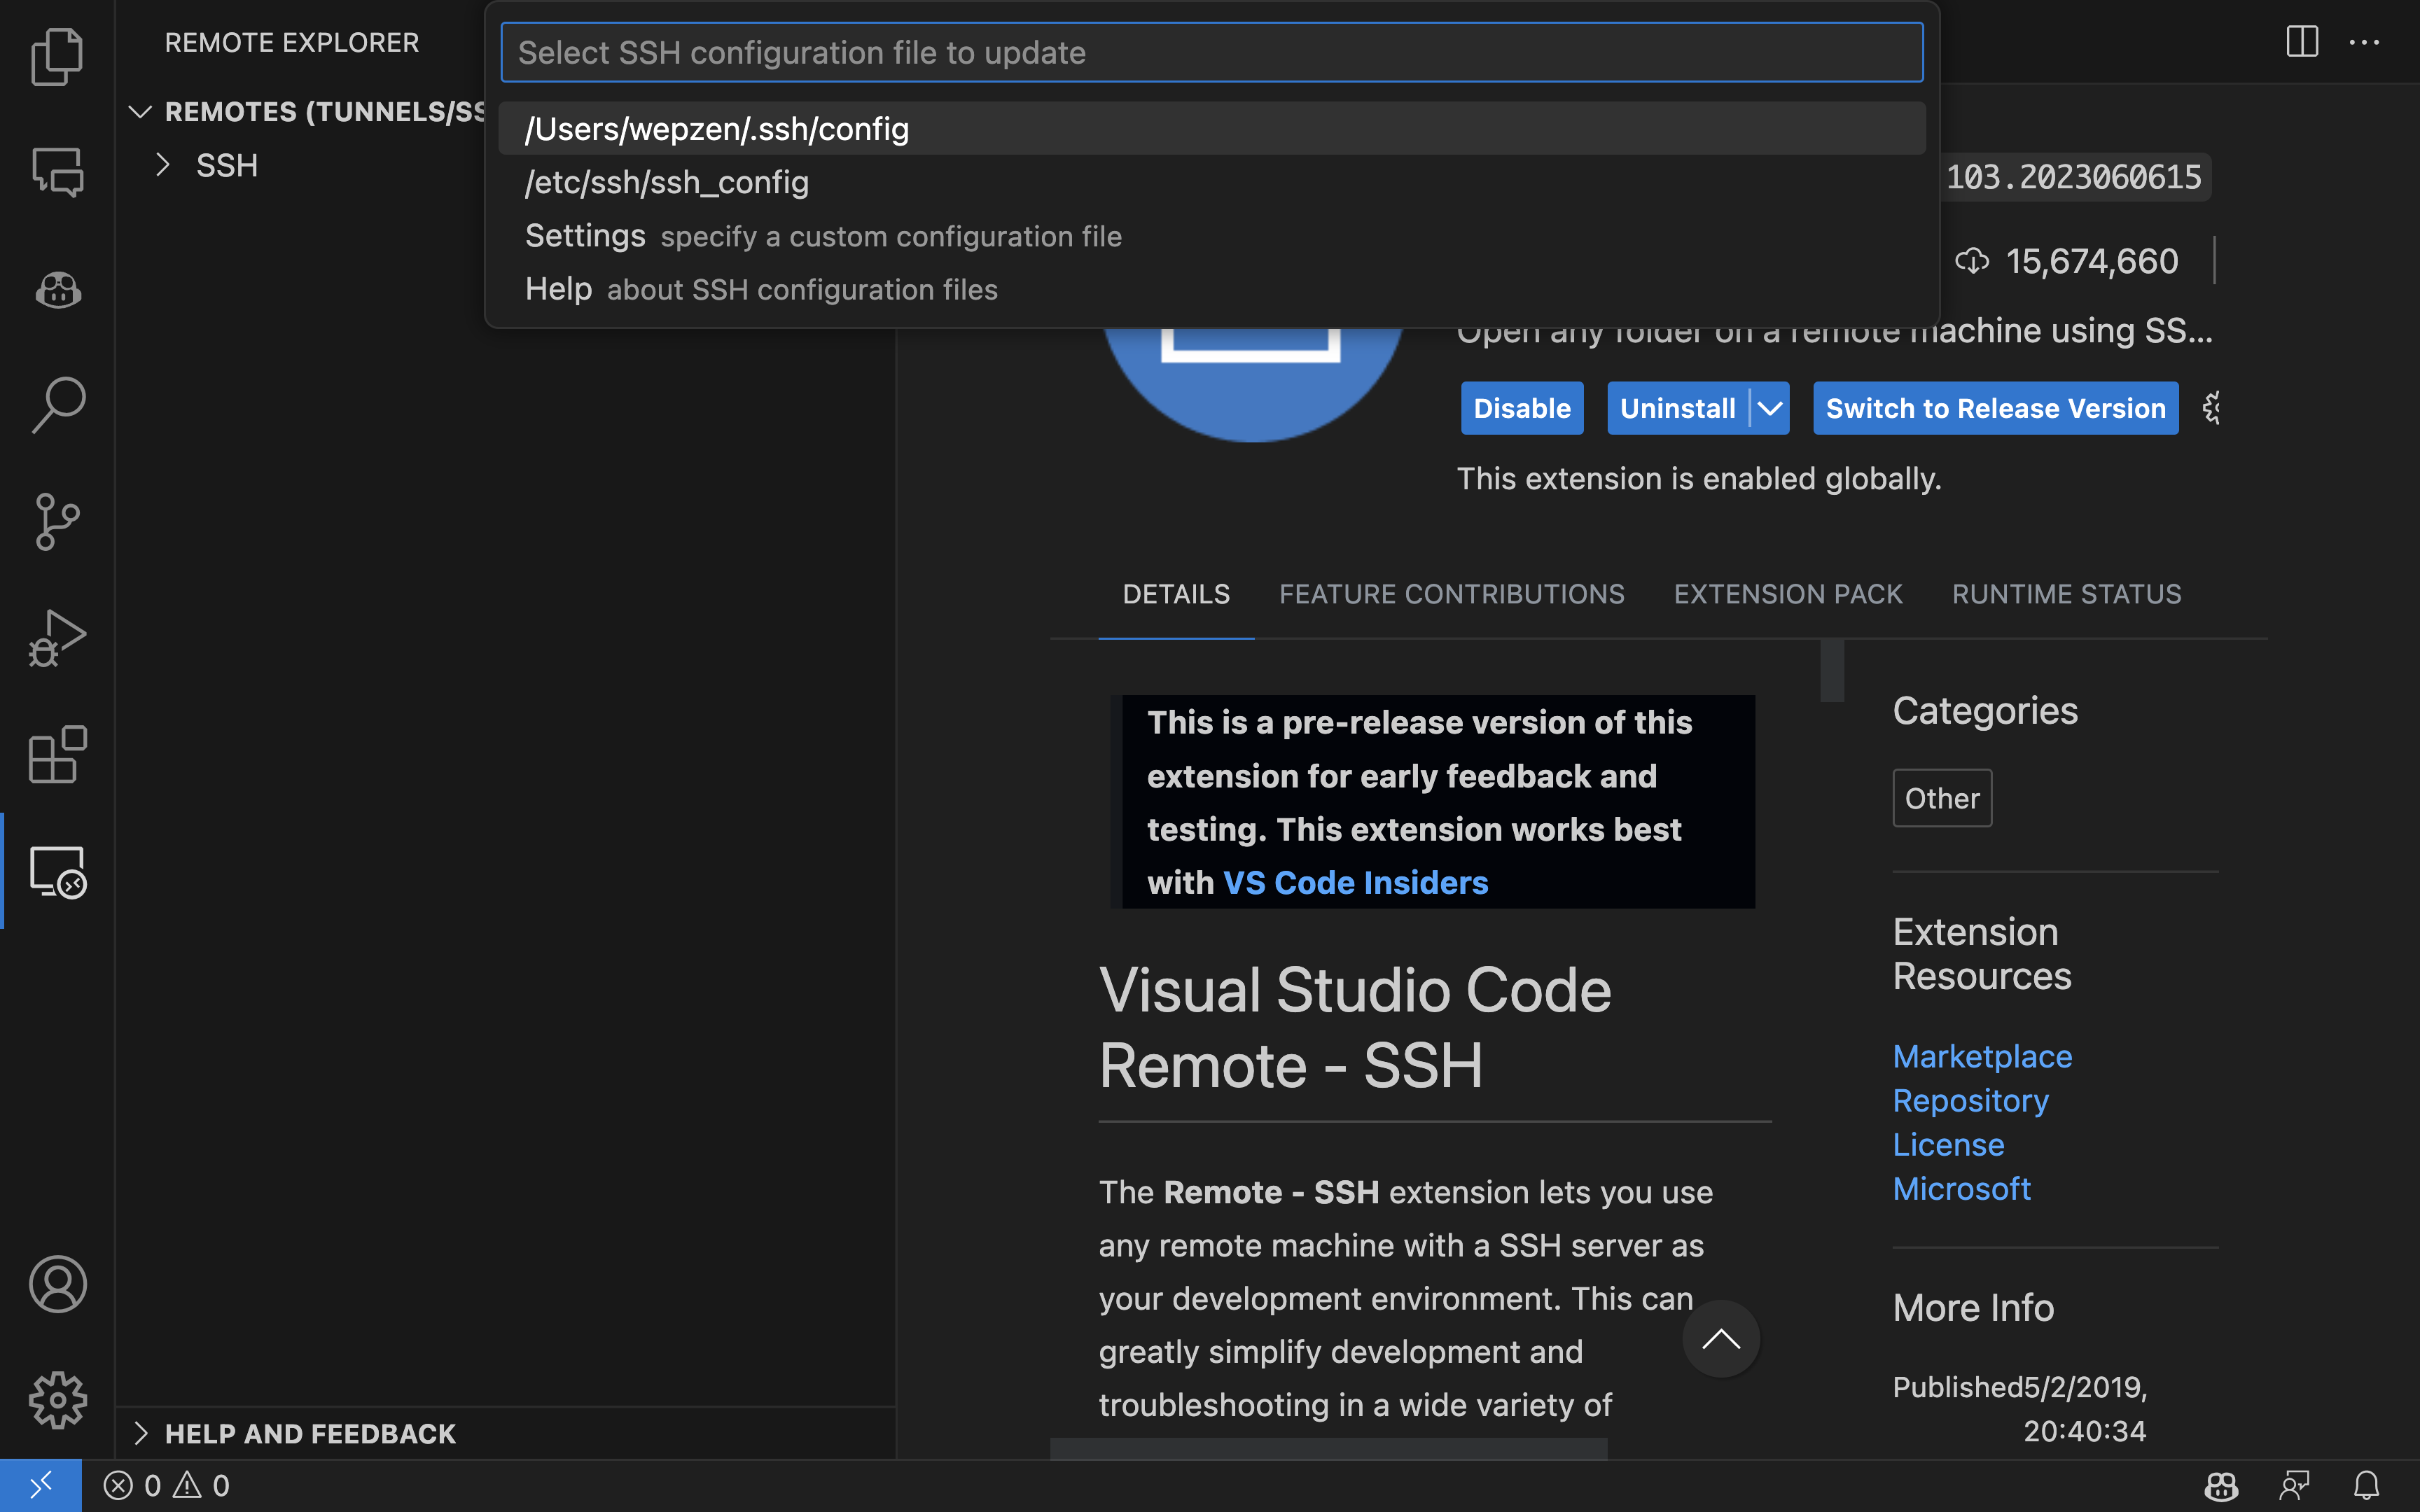 Select the default SSH configuration
4b.5. Click the "Connect" Button after the Host is Added
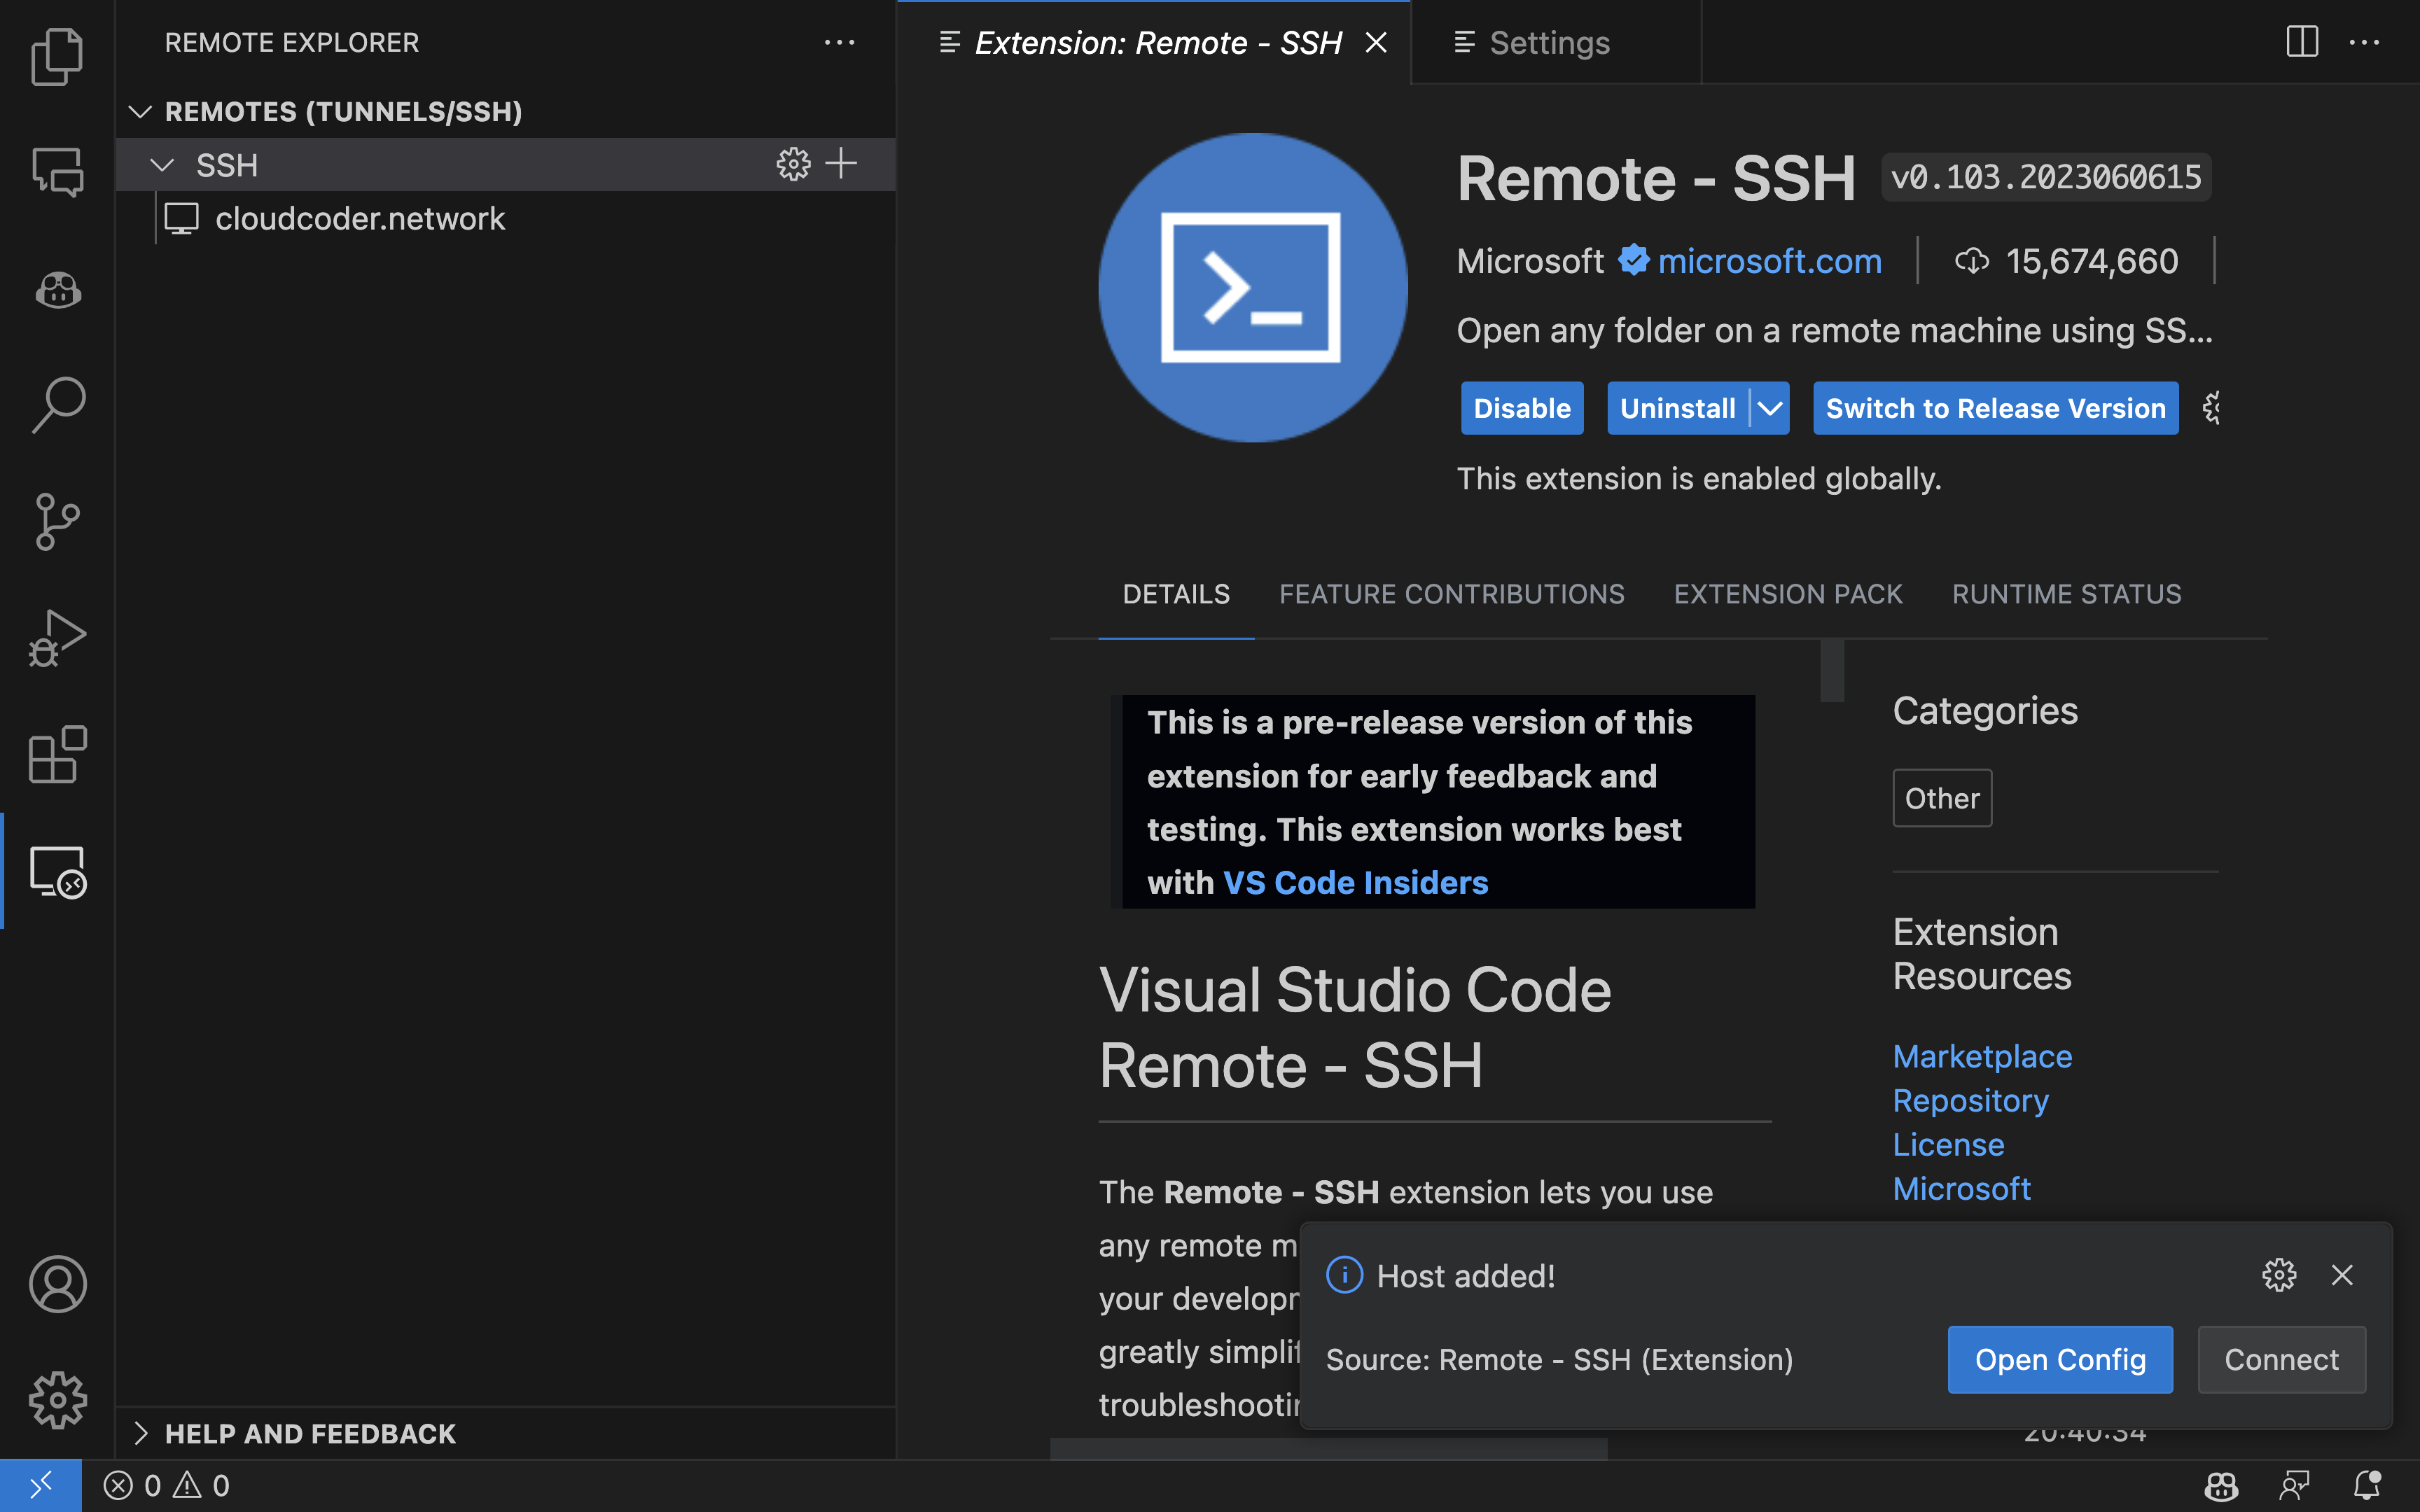 Connect to your workspace via SSH
You are successfuly connected to your Workspace with SSH!
4c. Connect to Your Workspace via SSH Using JetBrains Gateway
This section offers a comprehensive guide on establishing an SSH connection to your workspace using JetBrains Gateway.
4c.1. Install JetBrains Gateway
To access your workspace directly from your local JetBrains IDE, download JetBrains Gateway. This software enables SSH connection to your workspace using JetBrains.
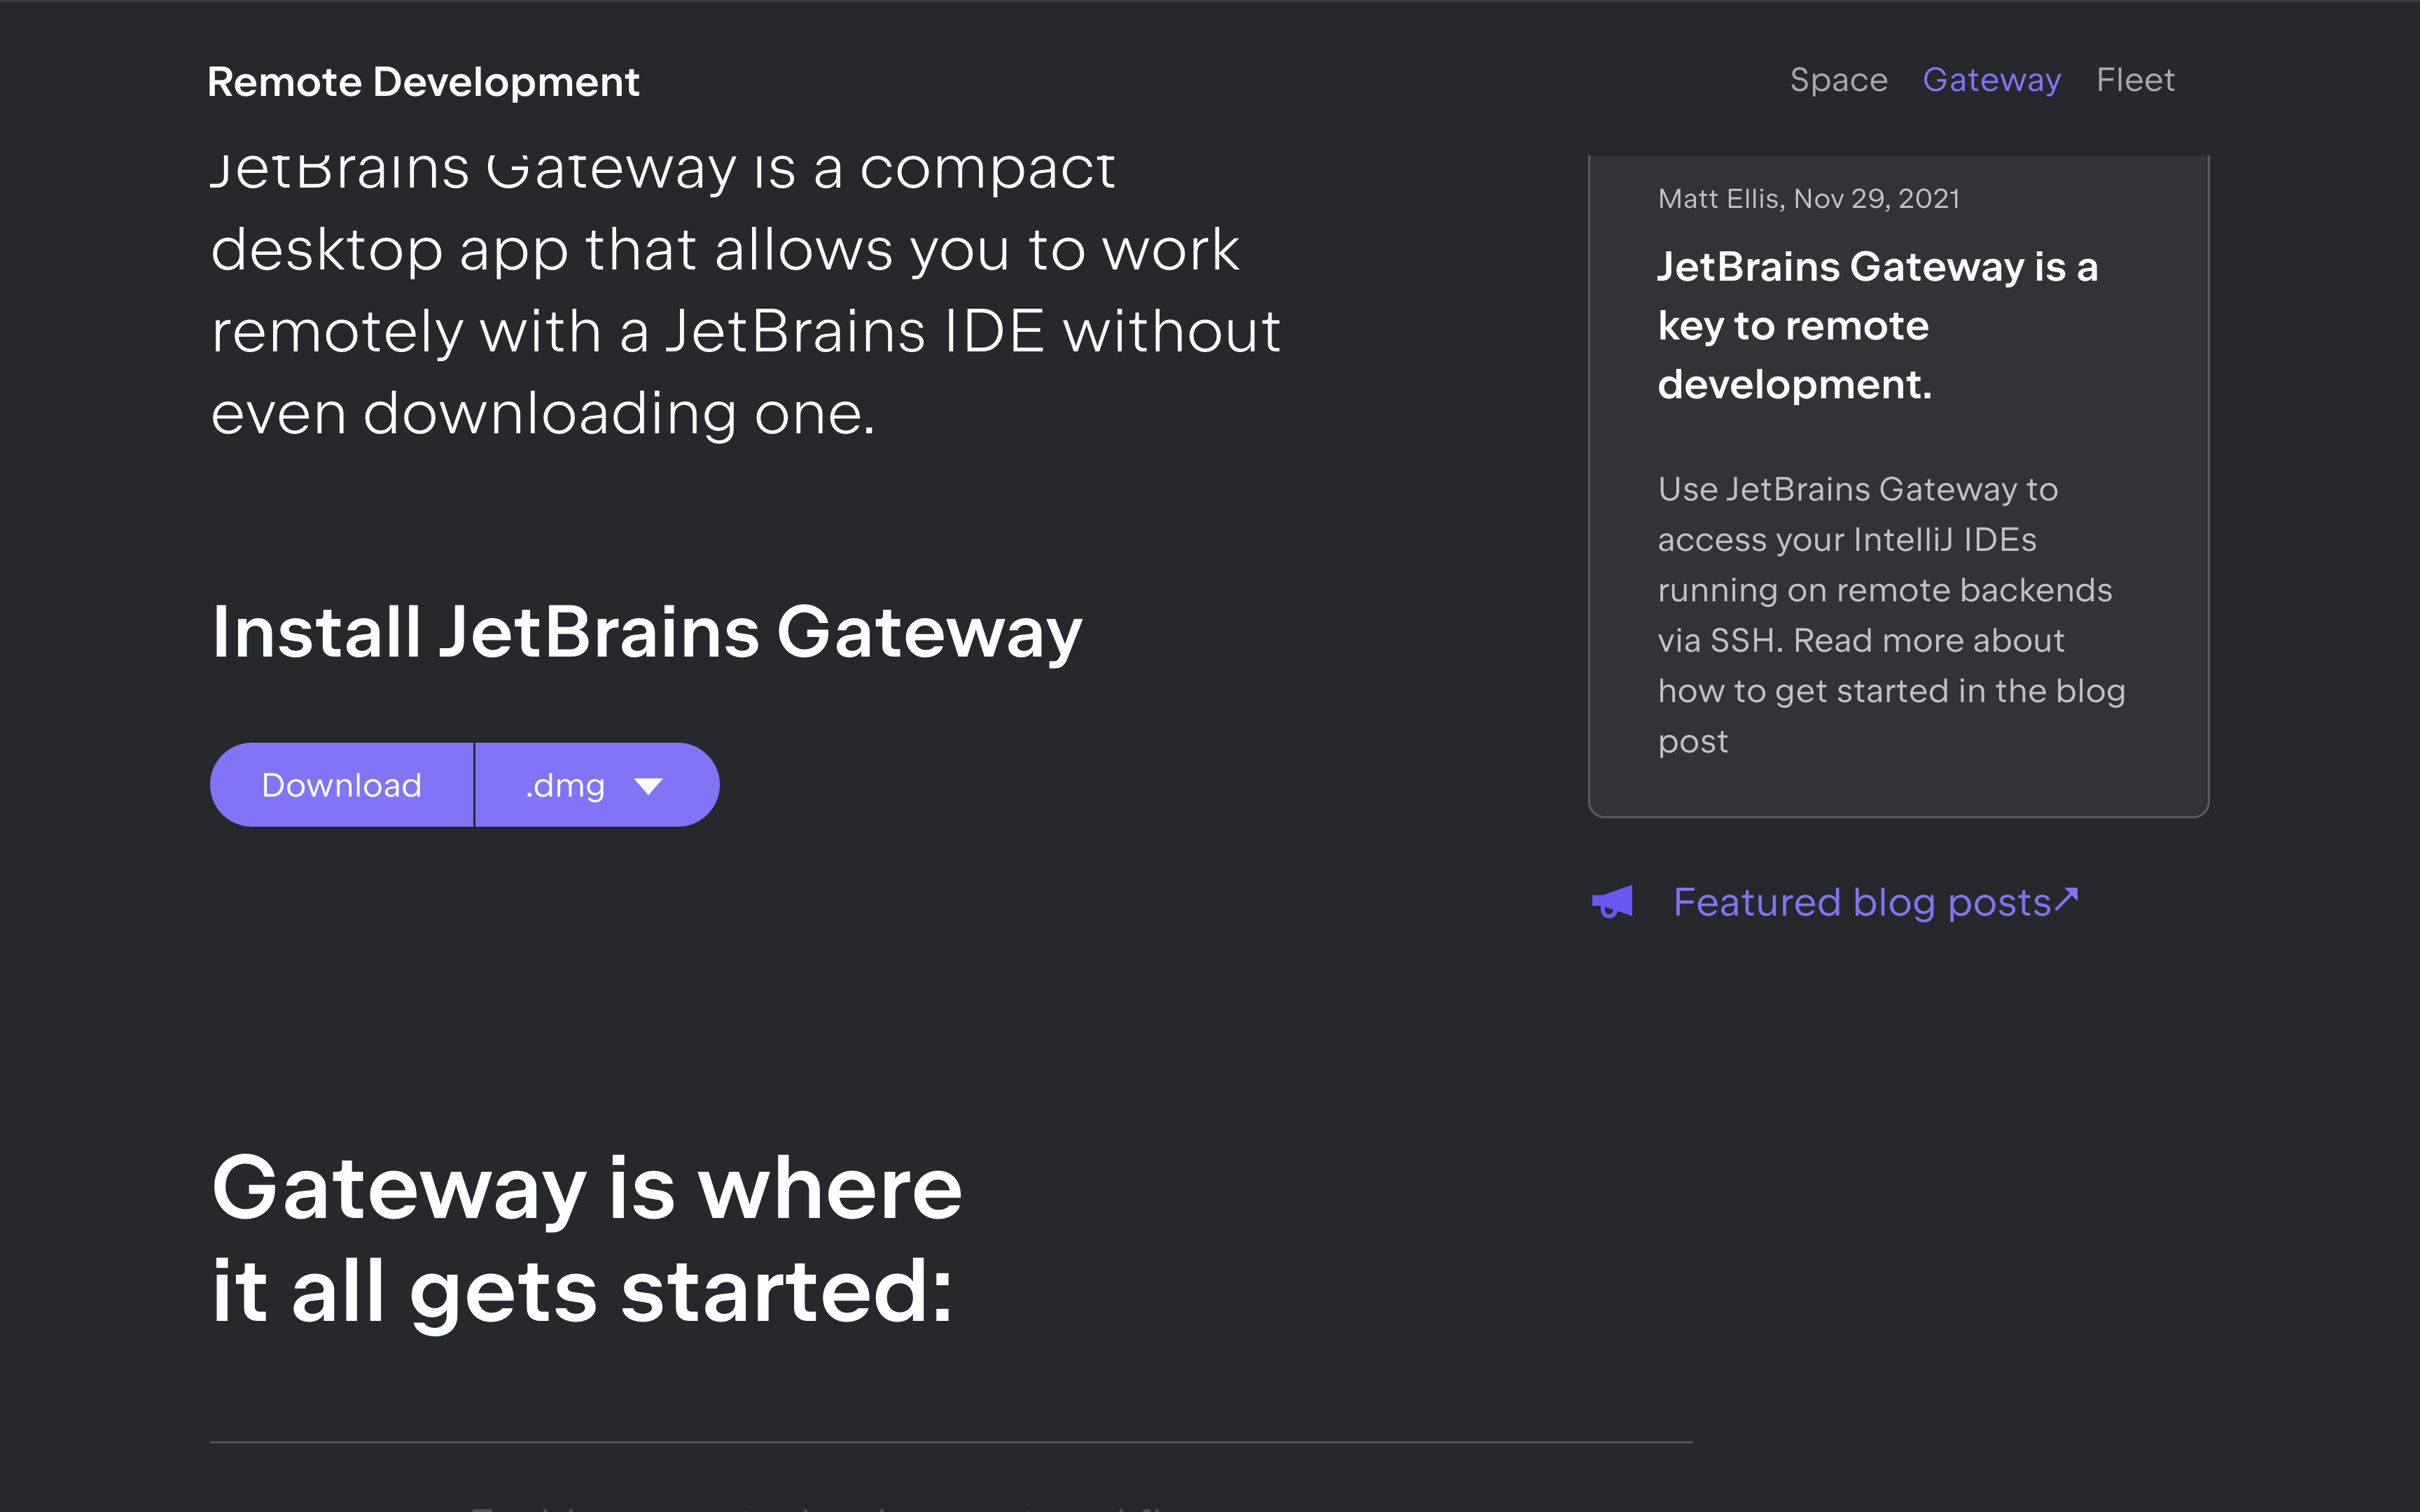 JetBrains Gateway Installation Website
4c.2. Begin a New SSH Connection
Start by clicking the "New Connection" button found below the "SSH Connection" title.
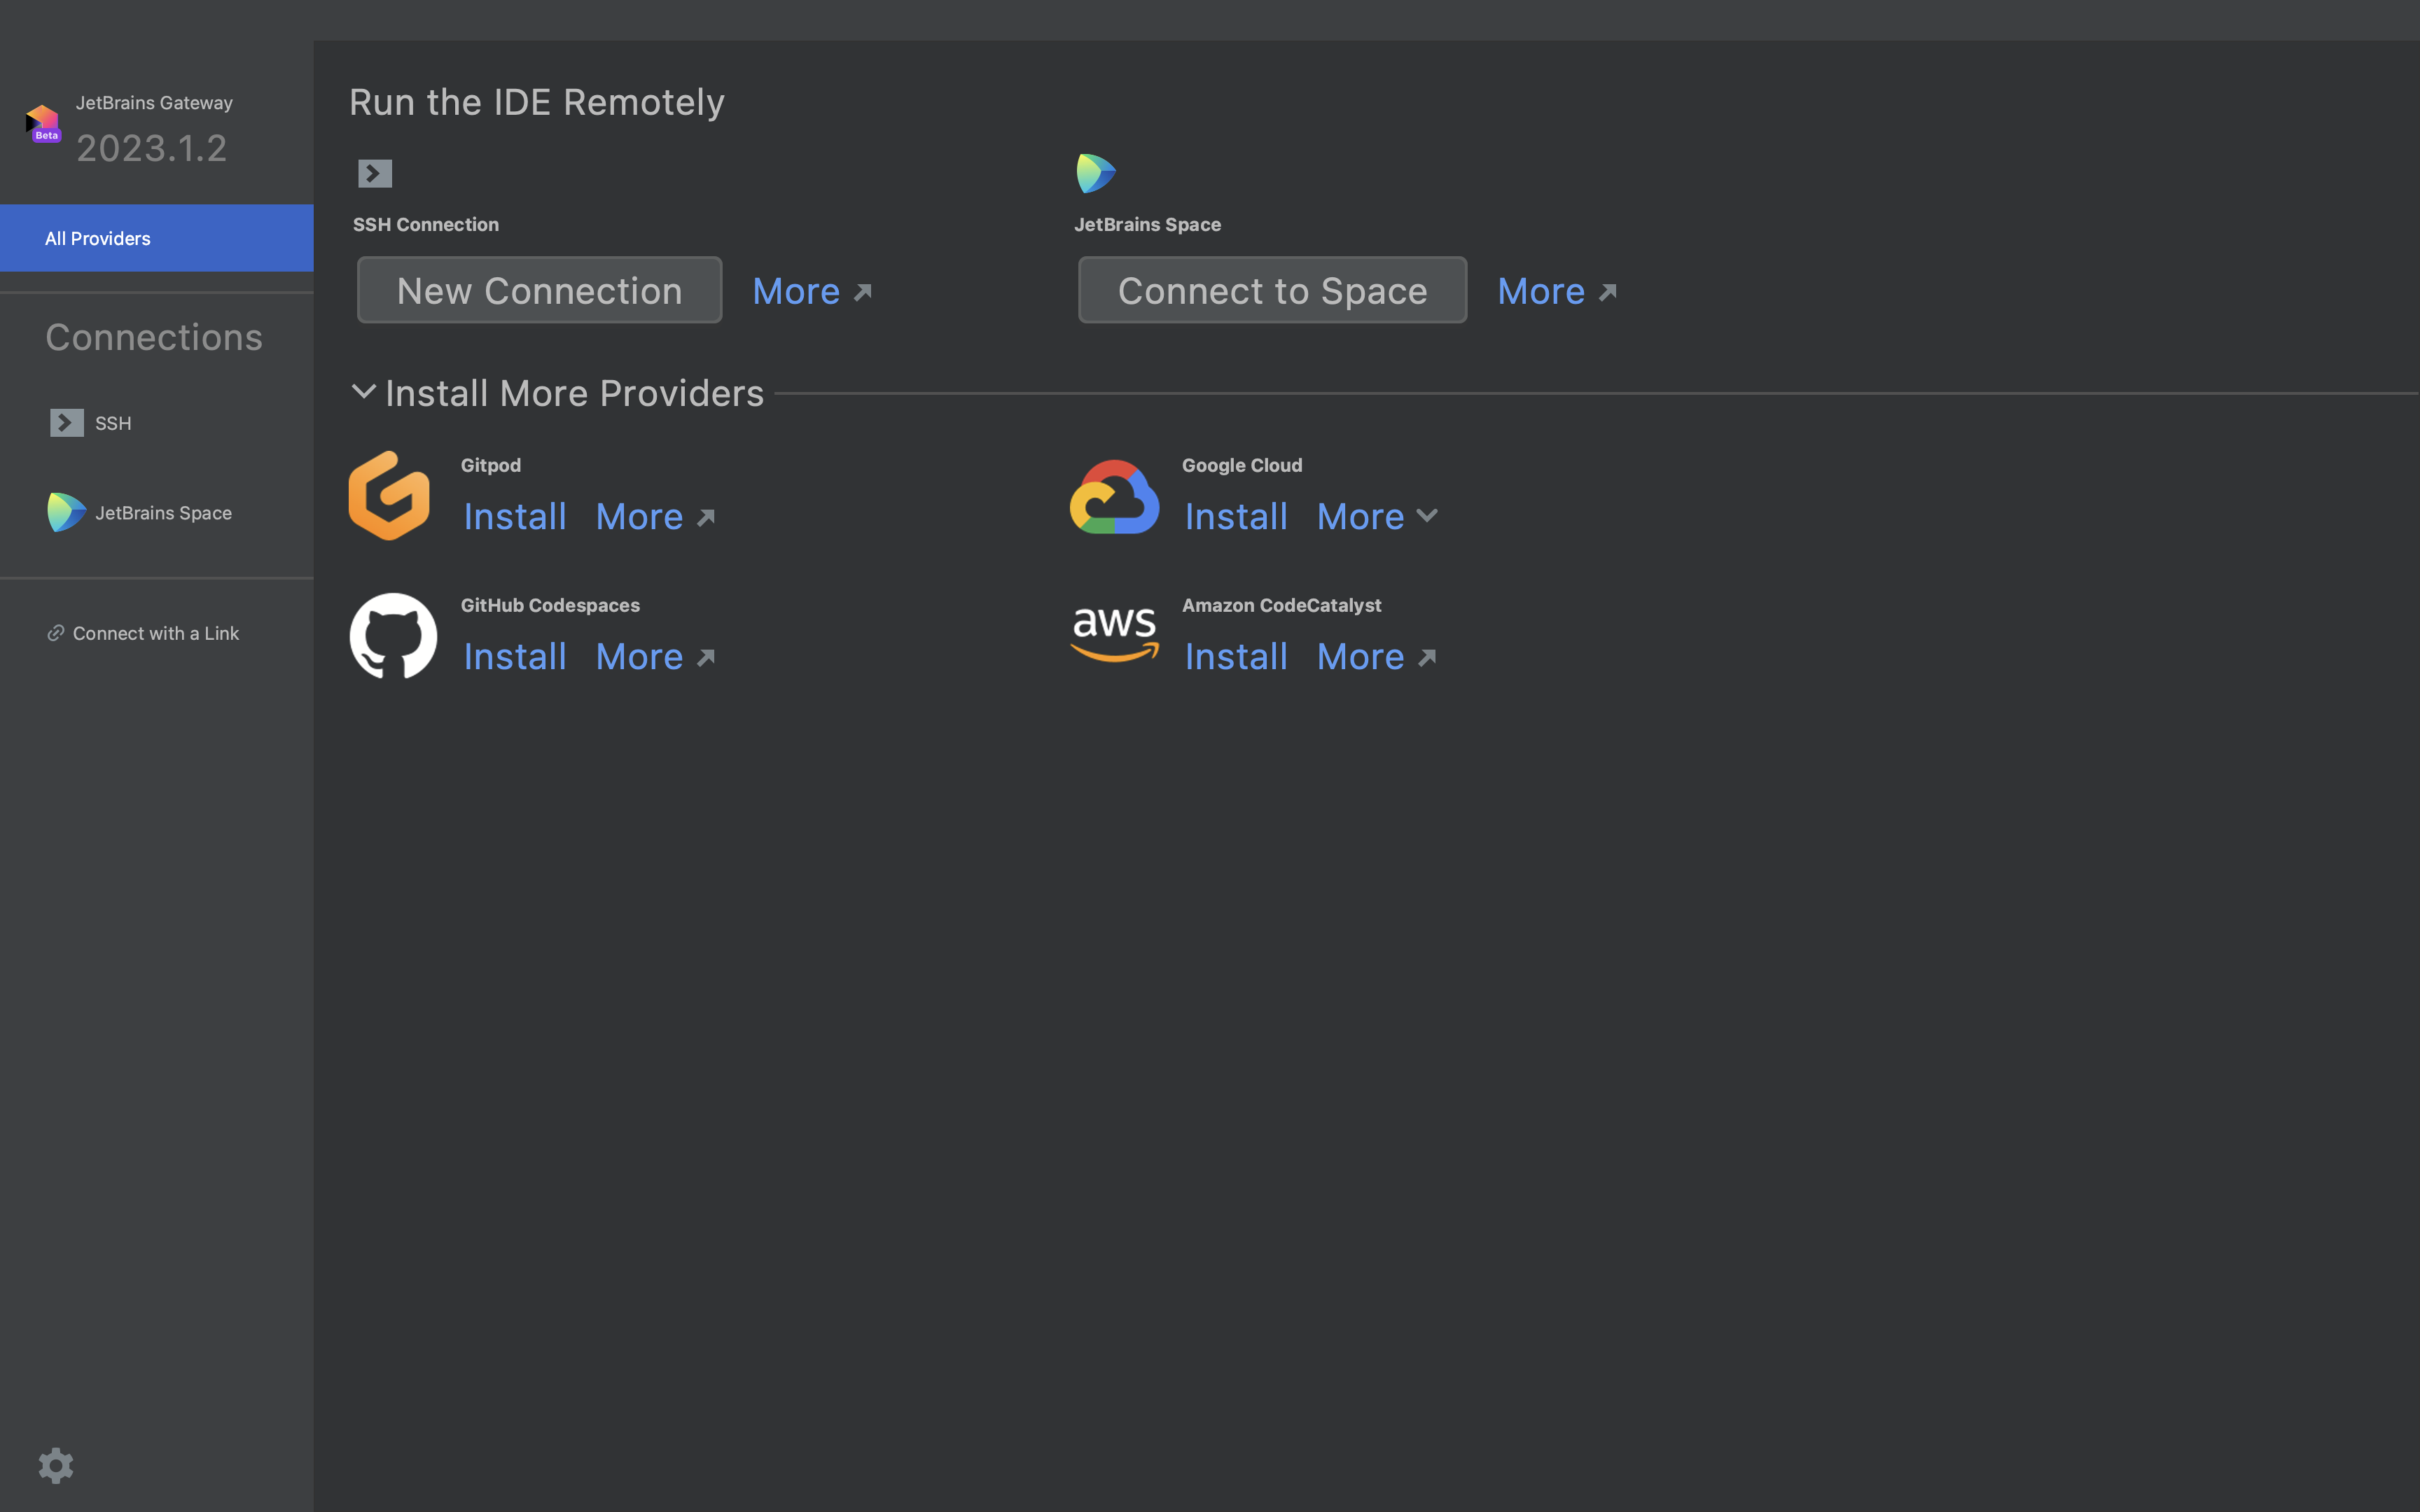 Start a new SSH connection
4c.3. Create an SSH Configuration
Click the "settings icon" next to the "New Connection" option.
 SSH connection settings menu
Then click the "+" icon to add a new SSH configuration.
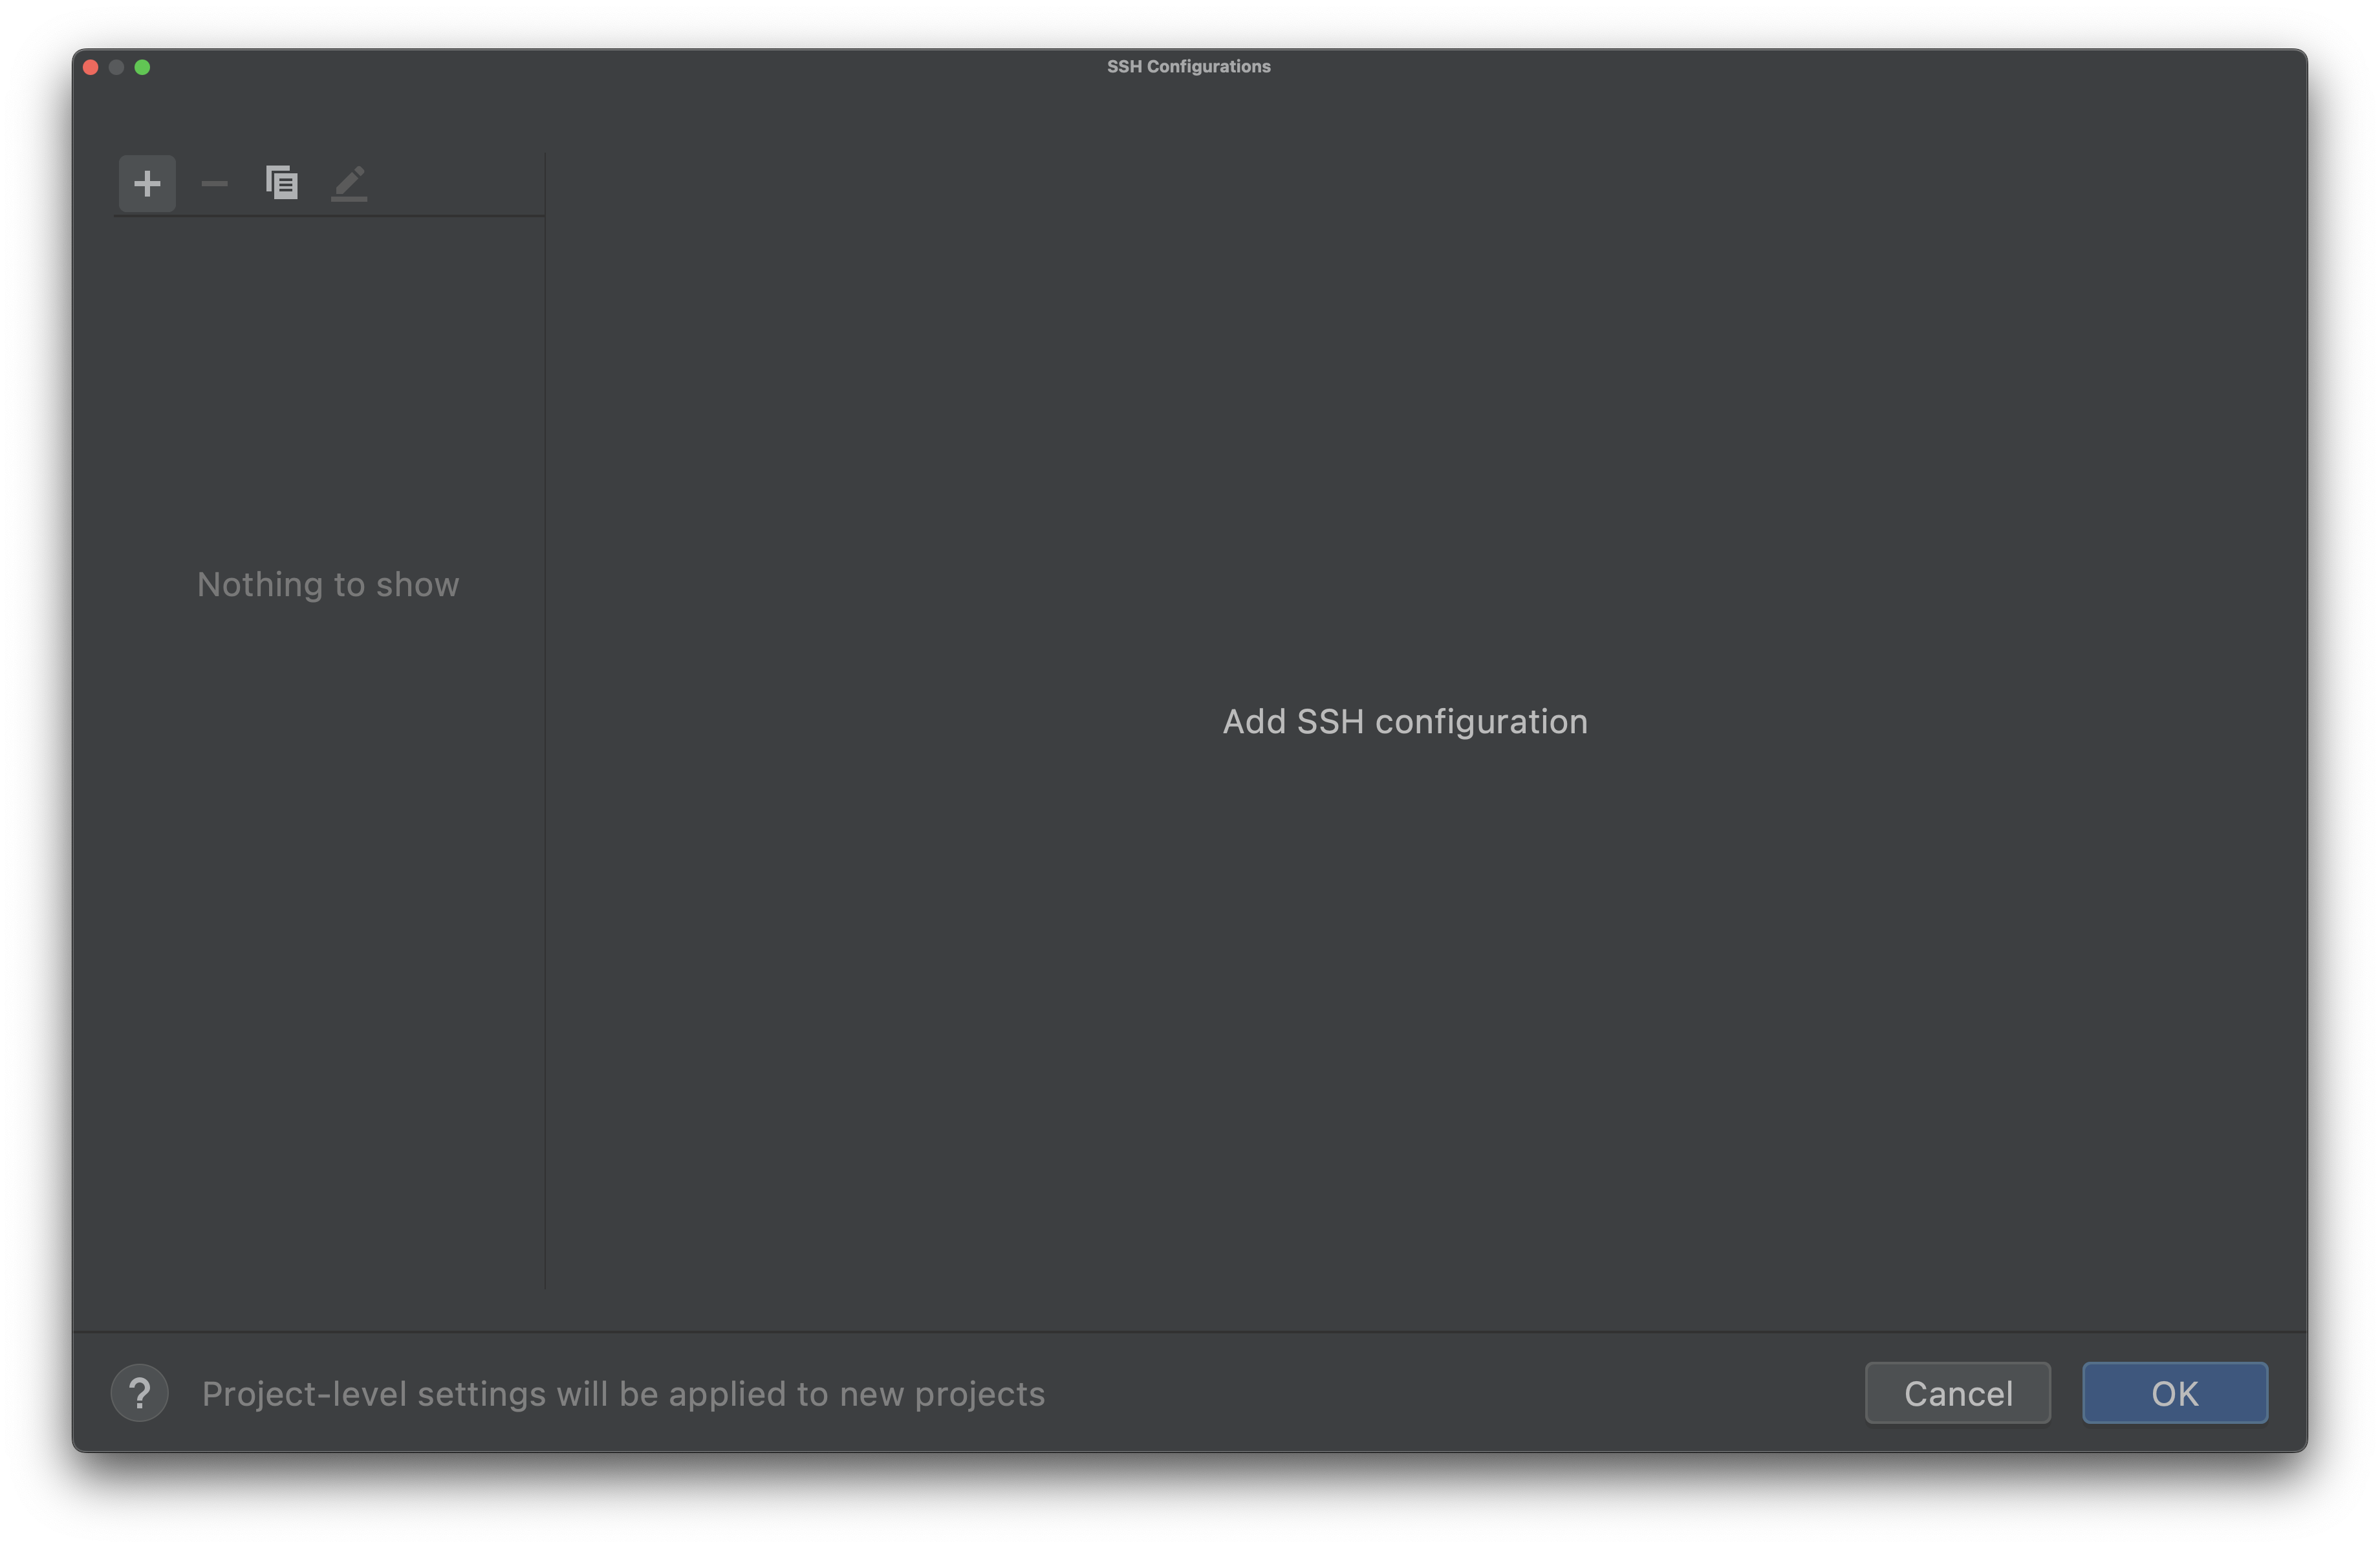 Add an SSH configuration
4c.4. Enter the Host and Username Information
Select the "Connect With SSH" option from your Workspace's Running Actions List to view the shh command necessary for the SSH connection to your workspace.
SSH command specific to your workspace
Enter the command details into the SSH configuration settings.
TIP
- Host = second part of the command (example: ssh.proxy.cloudcoder.network)
- Username = first part of the command (example: ws-694211124415614)
Disregard the ssh and @ characters.
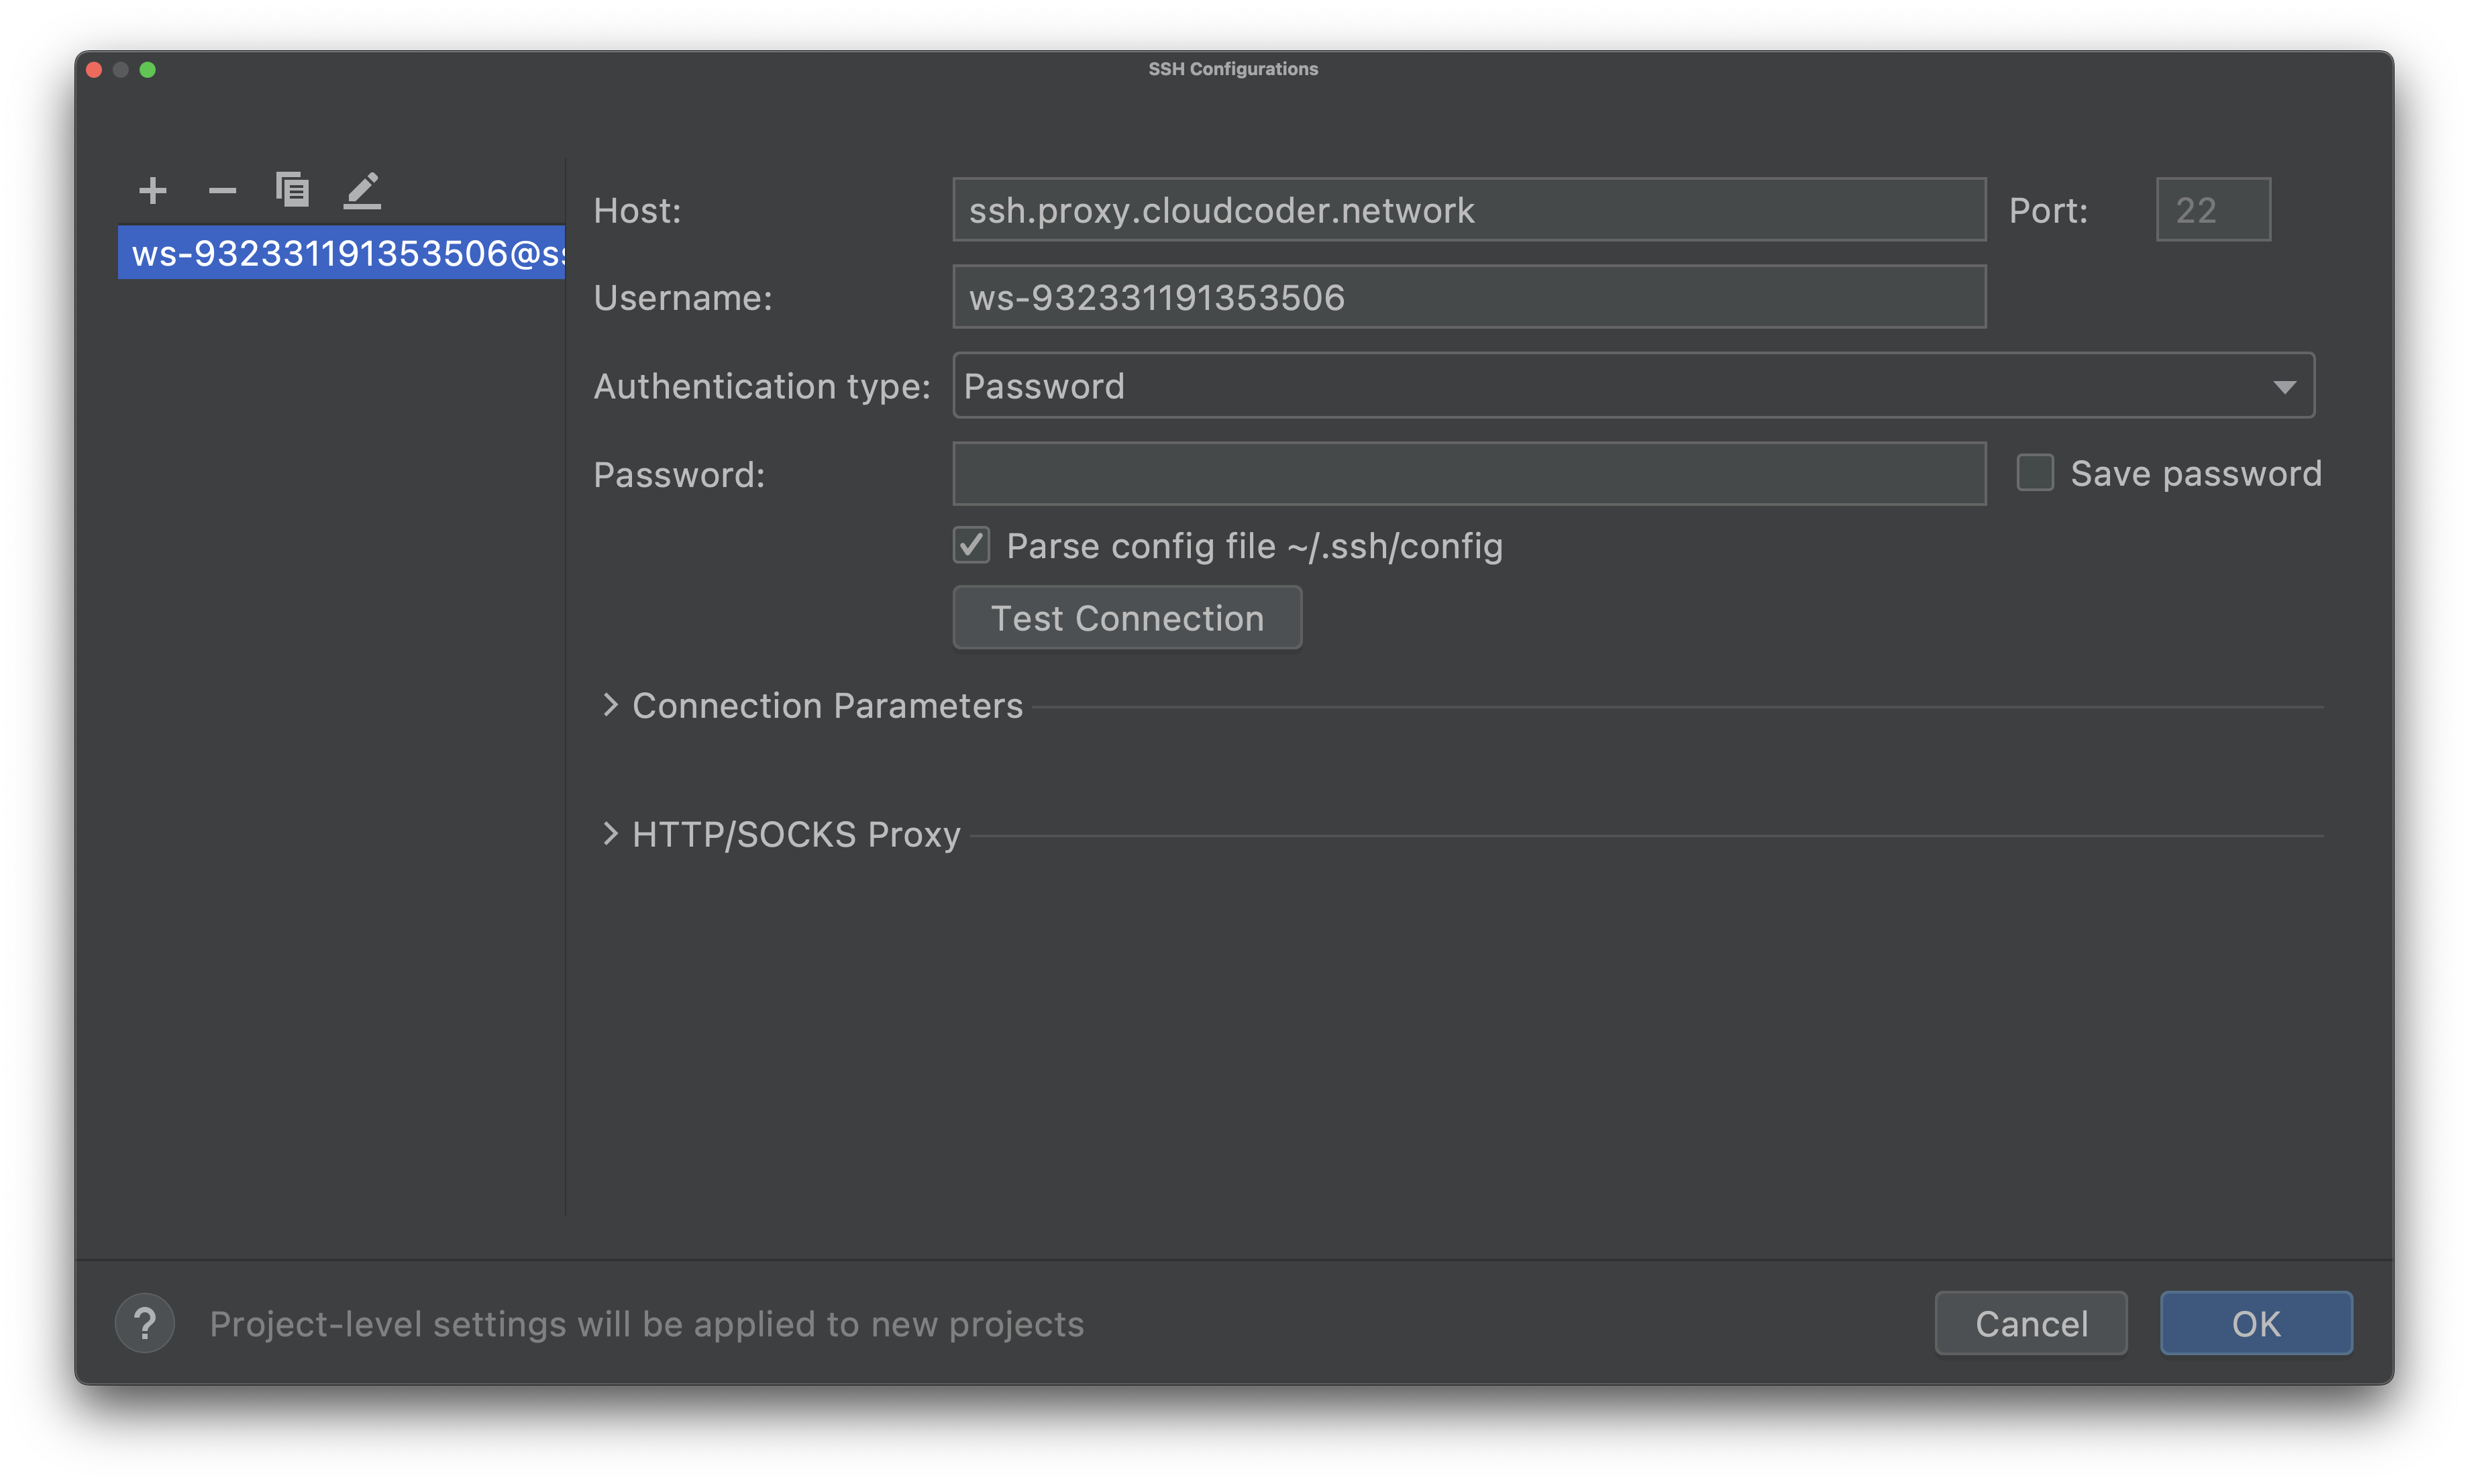 Input the SSH command details
4c.5. Choose Authentication Method and Test Your SSH Configuration
Select "Key Pair" as the "Authentication type" and provide the path for your key (the default field can be left as is).
WARNING
By default, the "Password" option is selected as the authentication method.
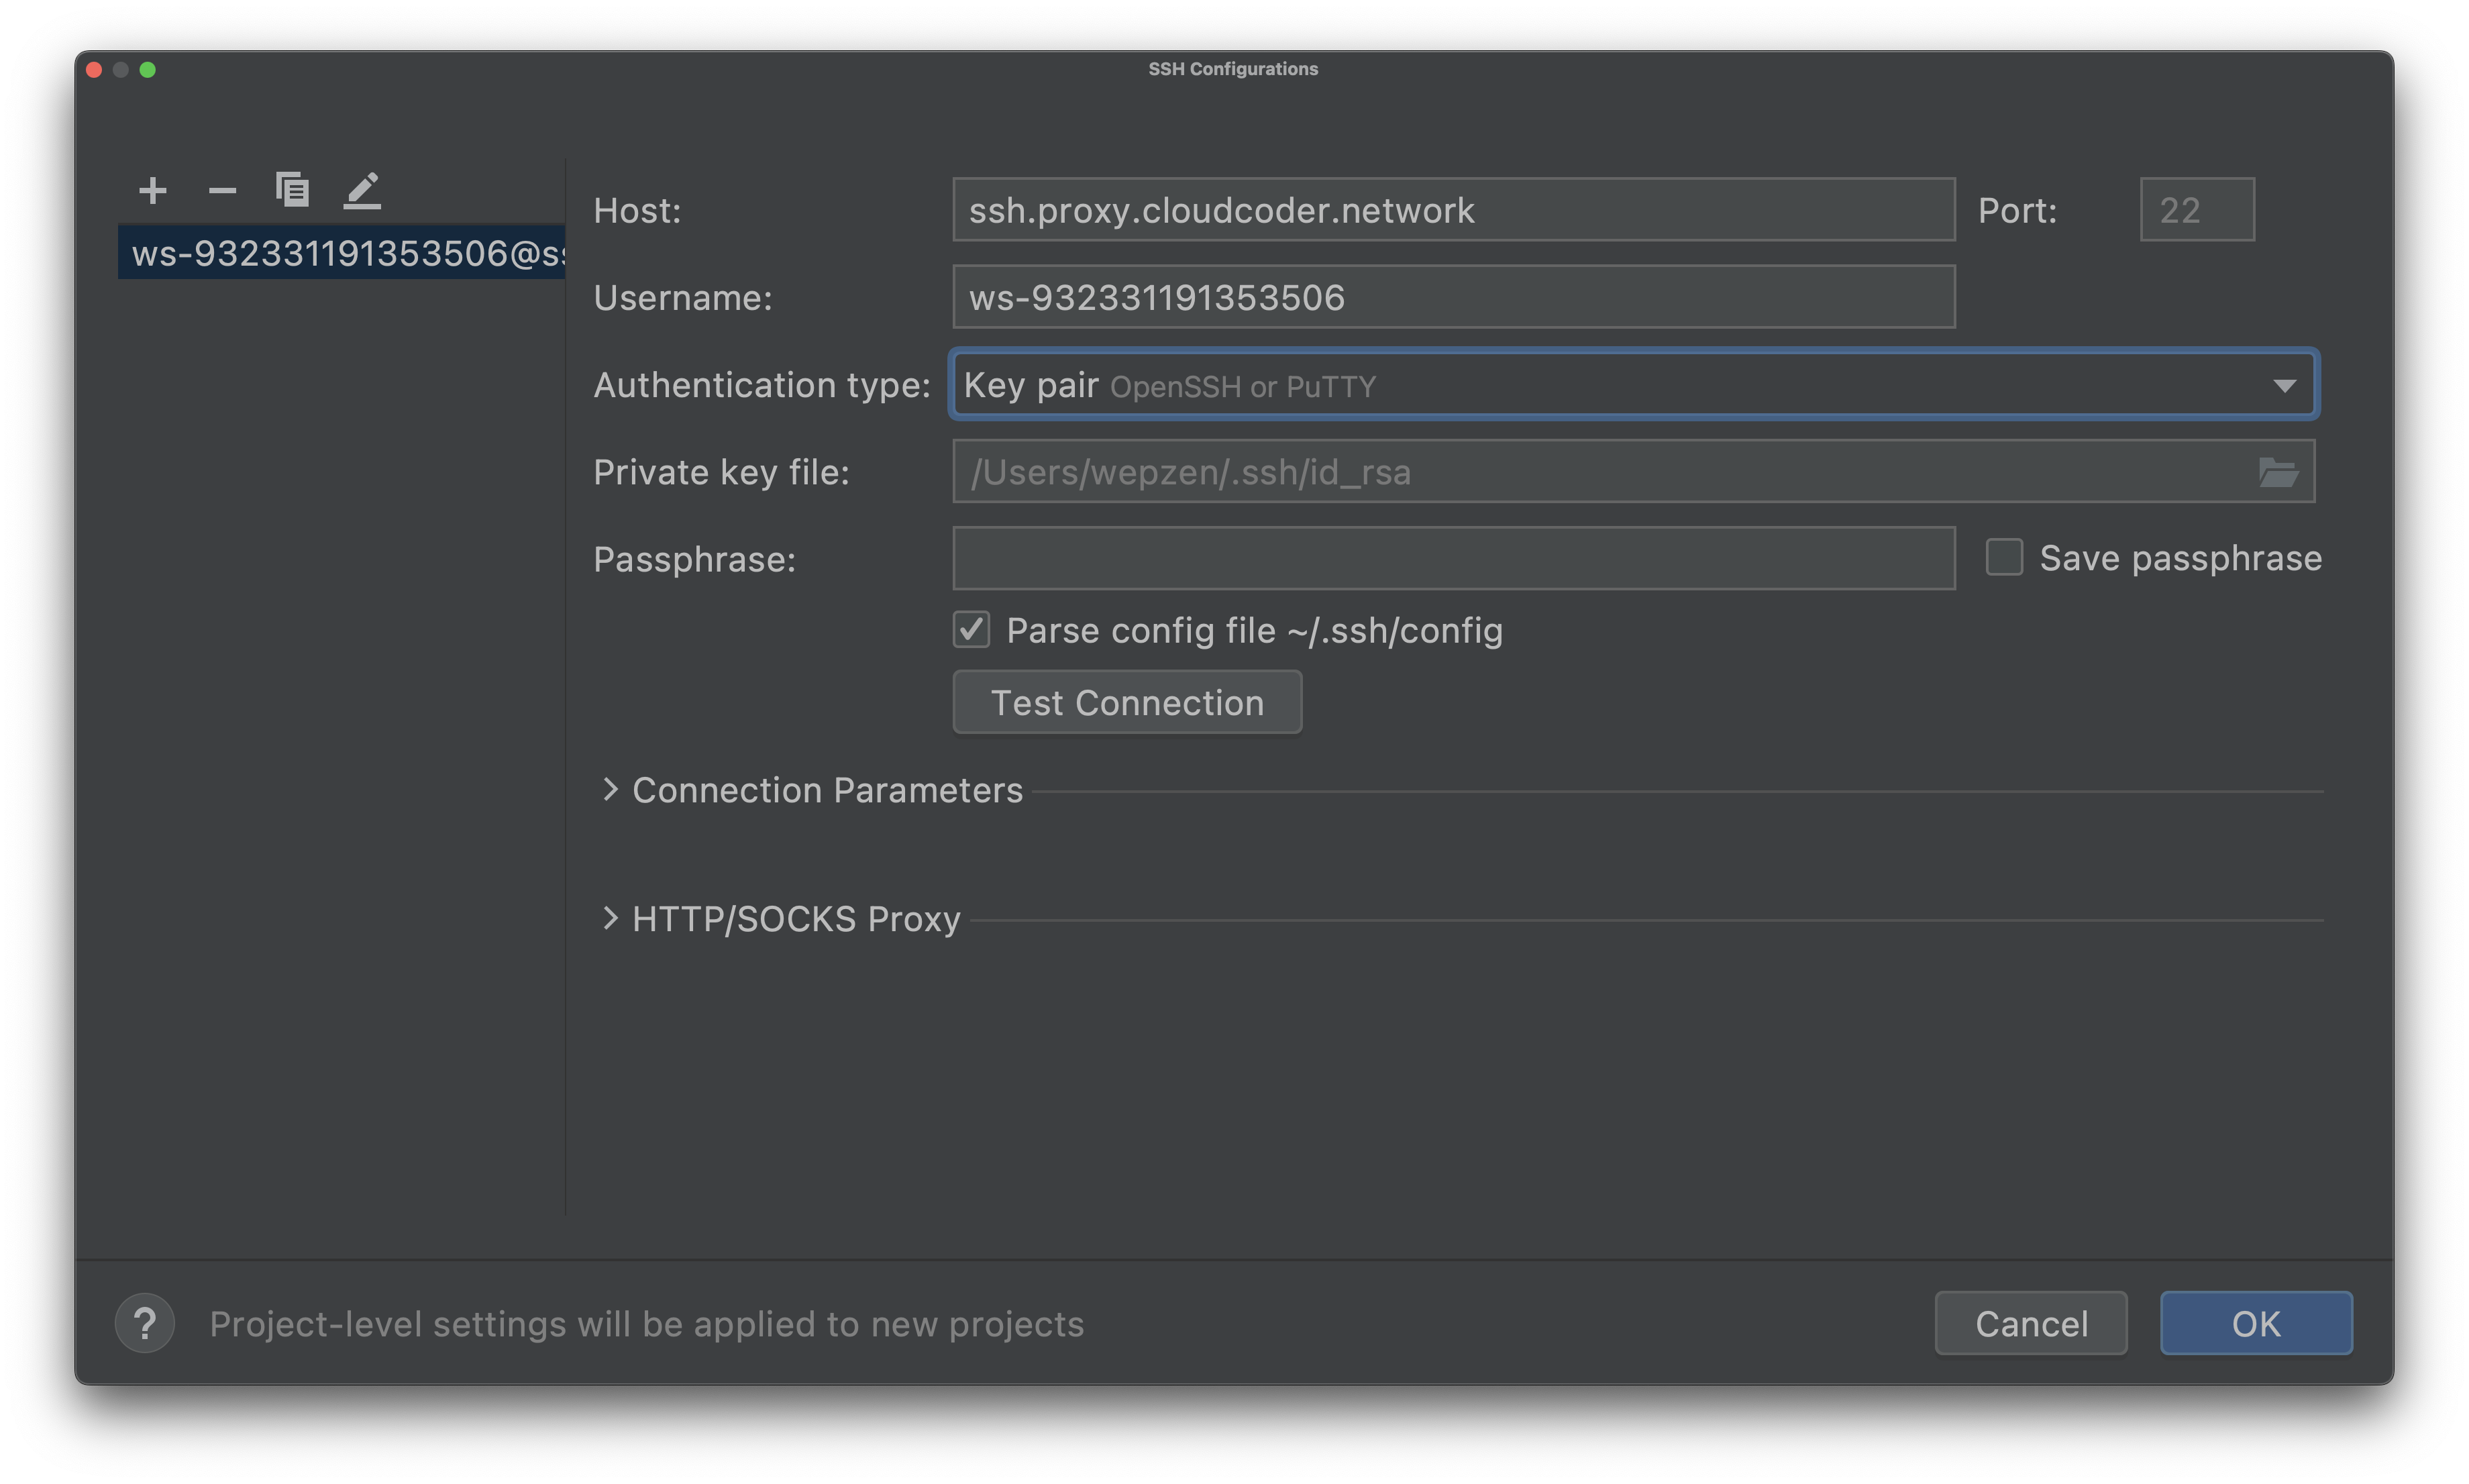 Choose Key Pair as the Authentication Method
After filling in the "Host", "Username", and "Authentication method" fields, test your SSH configuration by clicking the "Test Connection" button. You should see the following:
 Test your SSH configuration
4c.6. Select an SSH Configuration
Upon validating your SSH configuration by clicking "Ok", select your new configuration as the "Connection" in the "Connect to SSH" menu.
 Select Your SSH Configuration
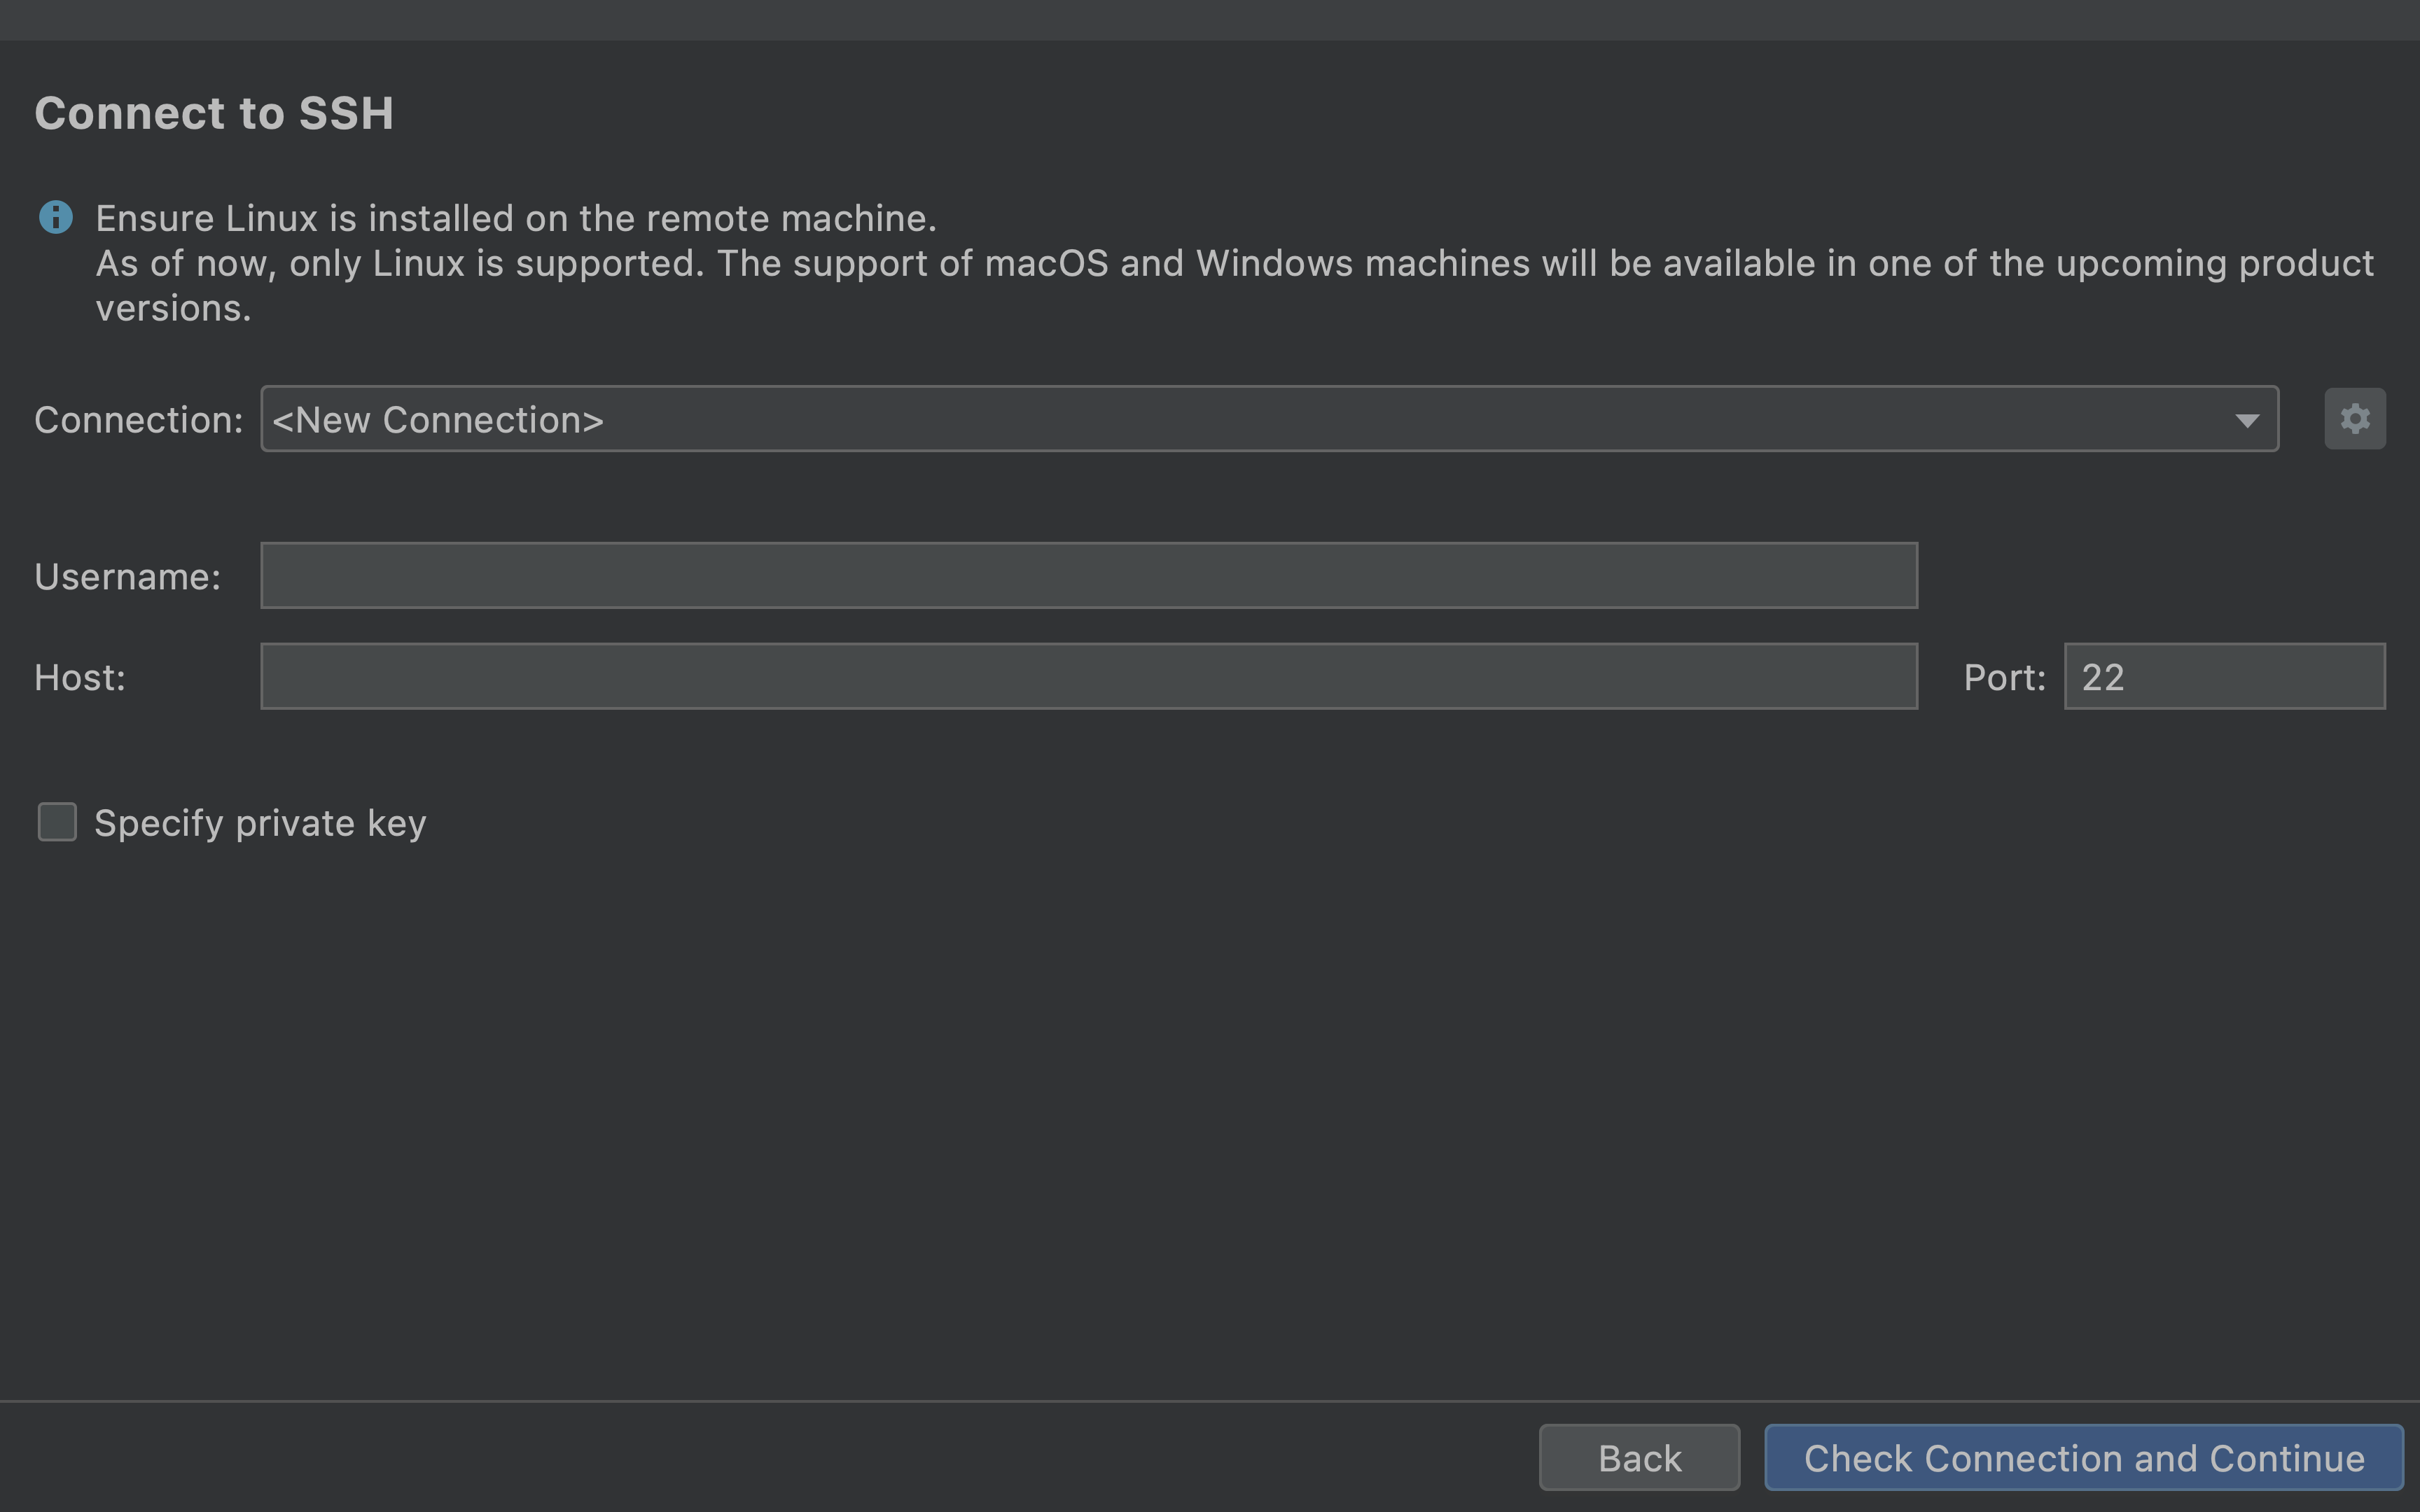
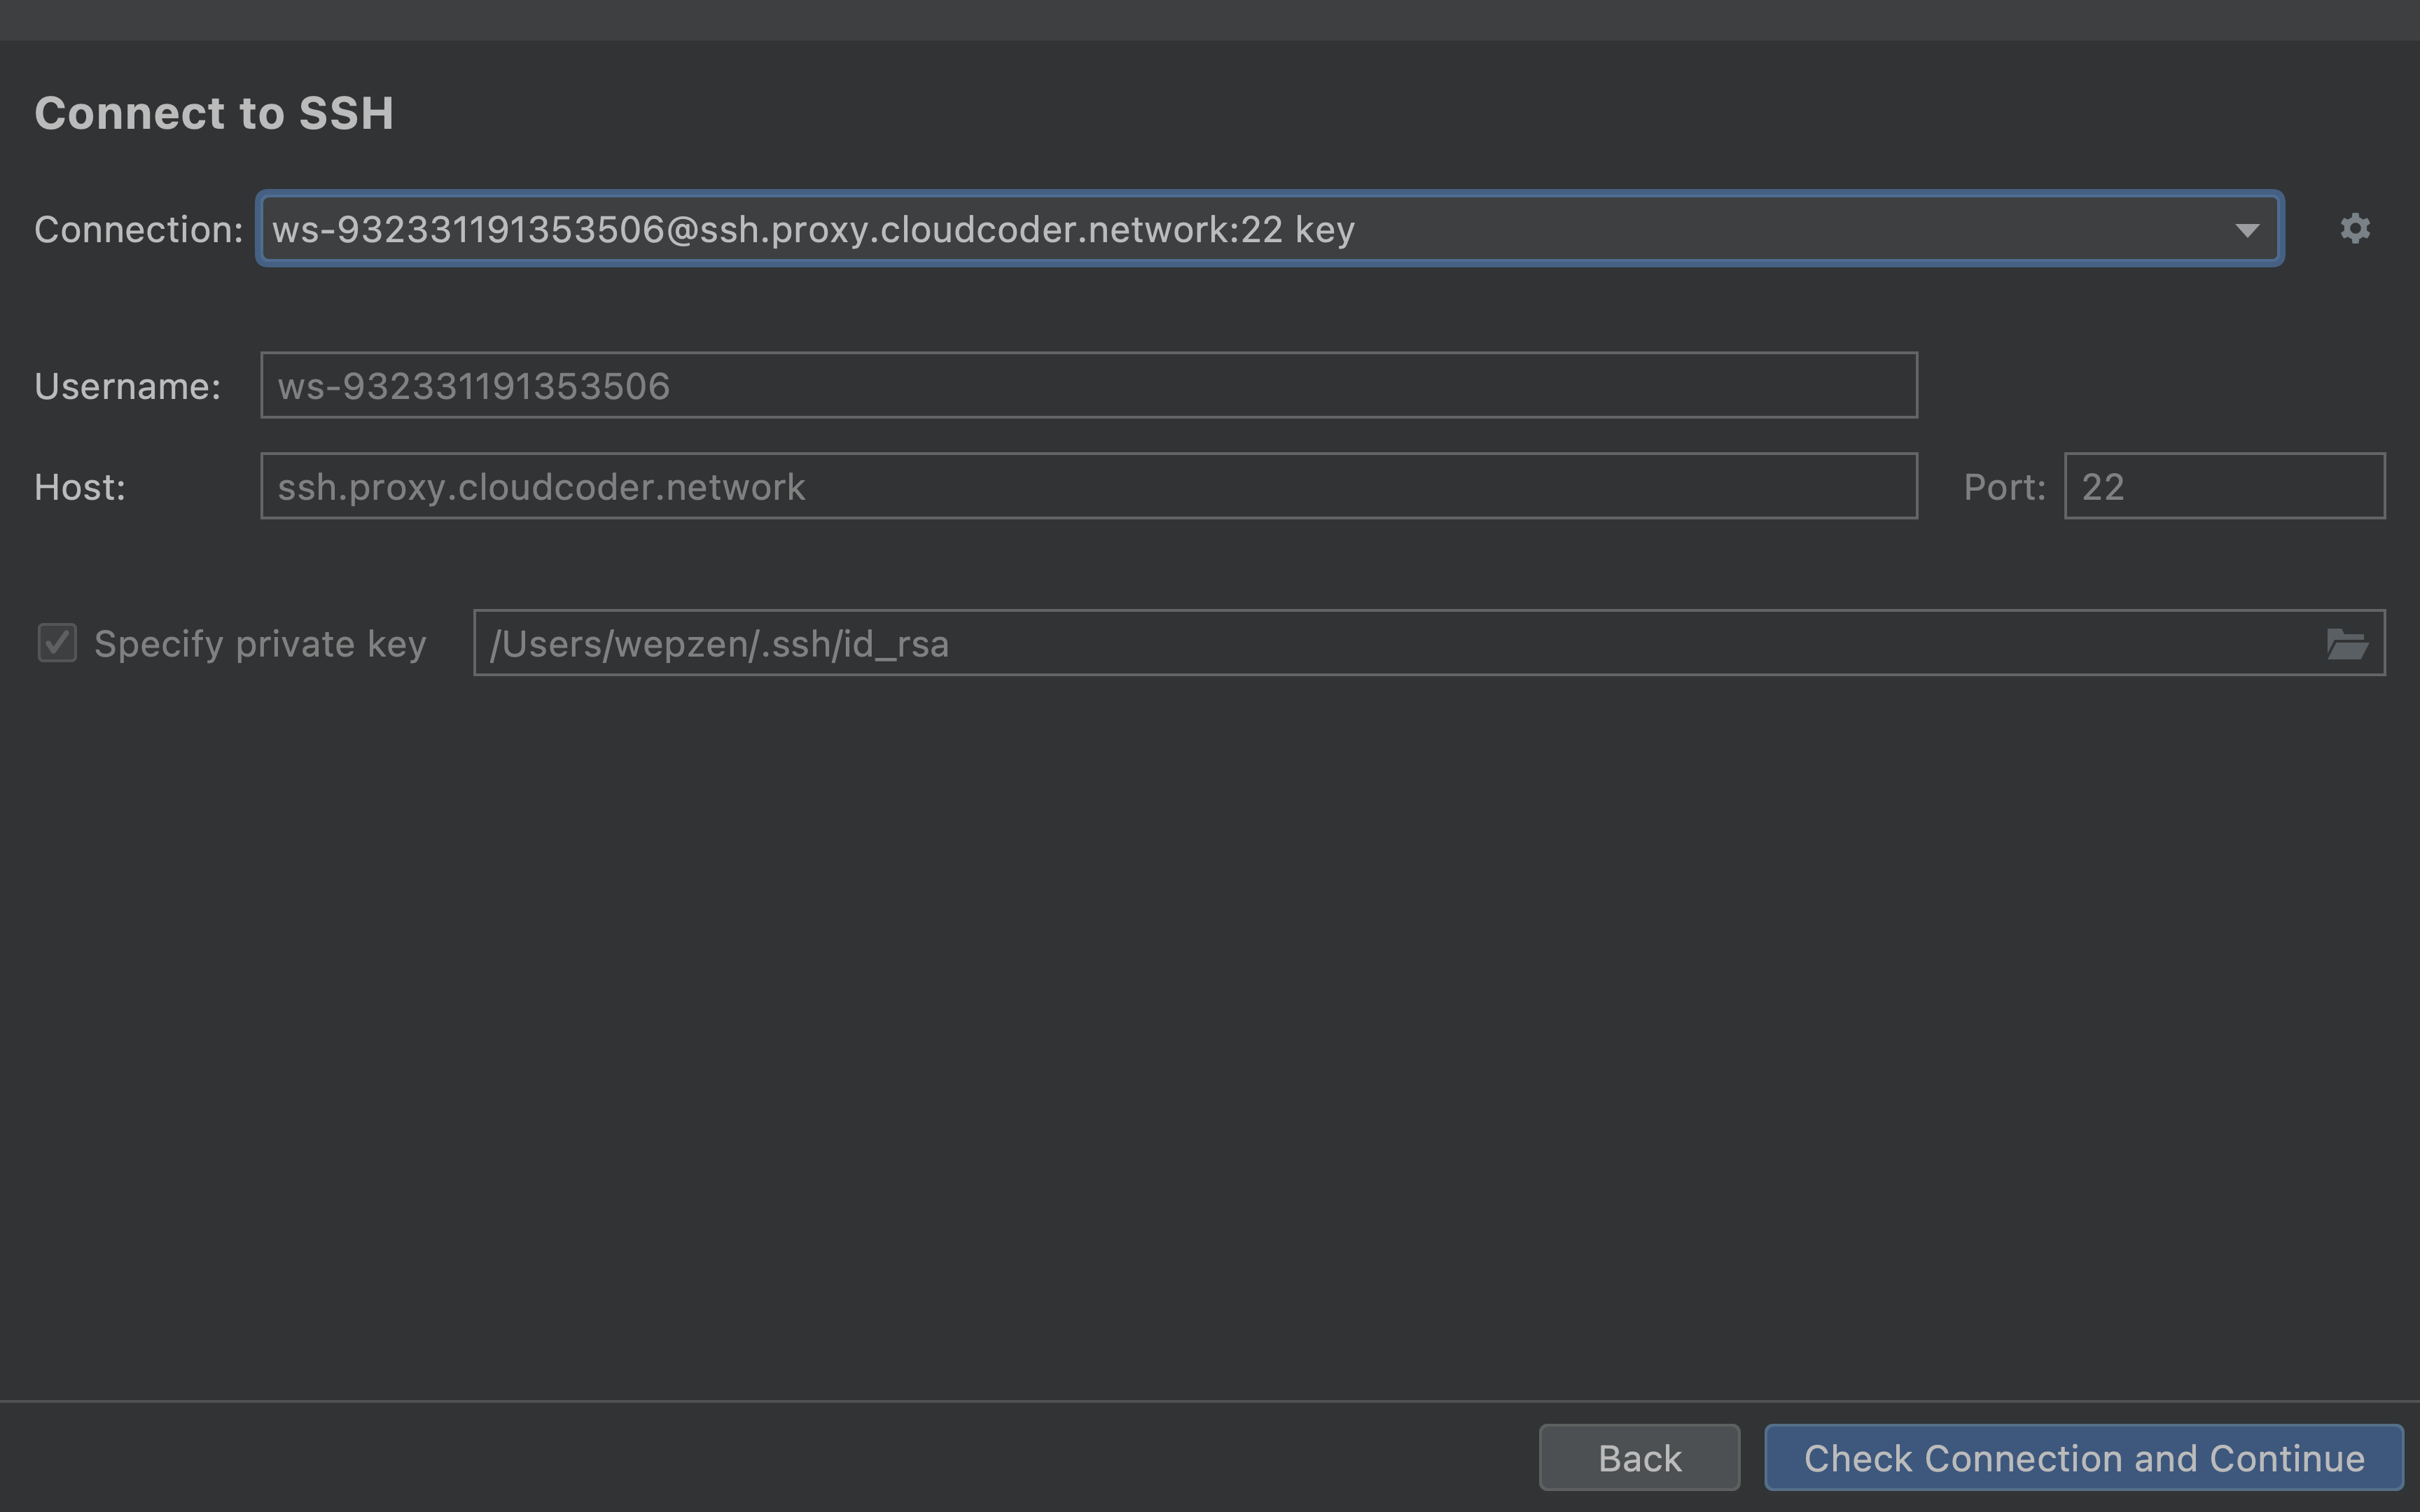
4c.7. Verify Your SSH Configuration and Connect to Your Workspace
Validate your connection by clicking the "Check Connection and Continue" button. If the connection is successful, you will be directed to the following screen:
 Successful Connection Screen
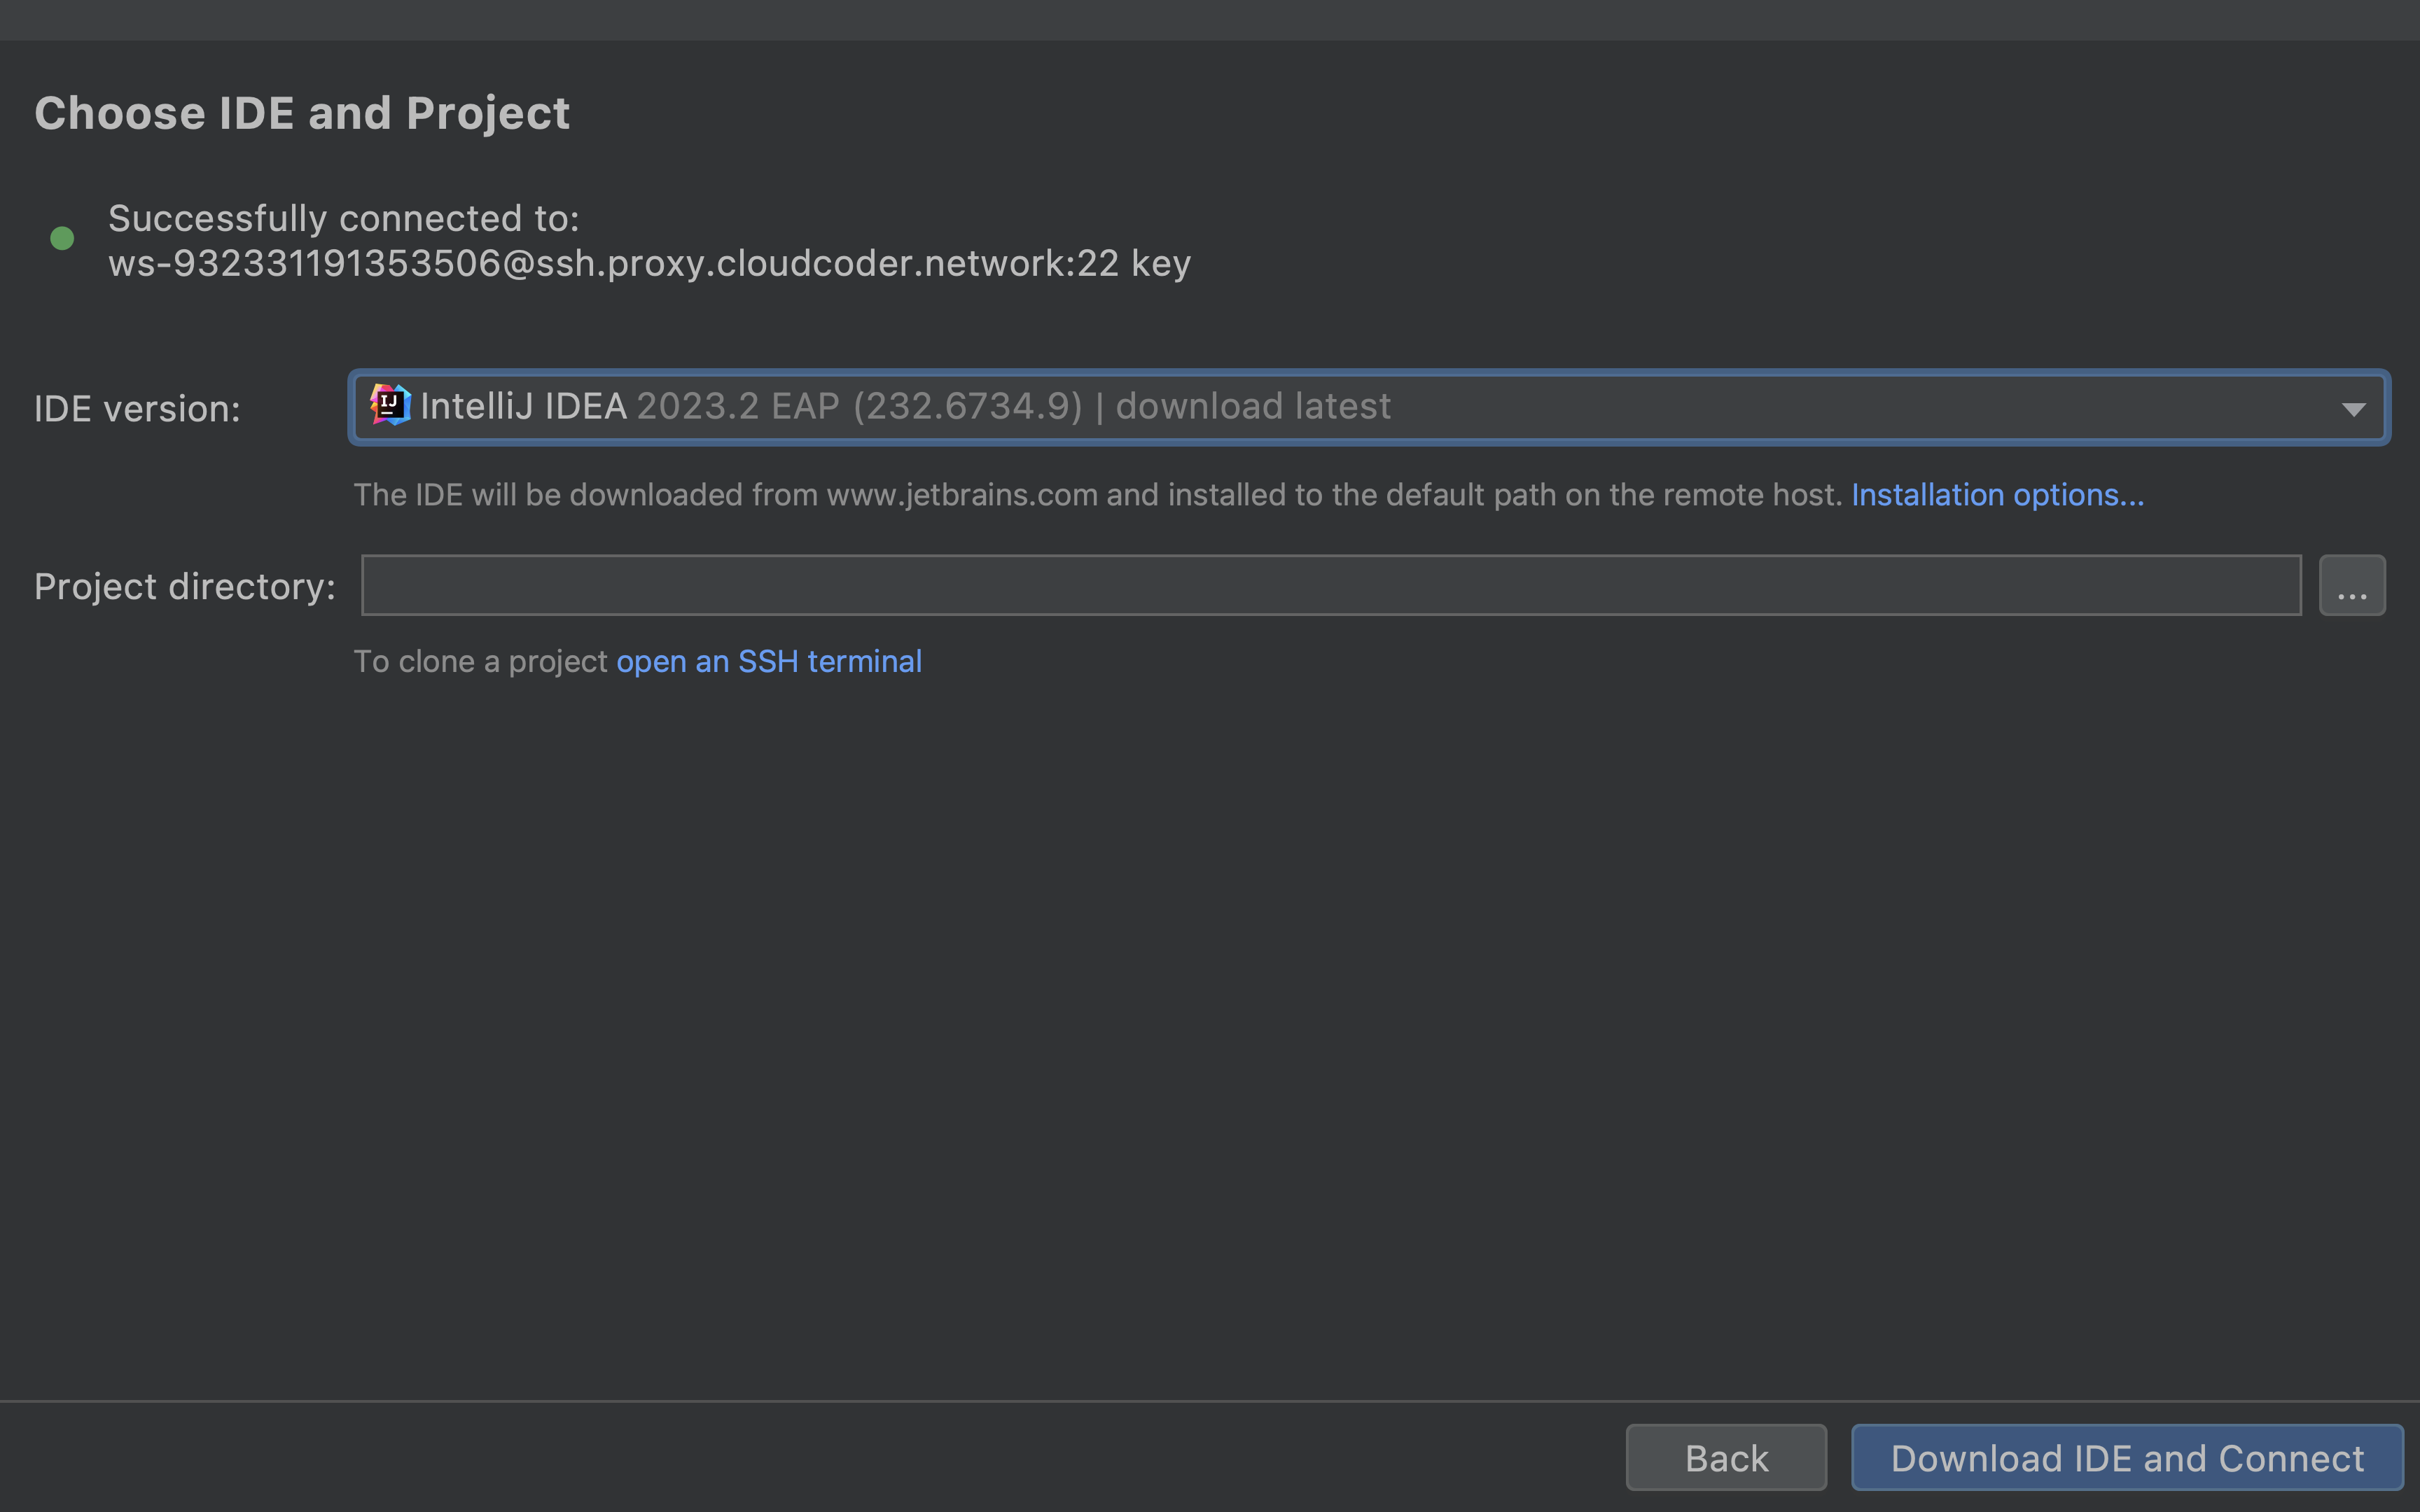
4c.8. Choose and Download the JetBrains IDE
On the successful connection screen, select the JetBrains IDE you wish to use and the folder you intend to open.
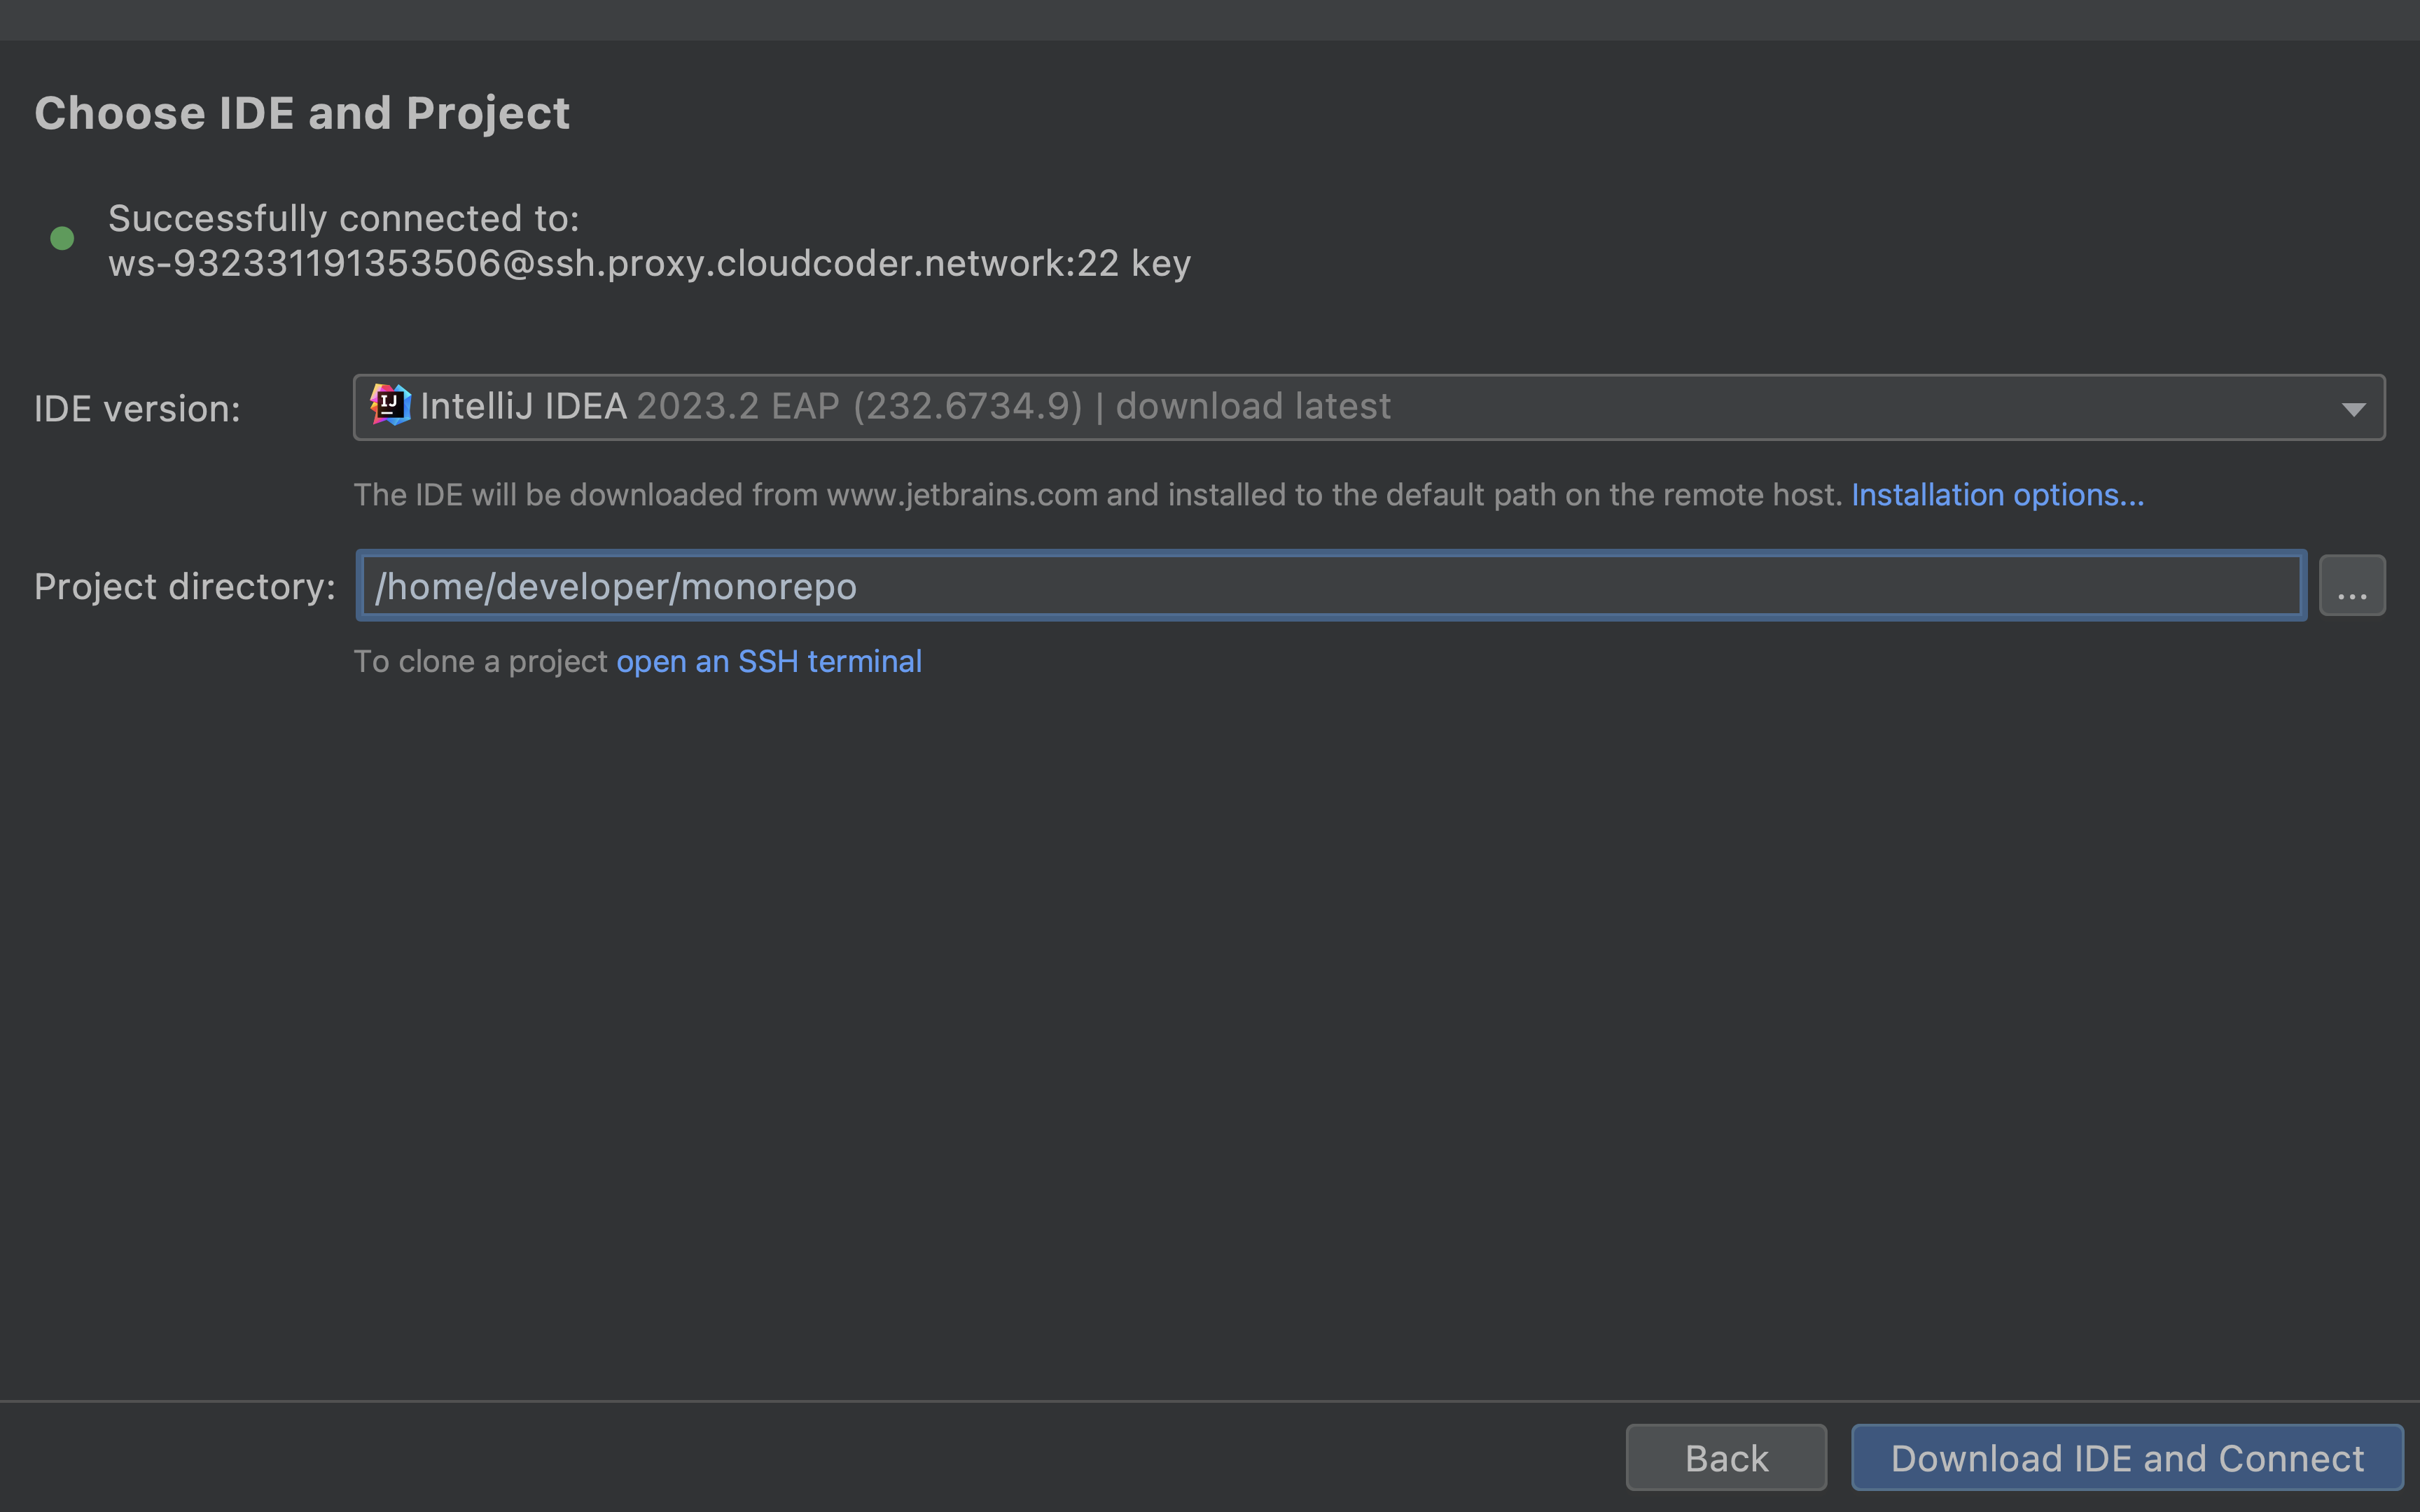 Select IDE and Folder
Confirm your selections by clicking "Download IDE and Connect". The following screen indicates that the IDE is being downloaded to your workspace.
TIP
The IDE is downloaded to your workspace, not to your local machine.
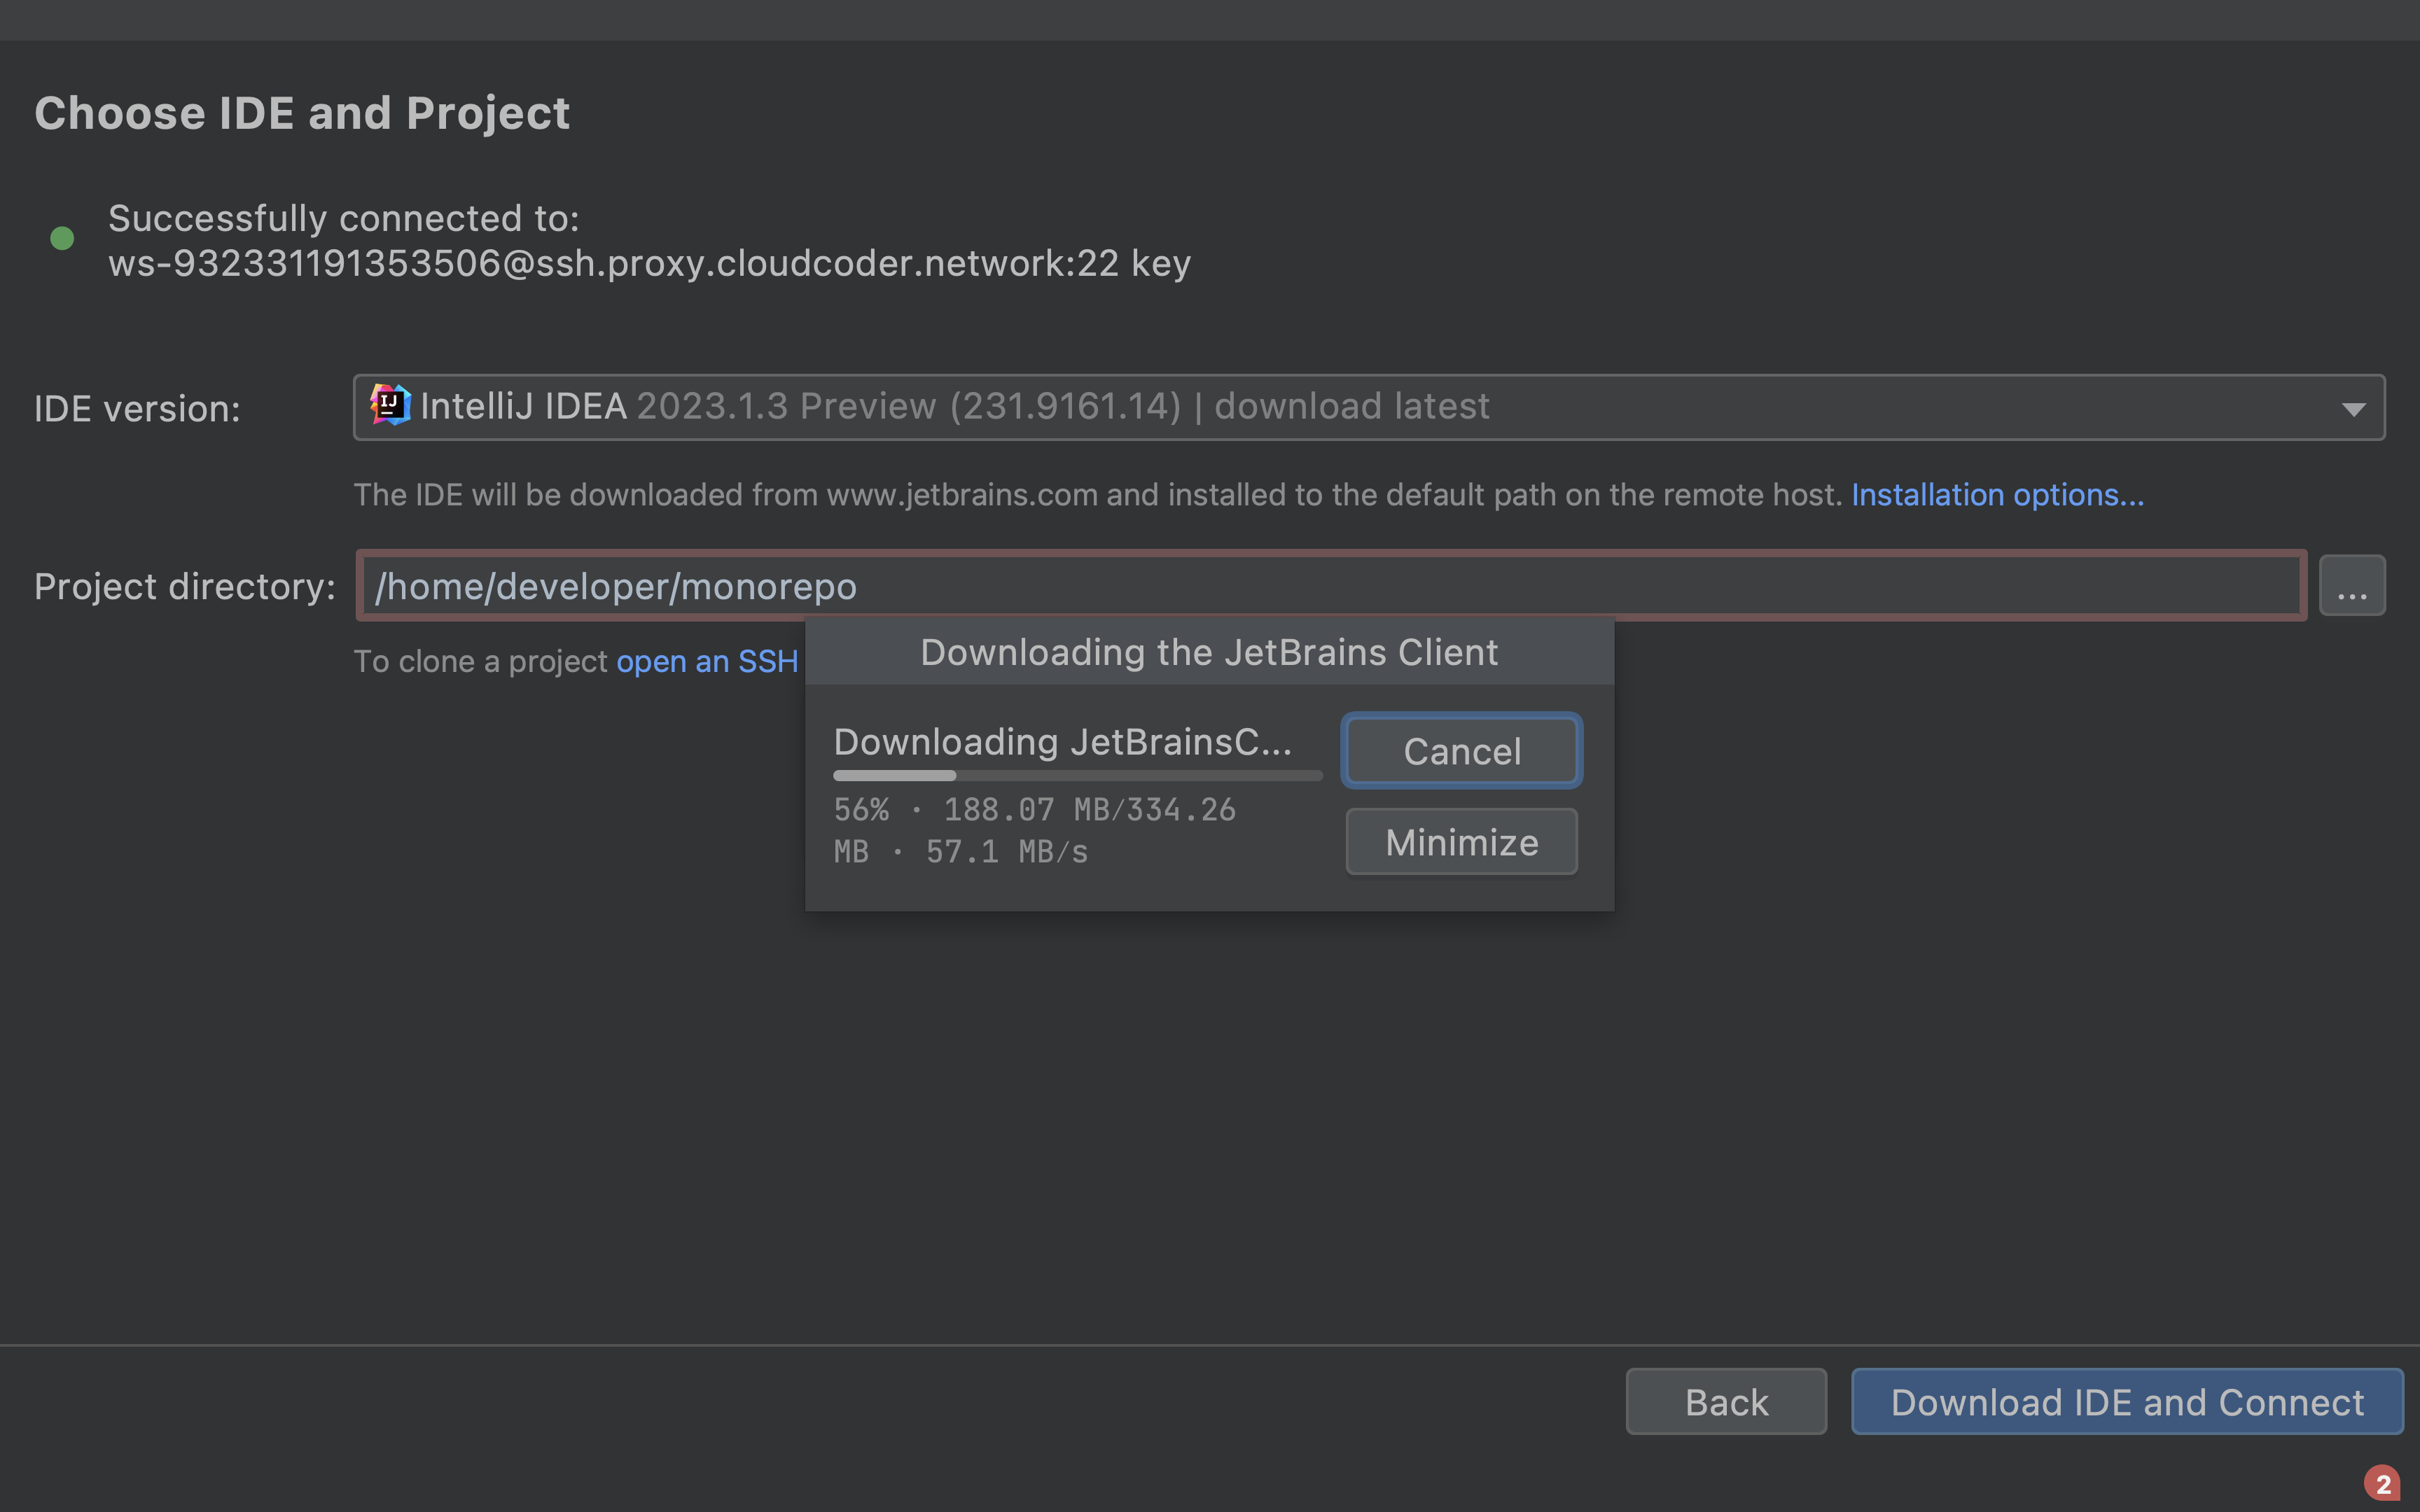 IDE Installation Window
4c.9. Access Your Workspace
After the completion of the IDE installation, you can now access your workspace via JetBrains Gateway!
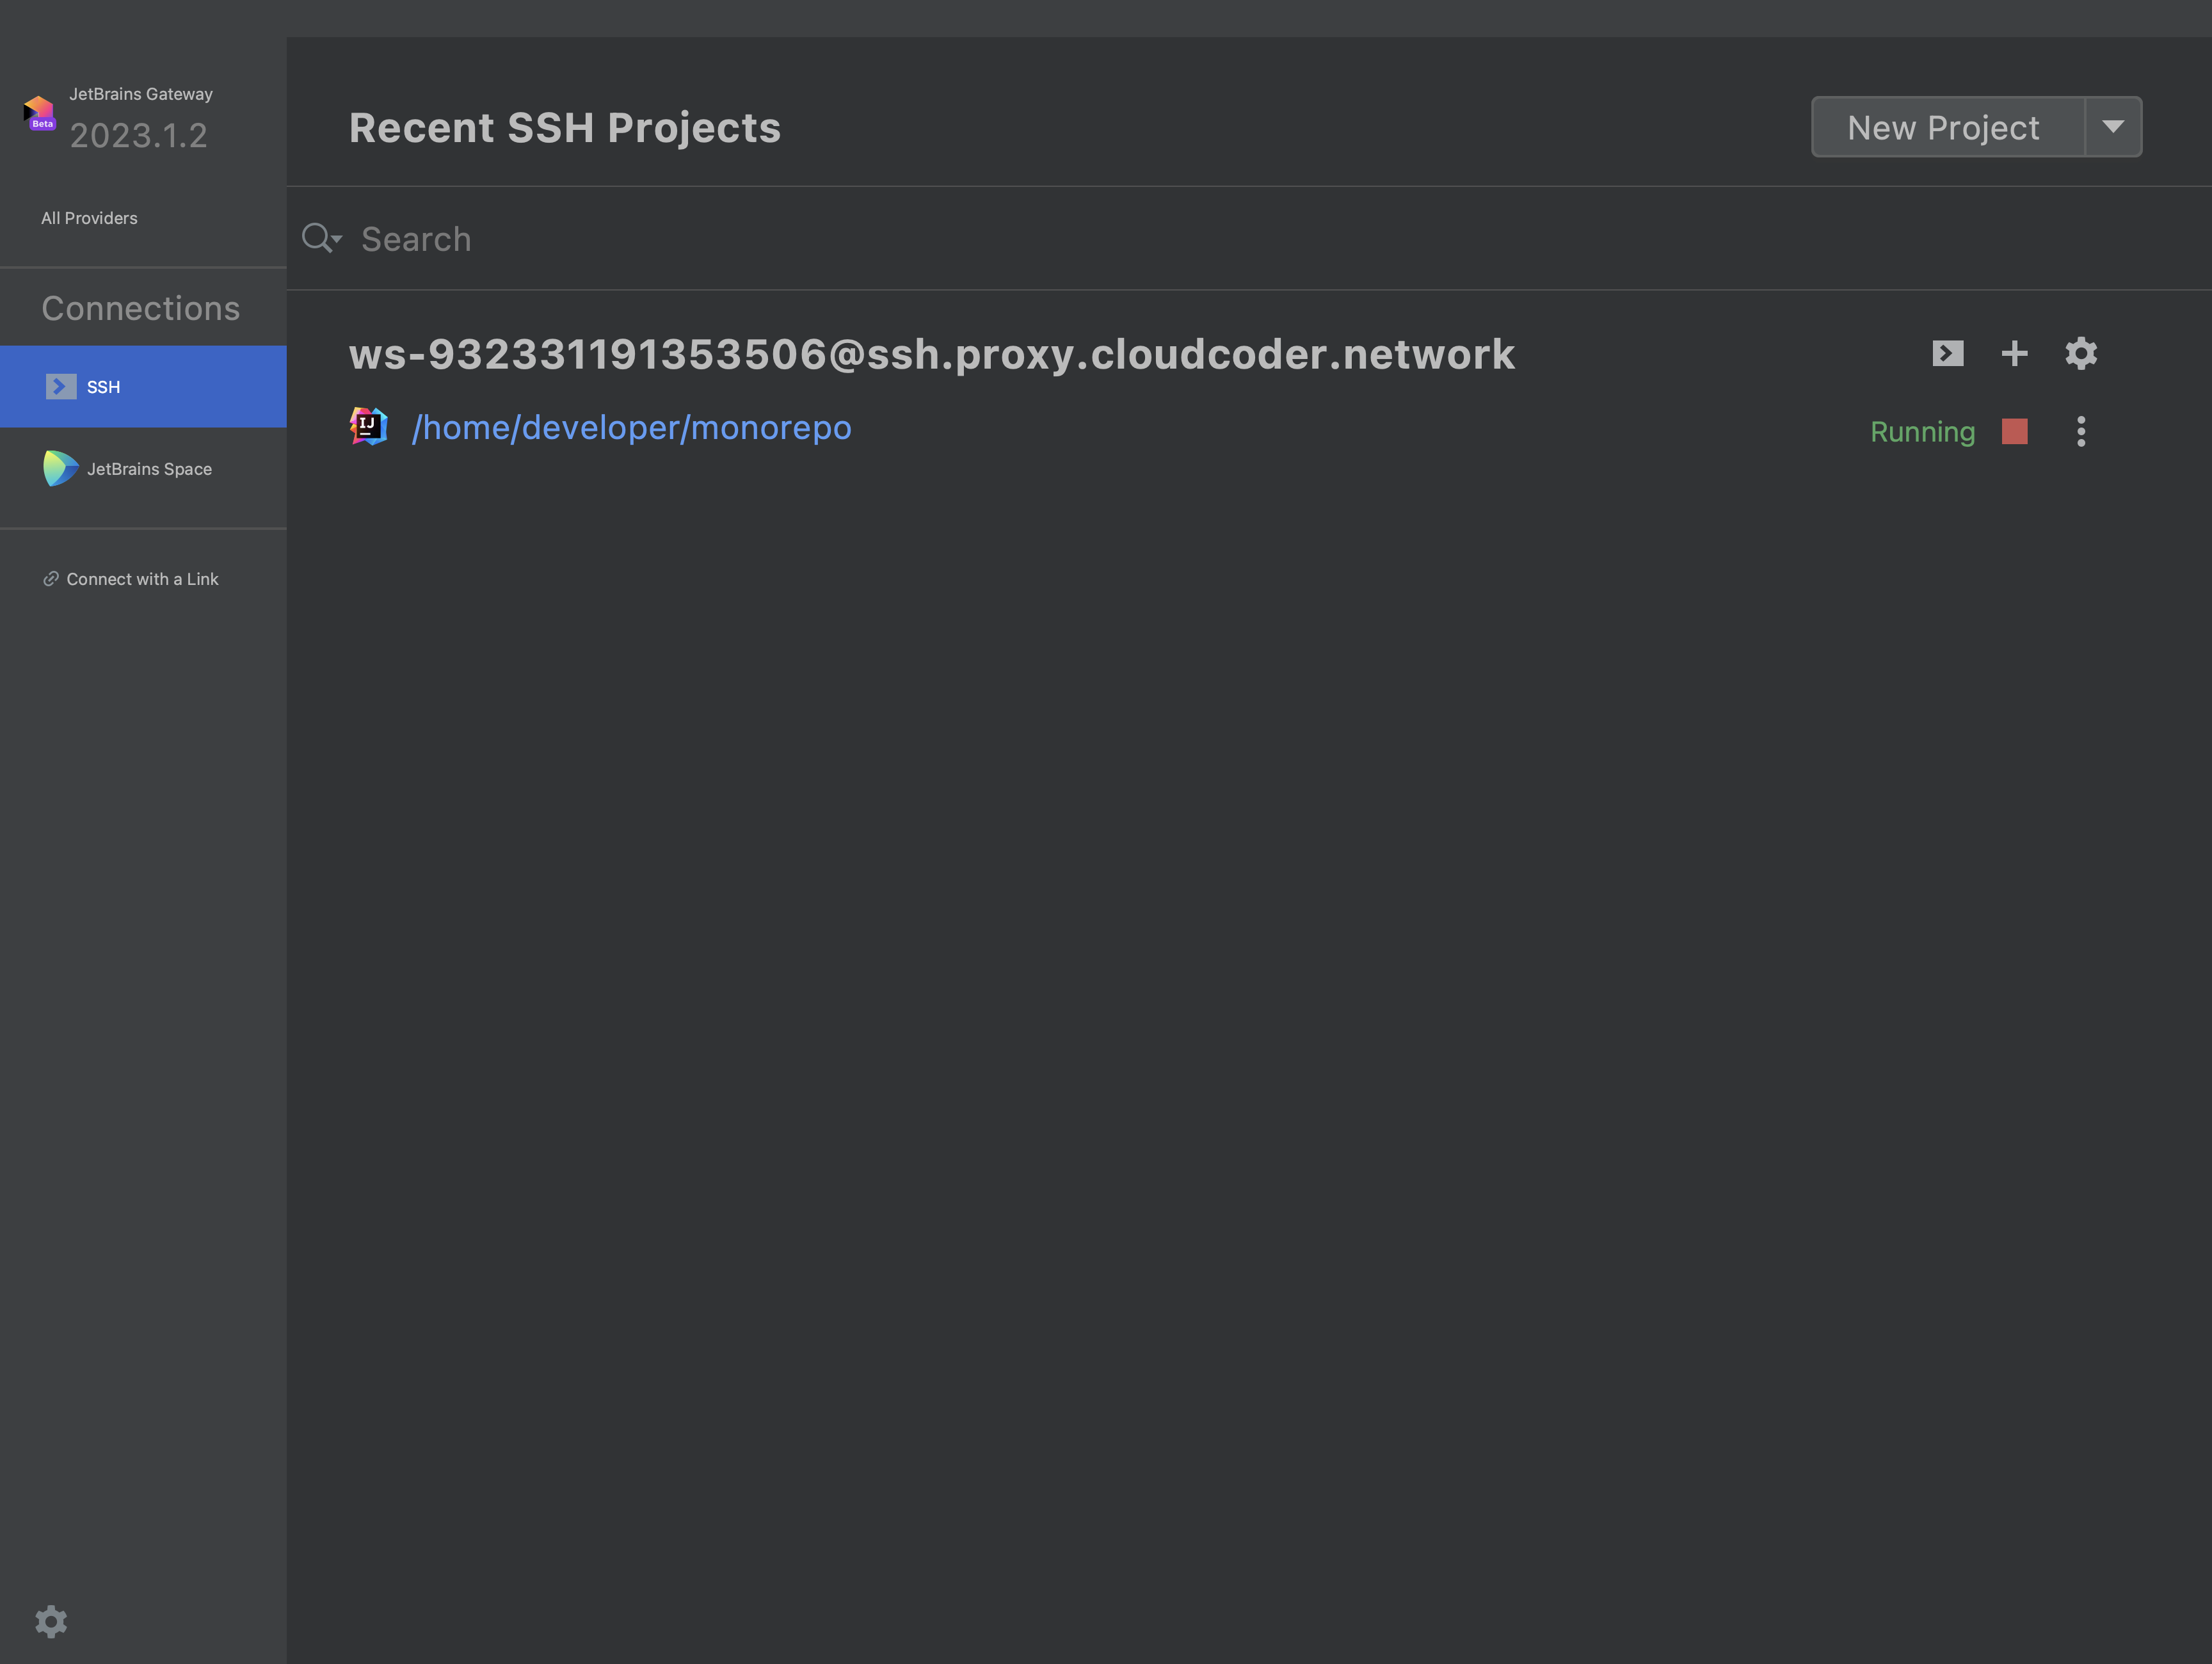 Final Configuration Window